Stone Veneer Details That Help an Exterior Look More Natural

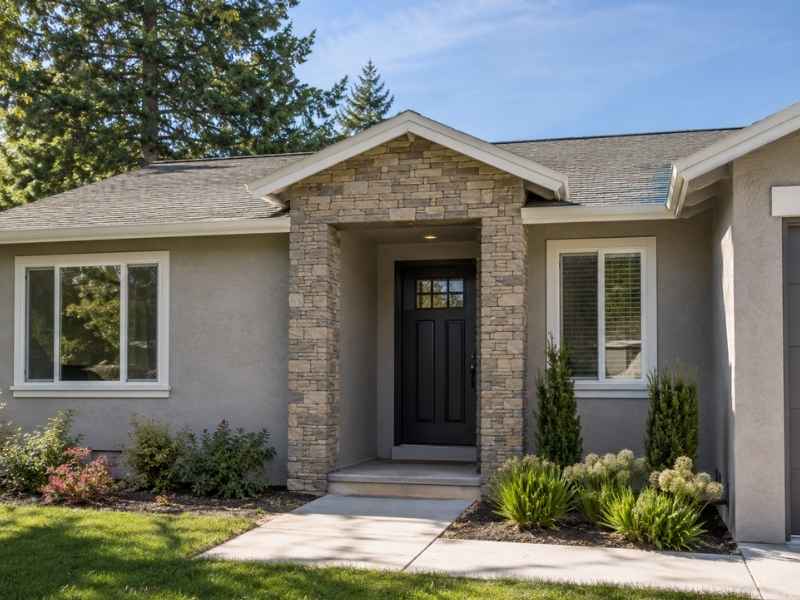
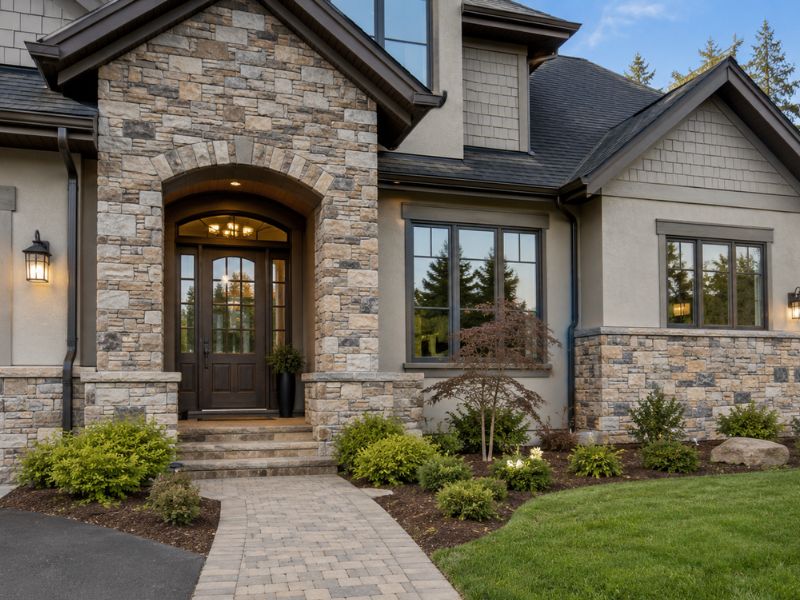
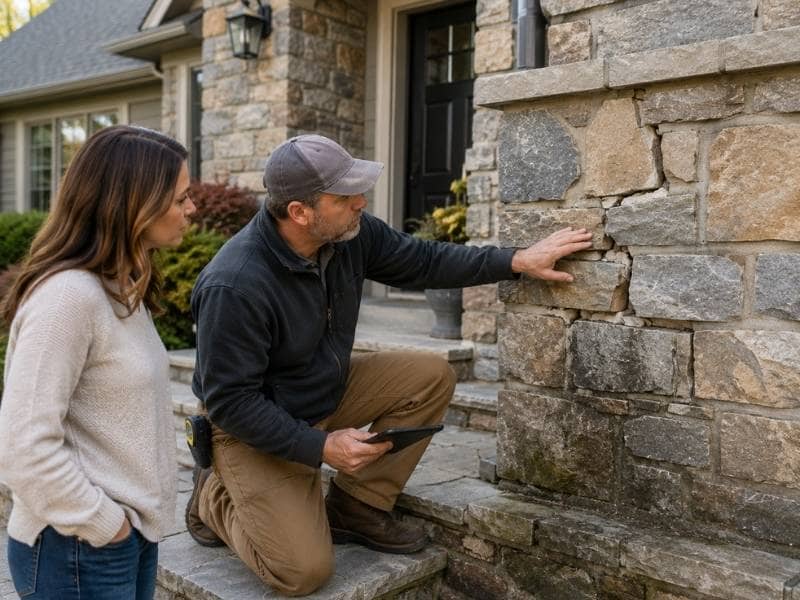
Stone veneer details on a home exterior in Auburn Alabama showing a natural looking entryway and facade.

Stone veneer can make a house look like it was built from solid rock. Or it can look fake from the street. It all comes down to a few small choices. The material itself usually isn’t the problem. It’s the details around it, texture, pattern, color, and where it gets used, that decide whether a home looks natural or looks like a kit someone snapped together. Get those details right, and stone veneer can hold up next to real stone in almost every way that matters to the eye.

How Stone Veneer Texture Creates a More Authentic Exterior Appearance

Real stone never looks perfectly smooth. Every piece has bumps, ridges, and rough spots. Light hits those spots differently depending on the angle. Good stone veneer copies that unevenness on purpose, instead of smoothing everything into one flat, repeated surface.

Surface variation matters just as much as texture. If every piece in a veneer set looks the same, the eye picks up on that pattern fast, even from across the yard. Homeowners who want a natural finish should pick veneer with visible differences from piece to piece, not a stamped, repeated look. That one choice, more than almost anything else, decides whether a wall reads as real stone or as a product trying to pass for one.

Choosing the Right Stone Veneer Pattern for Exterior Design Balance

Pattern is where a lot of installs go wrong. Lining up veneer pieces in a tight, even grid looks ordered but fake, since real stone never lines up that neatly. Irregular placement, where different sizes and shapes sit next to each other with no clear rhythm, tends to look far more convincing.

Consistent sizing still has its place, just not everywhere. A clean, even pattern can work fine on a small accent spot, while a bigger wall usually looks better with mixed sizes and staggered joints. Mixed stone arrangements, blending a few shapes and cuts across the same wall, help avoid the repeated look that gives veneer away fast. The goal is a layout that matches how stone naturally sits when it’s stacked by hand, not how it looks when it’s cut from a mold.

Stone Veneer Color Variation and How It Affects Curb Appeal

Color does a lot of quiet work here. Real stone pulls its color from the ground it came from, so it almost never shows up in one flat, even shade. Veneer with some color variation, instead of a single uniform tone, copies that natural mix.

Complementary shades matter too. A veneer color that clashes hard with the roof, trim, or plants can look out of place, even if the texture and pattern are both done well. Homeowners get the best results by picking veneer tones that echo colors already on the property, like a roof shingle shade or a nearby stone path. That link between the veneer and its surroundings often makes an exterior feel grounded instead of tacked on as an afterthought.

Exterior Features Where Stone Veneer Creates the Biggest Visual Impact

Stone veneer doesn’t need to cover a whole house to make an impact. Entry features, like the space framing a front door, rank among the highest impact spots on a property. That’s the first thing visitors see up close, and the stone there sets the tone for everything else.

Accent walls work well too, especially on a flat, plain section that could use some weight. One wall done in stone breaks up a long stretch of siding or stucco without turning into a full exterior overhaul. Architectural details, like columns, chimney faces, or window trim, offer smaller spots that still carry a lot of visual weight. These areas let stone veneer do its job without turning into a much bigger job than a homeowner actually wanted.

Installation Details That Help Stone Veneer Maintain a Natural Look Over Time

Even great material can look off if it’s put in carelessly. Proper spacing between pieces matters more than most homeowners expect. Gaps that are too even, or too wide, throw off the rhythm that makes stacked stone look real.

Transitions need close attention too, especially where veneer meets siding, trim, or another material. A rough or obvious edge at that meeting point breaks the whole look fast. Edge treatment at corners needs extra care, since poorly finished corners are one of the fastest ways to spot fake stone from a distance. Surface prep underneath it all sets the foundation for everything else, since veneer put on an uneven or poorly prepped surface tends to shift or crack sooner than it should. Skilled work at each of these steps is often the real difference between veneer that fools the eye and veneer that doesn’t.

Frequently Asked Questions

Does stone veneer look like real stone when installed correctly? 

Yes, in most cases. Material choice, texture, and color variation all play a part, but skilled installation is what ties everything together into a look that reads as real.

What factors should homeowners consider when choosing stone veneer colors? 

Match veneer tones with existing exterior materials, landscaping, and the home’s overall style. That helps the stone feel like part of the property instead of something added on later.

Can stone veneer be used on any exterior surface? 

Not automatically. It depends on the condition of the surface underneath, what prep work it needs, and which install method fits that surface best.

How do homeowners prevent stone veneer from looking too uniform? 

Mix stone pieces of different sizes, use varied patterns instead of a tight grid, and plan the layout before installation starts. These steps help avoid the repeated look that gives veneer away.

Does professional installation affect the appearance of stone veneer? 

Yes, a lot. Layout choices, joint spacing, transitions between materials, and finishing details all shape whether the final result looks natural or looks assembled from a kit.

Stone Columns That Add Structure to Covered Outdoor Areas

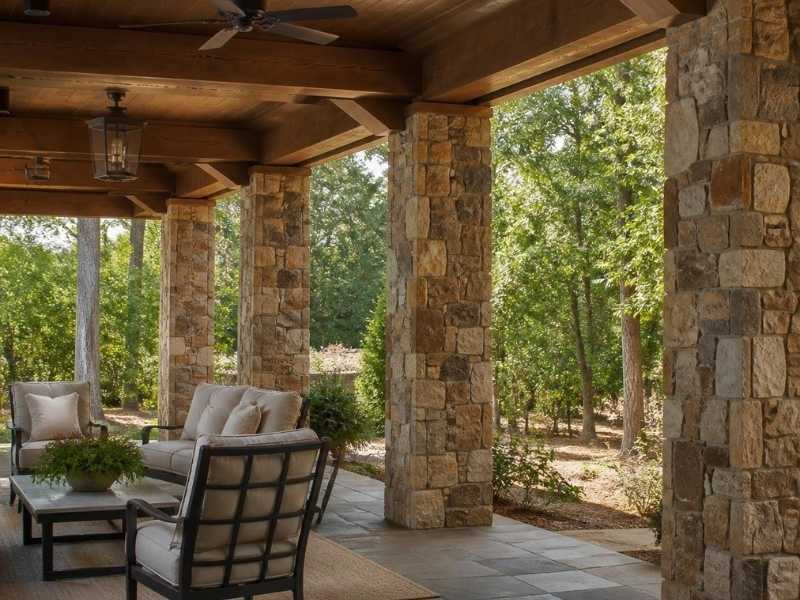
Natural stone columns supporting exposed wood beams over a covered patio in Auburn, Alabama.

A covered patio needs real support holding up the roof. Skinny metal posts can carry the load, but they look thin and temporary. Stone columns do the same structural job and look like they belong. For a developer, that mix of strength and curb appeal helps sell outdoor space. This article covers where stone columns fit, how they carry weight and what to get right before they go up.

Stone columns do real structural work. Built right, they hold up beams, roofs and heavy timber over a patio or porch. Built wrong, they’re a pretty stack of rock waiting to shift. The base and the core decide which one you get.

Where Stone Columns Earn Their Keep

Stone columns work best where a covered area needs support and good looks at once. That covers a lot of outdoor builds.

Think covered porches, patio roofs and freestanding pavilions. Think pergolas built to hold real weight overhead. A stone column can also anchor the corner of an outdoor kitchen or frame an entry. In each case, the column pairs with a wood or steel beam to hold the roof.

The draw is simple. One element does two jobs. It carries the load, and it looks solid doing it. On a spec build, that finished look can set an outdoor space apart from the plain posts a buyer sees everywhere else.

How a Stone Column Carries the Load

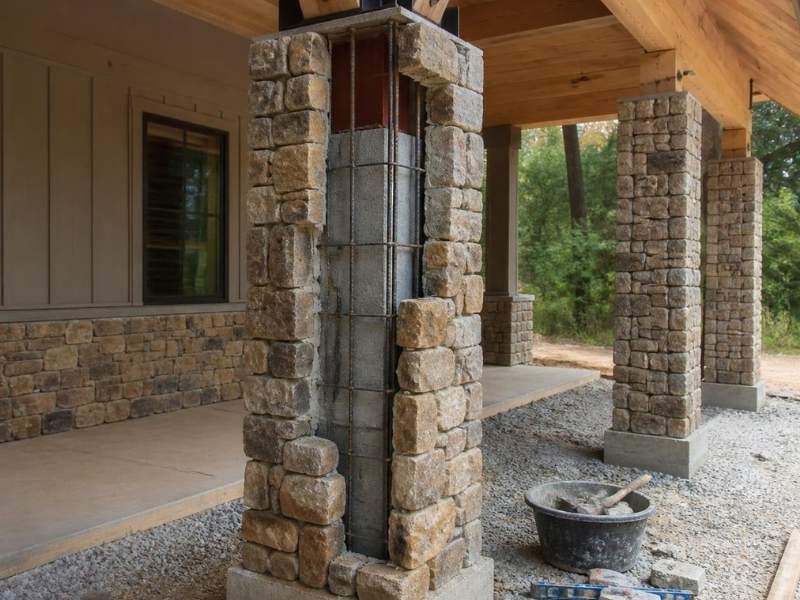
Natural stone veneer being installed around a reinforced masonry column supporting a covered patio in Auburn, Alabama.

A stone column moves the roof’s weight straight down to the ground. Every part of that path has to line up.

The beam rests on top of the column. The column carries that load down to a footing. The footing spreads it into the soil. Break any link in that chain and the whole cover is at risk.

Most tall outdoor columns hide a structural core inside the stone. That can be a steel post, a poured concrete center or a framed post wrapped in stone. The stone you see is the finish. The core is what really holds the beam. Ask your mason how the beam connects to that core, since a clean, hidden tie there keeps the roof anchored in wind and storms.

Solid Stone or Stone Veneer Over a Core

Most modern stone columns are veneer over a structural core. Full solid-stone columns are rarer and much heavier.

Veneer Over a Post

Here the load rides on a hidden post of steel, concrete or framed wood. Stone gets applied over that core as a finish. This build is lighter, faster and easier on the footing. It still looks like solid stone from the outside.

When Solid Stone Makes Sense

Full stone or block-and-stone columns carry the load through the masonry itself. They’re heavy, so they need a bigger footing and more skilled hands. Builders pick them for a high-end look or to match older stonework. The trade is cost and time for a fully solid feel.

One more option is manufactured stone veneer. It weighs less than natural stone and costs less too. Over a sound core, it holds up well for years.

The Footing Below Decides Everything

A stone column is only as strong as the footing under it. Skimp there and the column will move.

The footing has to sit below the frost line so winter can’t heave it. It has to be wide enough for the soil and the roof load above. On heavier columns, steel dowels tie the footing to the core so they act as one. Good drainage around the base keeps water from softening the ground.

Get the footing right and the column stays plumb for decades. Get it wrong and no amount of pretty stone will save it.

Sizing and Spacing for the Span

Column size and spacing follow the roof load and the beam span. Wider spans call for bigger columns or more of them.

A long beam over a wide patio puts real force on each column. Space them too far apart and the beam sags or the columns overload. For any roofed structure, a builder should size the columns to the actual load and local code. On bigger spans, that often means an engineer signs off.

Looks matter here too. A thick beam over skinny columns looks off, and thin beams on chunky columns look heavy. Match the column size to the beam and the space around it. The right proportion reads as solid and planned. It also keeps the roofline level and the whole cover looking built on purpose.

Frequently Asked Questions

Do stone columns need a concrete footing? 

Yes. A stone column carries roof weight down to the ground, so it needs a solid footing. That footing should reach below the frost line and match the load above. Without it, the column can settle or lean over time.

Are stone columns solid stone all the way through? 

Usually not. Most outdoor stone columns are stone veneer over a hidden core. That core can be steel, concrete or a framed post that carries the real load. The stone is the finish that gives the solid look.

Can stone columns hold up a porch or patio roof? 

Yes, when they’re built for it. A properly sized column with a strong core and a good footing can carry a beam and roof. The key is matching the column and footing to the actual load. A mason or engineer can confirm the sizes.

Is manufactured stone as strong as natural stone for columns? 

For veneer, it works well. The hidden core carries the load in both cases, and the stone face is just finish. Manufactured stone weighs less and costs less than natural stone. Over a sound core, it lasts for years with little care.

How far apart should stone columns be spaced? 

Spacing follows the beam and the roof load. Wider spans need bigger columns or shorter spacing between them. A builder sizes the spacing to the span and local code. For large covers, an engineer should set the layout.

Stone Steps That Make Sloped Yards Easier to Use

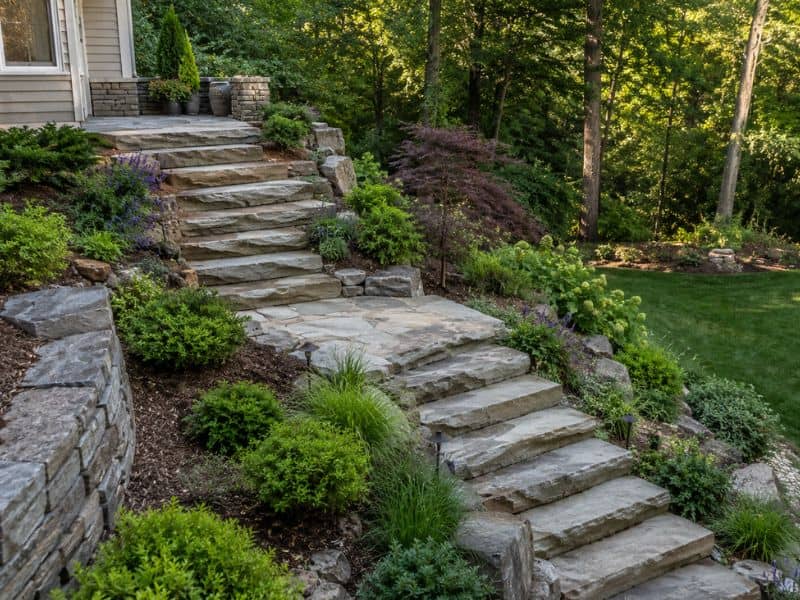
Natural stone steps with textured treads and a landing built into a landscaped sloped yard in Auburn, Alabama.

A yard with a steep slope can be a pain to walk across, especially after rain. Stone steps fix that problem by turning an awkward hill into a path people actually want to use. Some yards have enough grade change between the house, the driveway, and the back lawn that a simple dirt path just doesn’t cut it anymore. Getting the layout right takes more than picking pretty stones. It means thinking about where people actually walk, how steep the climb feels, and whether the stairway will hold up season after season. Here’s what goes into planning stone steps that work with a slope instead of fighting it.

Plan the Stone Step Route Around How the Yard Is Used

The first mistake homeowners make is picking the shortest line down the hill and building steps there. That sounds efficient, but it ignores how people move through a yard. A good staircase should connect places people actually go: the driveway, a side gate, a garden bed, the lower lawn, or an outdoor seating area near the back of the house.

Watching how family members already cross the slope helps here. If everyone naturally cuts across a certain path to reach the mailbox or the shed, steps placed along that route will feel obvious rather than forced. Steps placed somewhere else, even if it looks tidier on paper, often get ignored. People will keep crossing the steep, worn section they’re used to, and that worn patch will only get worse over time.

Match the Step Rise and Tread Depth to the Slope

Once the route is set, the math starts. Total elevation change and the horizontal distance available determine how many steps fit and how big each one needs to be. A slope that drops six feet over twenty feet of yard needs a very different step count than one that drops six feet over eight feet.

Riser height matters more than most people expect. A riser that’s too tall makes each step feel like a small climb. Uneven risers are worse. Even a half-inch difference between two steps can trip someone who isn’t paying attention. Tread depth needs the same care. A tread that’s too shallow forces an awkward, choppy stride, especially on a long hillside stairway where dozens of steps are involved. Consistent dimensions from top to bottom make the whole climb feel natural instead of jarring.

Add Landings Where the Climb Needs a Break

A long, unbroken run of stone steps can feel exhausting, even if each individual step is well built. Landings solve this by splitting the staircase into shorter sections with a flat spot to pause on.

Landings work especially well near a change in direction. If the stairway has to bend around a tree or follow the natural curve of the hill, a landing at that turn gives people solid footing before they change course. They’re also useful near gates or garden entrances, where someone might stop to open a latch or set down tools. On a particularly steep stretch of yard, a landing partway up breaks the intensity of the climb without turning the whole project into a patio. The goal is a resting point, not an extra destination.

Choose Stone Treads That Provide Stable Footing

Not every stone works as a step. Thickness matters because thin stone can crack under repeated weight, especially outdoors where temperature swings and moisture add stress. Surface texture matters just as much. A smooth, polished stone looks nice in photos but turns dangerous the moment it gets wet.

Usable width counts too. A tread that’s technically walkable but only a few inches wide doesn’t leave room for a full footstep, and that forces people to watch their feet instead of walking normally. Edge shape plays a role as well, since sharp or uneven edges can catch a shoe or a cane. Every stone needs to sit firmly on a properly prepared base. A rocking stone, even a small wobble, is one of the fastest ways to turn a nice staircase into a hazard.

Fit the Steps Into the Existing Grade and Landscape

Stone steps look best when they seem like they were always part of the hill, not dropped on top of it after the fact. That means recessing each step into the slope rather than stacking stone on the surface and hoping the sides hold.

The top and bottom of the staircase need to meet the existing grade smoothly, without an awkward lip or a sudden drop where the steps end. Planting areas near the route deserve some thought too. A staircase that cuts straight through an established garden bed, ignoring root systems and existing plants, tends to look out of place even with excellent stonework. When the steps follow the natural contour of the yard and leave surrounding greenery intact, the whole thing reads as landscaping rather than construction dropped into a hillside.

Frequently Asked Questions

How steep can a yard be before stone steps are useful?

Stone steps start making sense once a slope is steep, slippery, or uneven enough that a regular path feels uncomfortable to walk. The exact layout still depends on how much space is available and how much the elevation actually changes.

How many stone steps will a sloped yard need?

The number comes from math, not guesswork. Total vertical rise divided by the chosen riser height gives the step count, and that number shifts depending on how tall each riser is built.

Do long outdoor stone stairways need landings?

Landings help on longer climbs by giving people a flat spot to pause and by dividing the staircase into shorter, more manageable sections. They’re especially useful anywhere the path changes direction.

What type of stone surface works best for outdoor steps?

Durable stone with a naturally textured surface holds up better underfoot than polished stone, which gets slick when wet. Deeply irregular material can also be tricky to walk on safely.

Can stone steps follow a curved route through a yard?

Yes, a gentle curve can follow the shape of the land and connect different areas of the yard naturally. The tread size and walking space just need to stay consistent throughout the curve, not only on the straight sections.

Stone Pavers for Durable Commercial Walkways

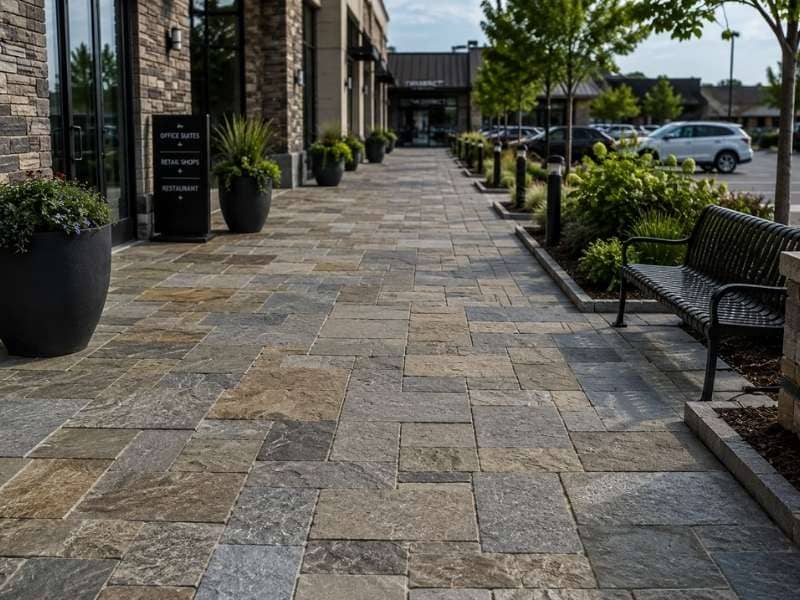
Stone pavers forming a durable commercial walkway outside modern retail and office buildings

Commercial walkways experience constant foot traffic and must withstand years of daily use while maintaining a professional appearance. Stone pavers are a durable paving option that can provide long-term performance when properly selected and installed. Their modular design also makes individual repairs easier if damage occurs. For commercial properties, choosing the right paver material and building a properly prepared base are important steps in creating walkways that remain functional, attractive, and easier to maintain over time. 

Why Stone Pavers Suit Commercial Walkways

Stone pavers handle heavy use better than many surfaces. Each paver is a solid unit, so the path spreads weight across many small pieces instead of one large slab. When concrete cracks, you see a long ugly line and often have to replace a whole section. When a paver cracks, you swap out that single unit. That difference matters on a busy commercial site where downtime and repairs cost money.

Pavers also flex with the ground. Soil shifts with weather and time, and a rigid slab fights that movement until it cracks. A paver surface moves a little without failing, since the joints between units absorb small shifts. This keeps a walkway smooth and safe longer, which cuts down on both repairs and trip hazards. Fewer trip hazards also means fewer complaints and fewer liability worries for a property owner.

Choosing the Right Stone for Traffic

Not every stone stands up to constant foot traffic, so the choice matters. Harder, denser stones resist wear and hold their surface under heavy use. Softer stones can wear smooth or chip faster in a commercial setting, which shortens the life of the path. Picking a stone rated for the traffic you expect is the first durability decision, and it’s worth getting right.

Surface texture counts too. A walkway needs enough grip to stay safe when wet, especially where the public walks. Very smooth stone can turn slick in rain, which is a real hazard on a commercial route. A stone with some natural texture, or a finish that adds grip, keeps footing sure in all weather. Matching the stone to the job protects both the path and the people on it, and a safe surface is part of what durability really means.

The Base Is Where Durability Lives

The strongest pavers fail on a weak base, so the ground prep is where a walkway is won or lost. A commercial paver path needs a deep, well-compacted base of crushed stone under it. This base carries the load and lets water drain away. Skimp on it and the surface will sink, shift and heave no matter how good the pavers are. Most failed paver paths trace back to a base that was too thin or poorly compacted.

Drainage is part of the base too. Water that sits under pavers softens the ground and pushes them out of place, especially through freeze and thaw. A proper base sheds water and holds its shape season after season. Edge restraints then lock the pavers in from the sides so the path doesn’t spread over time. Get the base right and the surface lasts for decades. Get it wrong and no surface repair will save it.

Meeting Commercial Standards and Access Rules

Commercial walkways answer to rules that home paths don’t. Public routes usually have to meet accessibility standards, which set limits on surface smoothness, gaps and slope. Pavers can meet these rules, but only if they’re chosen and laid with the standards in mind. Wide joints or uneven units can fail an accessibility check and force a costly redo.

Slope and surface evenness carry the most weight here. A walkway has to drain without being too steep, and it has to stay flat enough for wheels and canes. A person using a wheelchair or a cane needs a firm, even path with no lip to catch on. Planning for these limits during design avoids a failed inspection or an expensive rebuild. A paver walkway that meets the rules serves everyone and keeps the property clear of complaints and legal trouble.

Keeping a Paver Walkway Looking Good

A paver walkway needs some care to stay sharp, but the upkeep is simple. Sweeping and the occasional rinse keep dirt from grinding into the surface. Joint sand may need topping up over the years to keep the pavers locked together. These small tasks cost little and add years of life to the path.

Repairs are where pavers shine. When a unit stains or cracks, you lift it and set a new one, and the fix disappears into the path. There’s no patch that never quite matches, which is the usual result with concrete. This easy repair keeps a commercial walkway looking clean and cared for long after other surfaces would show their age. A property that looks maintained sends a message to tenants and customers, and pavers make that easy to keep up.

Weighing Cost Against Long-Term Value

Stone pavers cost more up front than poured concrete, and that gap is worth understanding. The higher price buys a surface that lasts longer, repairs cheaper and looks better for its whole life. On a commercial property held for years, those savings often close the gap and then some. The real comparison isn’t the install price. It’s the total cost over the life of the walkway.

Downtime is part of that math too. Replacing a cracked concrete section means closing off the area, breaking out the old slab and pouring new, then waiting for it to cure. Swapping a paver takes minutes and keeps the path open. For a business that depends on foot traffic, keeping walkways usable has real value. When you count durability, repair ease and appearance together, pavers earn their price on a commercial site.

Stone Mason Work to Review Before Buying a Home

Stone mason work on a home's exterior showing a stone chimney, retaining wall, front steps, and masonry features inspected before buying a home.

Stone mason work shows up all over a home’s exterior, from walls to chimneys to front steps. Before you buy, these features deserve a close and honest look. Good stonework lasts for decades, but hidden problems can lead to costly repairs.

A house may look charming at first glance while masking real masonry trouble. Loose stones, missing mortar or shifting walls do not always jump out. Knowing where to look helps you judge the true state of the stonework before you sign.

Exterior Stone Mason Work That Deserves a Closer Look

Several outdoor features rely on solid stone mason work. Stone veneer, retaining walls, chimneys, steps, patios, entry columns and foundation stone all fall in this group. Each one carries weight or faces weather, so each can show its own kind of wear.

Walk outside of the home and study these spots one by one. Watch for loose units, missing mortar, staining, bulging or uneven settling. A slow, patient look often turns up small clues that a fast walk-through would miss.

Signs of Poor Stone Mason Repairs or Alterations

Not all past repairs were done well. Mismatched mortar, smeared joints and poorly fitted replacement stones can all signal rushed or low-quality work. Wide patches and uneven joint depth are other red flags.

These signs can hide bigger issues underneath. A sloppy repair may cover damage that was never fixed at the root. Spotting weak past work helps you ask better questions about what really happened to the wall.

Structural Warning Signs in Stone Mason Construction

Some problems point to movement in the structure itself. Bulging walls, stair-step cracks and large openings all raise concern. So do leaning sections and gaps where the stone pulls away from nearby materials.

Trouble around doors and windows deserves special attention. Shifts in these areas can mean the wall is moving with the ground beneath it. Conditions like these often call for a review by a qualified mason or a structural expert.

Questions Buyers Should Ask About Previous Stone Mason Work

A few direct questions can reveal the history behind the stonework. The answers help you judge both the quality and the age of the work.

Helpful questions to ask include:

  • When was the work completed?
  • Who performed the stone mason work?
  • What materials were used?
  • Were permits required for the job?
  • Are any warranties or repair records available?

The replies fill in gaps that the eye alone cannot cover. A well-documented job with quality materials builds confidence. Vague answers or missing records are a sign to dig a little deeper.

When a Professional Stone Mason Inspection Is Worth Considering

Some situations clearly call for expert eyes. Visible damage, an older home, recent repairs, moisture problems or lots of stone features all raise the value of a professional check. Each of these can hide costs that matter to your decision.

A skilled mason brings real clarity to the picture. They can name the likely cause of a problem and outline the repairs it may need. That insight helps you weigh the home with a fair sense of what lies ahead.

Frequently Asked Questions

What Defects Should Buyers Look for in Stone Masonry?

Watch for loose stones, cracked or missing mortar and bulging areas. Staining, open joints and uneven settling are also worth noting. Repairs that clash with the surrounding stone can point to earlier trouble.

Can Damaged Stone Masonry Affect a Home’s Value?

Yes. Visible wear, structural worries or big repair bills can shake a buyer’s confidence. Those same factors often come up during inspection talks and can pull down the price.

Is Every Crack in Stone Masonry a Structural Problem?

No. Some cracks stay in the mortar or come from minor surface movement. Others signal settling or deeper stress. The size, direction and growth of a crack help tell the two apart.

Should a Stone Mason Inspect Older Homes Before Purchase?

It can be a smart move when an older home has lots of stonework or visible wear. Moisture staining, past repairs or signs of movement add to the case. An expert look brings peace of mind before you commit.

Stone Patio Designs That Stay Beautiful for Years

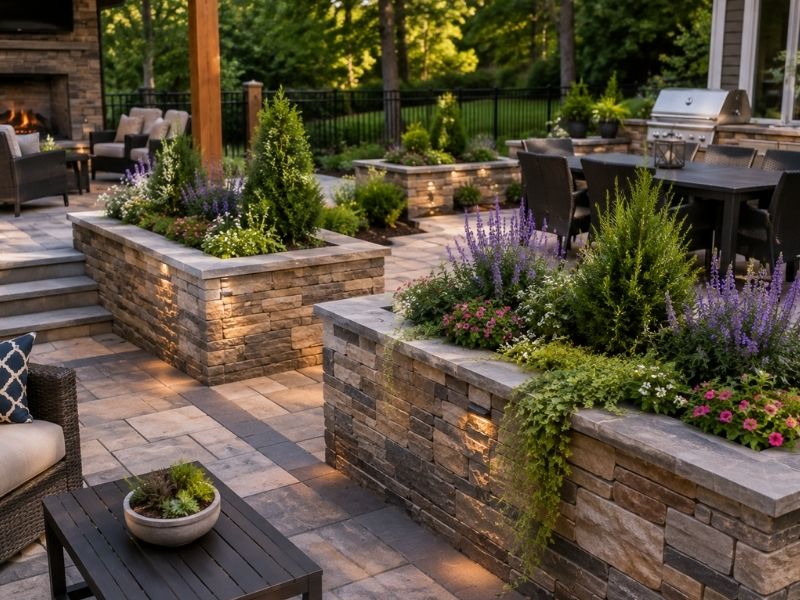
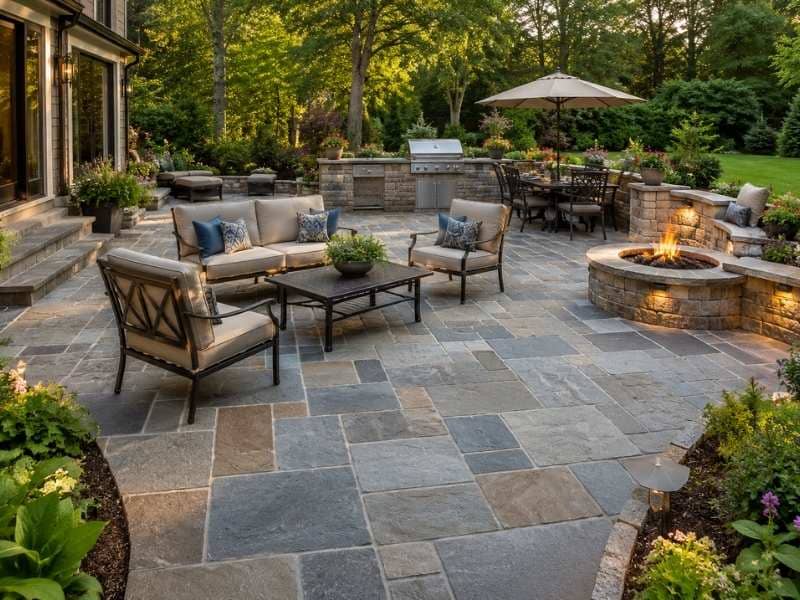
Stone patio designs featuring natural flagstone, a fire pit, seating wall, outdoor dining area, and landscaped garden built for lasting beauty.

A stone patio can hold its looks for decades, but only when four things line up: the right stone, a simple design, a solid base and steady care. Miss one, and the patio starts to dip, stain or fade too soon. Get all four right, and it stays sharp for years with little fuss.

Choose the Best Stone for a Patio That Lasts

The stone you choose shapes how the whole patio wears. Dense, hard stones like granite and bluestone resist scratches, stains and fading the longest. Softer stones bring charm, but they need more care to stay looking good.

  • Flagstone lays flat in natural, uneven shapes for a rustic look. It handles weather well, though its rough face traps dirt and needs regular sweeping.
  • Bluestone has a smooth surface and a calm blue-gray color that barely shifts. It suits busy patios, since it wears slowly and wipes clean easily.
  • Limestone feels warm and soft underfoot in pale tones. It stains more easily than the others, so a sealer helps, but it ages into a worn look many people love.
  • Granite is the toughest of the group. It shrugs off scratches, heat and stains, and its color stays put for decades. The trade-off is a higher price.

Many people also compare natural stone with concrete pavers. Pavers cost less and install fast, but their color sits on the surface and fades with no way to restore it. Natural stone costs more, yet its color runs all the way through, so a chipped edge still blends in years later.

Design a Stone Patio That Ages Well

Good design comes down to keeping things simple. Clean lines, steady colors and a layout that fits the yard look right far longer than busy patterns or loud color mixes. Size matters as much as style. A patio that’s too big feels empty, while one that’s too small feels tight once you set out chairs, so plan around how you’ll really use the space.

Match the Patio to Your Home’s Other Stonework

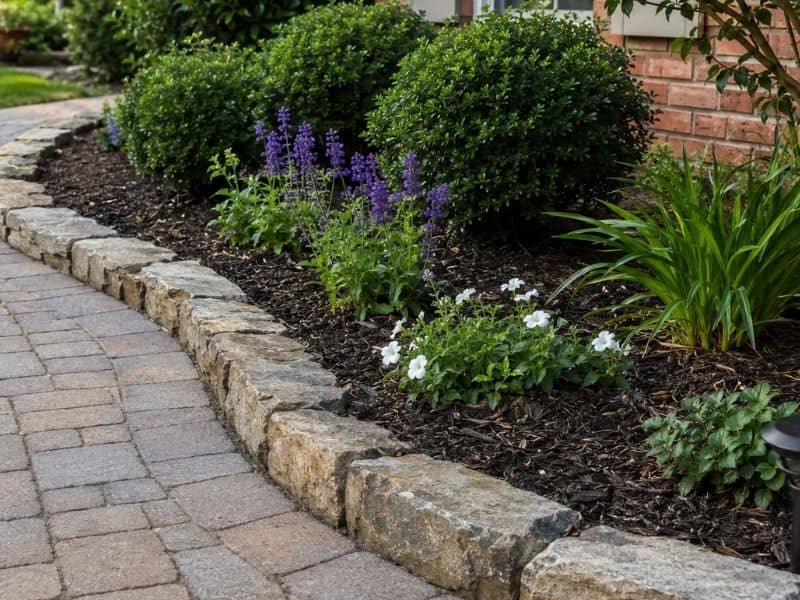
A patio looks best when it feels tied to what’s already around it. If you have stone walkways, steps, a fireplace or a low wall nearby, pick patio stone that gets along with them. Nothing needs to match exactly, but the colors and textures should agree. Borrowing a color from an existing feature is an easy way to make the whole yard read as one plan.

Build a Solid Base Before the Stone Goes Down

The base decides how long a patio stays flat and even. Trade groups like the Interlocking Concrete Pavement Institute call for at least four inches of compacted crushed rock under a patio, and pros pack it in layers no thicker than four inches so it settles evenly. Skip that prep, and even good stone shifts within a few seasons. A gentle slope of about a quarter inch per foot sends water running off instead of pooling in the joints. Firm edges then hold the outer stones in place so the patio can’t spread apart. None of this shows in photos, yet it keeps the surface level for years.

Keep Your Stone Patio Looking New With Simple Care

Upkeep is easier than most people expect. A sweep every week or two keeps grit from grinding into the surface, and a quick rinse handles most dirt. Stay ahead of weeds by pulling small ones early or using a joint filler that blocks them. The joints themselves need attention once a year, since the sand between stones washes out and open joints let stones wander and weeds settle in. Spills call for quick action too, because oil or food soaks in deeper the longer it sits. Sealing depends on the stone: soft, porous types like limestone benefit from it, while dense stones like granite usually don’t.

Add Features That Make the Patio More Useful

The right add-ons turn a patio into a space you actually use. A low seating wall gives people a place to sit and doubles as a border, while a fire feature draws everyone in on cool evenings and stretches the seasons you’ll use the patio. An outdoor kitchen area helps if you cook outside often. Soft lights along the edges or steps let you enjoy the patio after dark, and planting beds soften the hard stone with color that changes through the year. A new patio pays off at resale too, returning close to 95 percent of its cost in the National Association of Realtors’ remodeling research.

Frequently Asked Questions

What is the most durable stone for a patio?

Granite is the toughest common choice, since it resists scratches, heat and heavy use while holding its color for years. Bluestone comes a close second and often costs less, which makes it a favorite for patios that get daily use.

How long does a stone patio usually last?

With a solid base and simple care, a stone patio can serve for decades. The stone usually outlasts the joints and the ground beneath it, so most repairs deal with the base rather than the surface.

Does a stone patio need sealing?

Only some stones do. Soft, porous types like limestone benefit from a sealer that blocks stains and water, while dense stones like granite usually get by without one.

How do you prevent weeds between patio stones?

Weed control starts in the joints. A tight joint filler that you refresh once a year leaves weeds little room to sprout, and pulling the few that appear while they’re small keeps their roots from loosening the stones.

Can a retaining wall improve a stone patio design?

Yes. A retaining wall holds back sloped ground so you can build a flat patio where the yard would otherwise fall away. Matching it to the patio stone ties the whole space together and adds another spot to sit.