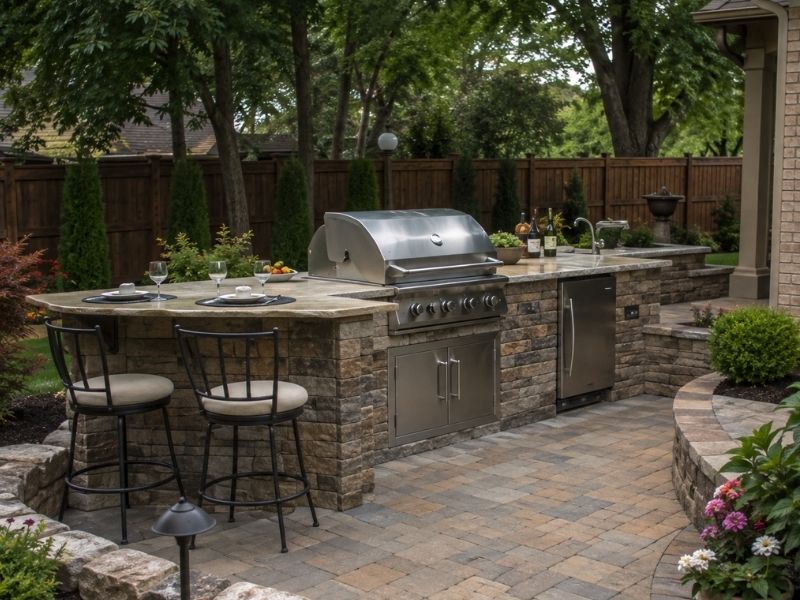
Wide French Doors Can Shape a Stone Patio Layout
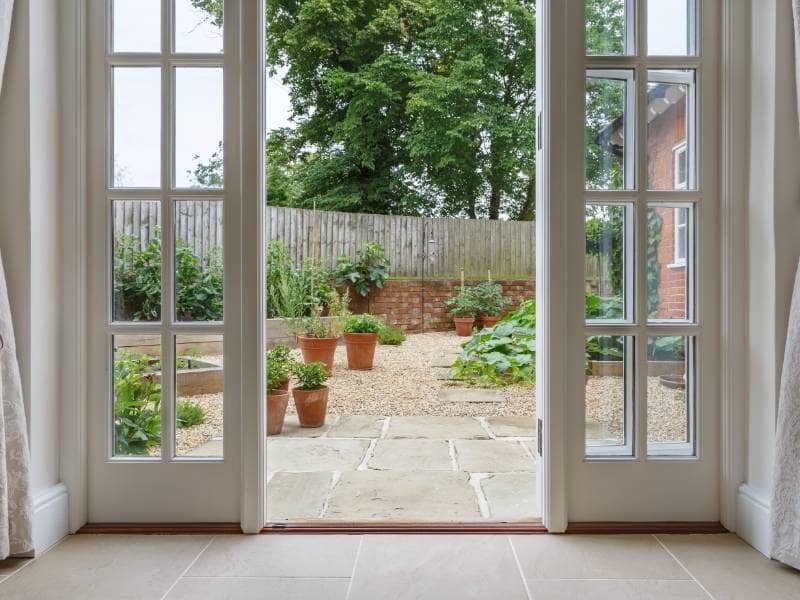
Wide French doors change how people use a backyard. When both panels swing open, the doorway turns into a broad gateway, and the patio outside has to handle that traffic. A stone patio planned around those doors feels like part of the house instead of a slab set beside it. The best approach is simple: let the door opening guide the layout, the grade, and the transitions before a single stone gets ordered.

Planning a Stone Patio Around Wide French Doors

Start at the door and build the patio outward. The width of the opening, the way the doors swing, and the path people take after stepping outside should shape the first few feet of stone. In many layouts, the landing runs a little wider than the open doors and deep enough for two people to pass without stepping onto grass.

Wide doors also create a strong view line into the yard. Guests look straight out when they walk toward the glass, so that line is a natural place for a table, a fire feature, or the start of a walkway. Lining up the patio with that view makes the space feel planned from the inside and the outside.

Before layout starts, it helps to check a few details with your mason:

  • The height of the door sill and how much room sits below it
  • Whether the doors swing outward and need clear space
  • Where furniture, grills, or planters will sit near the opening
  • Any existing steps, walls, or brick masonry the patio has to meet

These details decide how the first row of stone meets the house. Skipping them often leads to awkward cuts, blocked doors, or a step nobody expected.

Choosing Stone Pavers for a Smooth Doorway Transition

Pick stone pavers that sit flat, stay a steady thickness, and give good grip when wet. The area right outside a French door gets the most foot traffic on the whole patio. Uneven flagstone can look great in a garden, but a small lip at the doorway turns into a trip hazard fast.

Sawn or cut stone usually gives the cleanest threshold because the edges line up tightly. Tumbled or natural-cleft stone brings more texture and can still work well when the setting bed is carefully leveled. A textured finish helps when rain blows onto the landing or wet feet come in from the pool.

Brick pavers are worth a look too, especially when the house already has brick.A brick border along the door and patio edge can tie a stone patio back to the home’s stone masonry and brickwork.  Neither material is always the better choice. The right pick depends on appearance, traffic, upkeep, climate, existing masonry, and budget.

Using a Stone Patio to Connect Outdoor Living Areas 

The stone patio outside French doors works best as a hub. From that spot, paths can branch toward an outdoor kitchen, an outdoor fireplace, a seating area, or garden beds. Each branch should feel like a clear route, so guests know where to walk without thinking about it.

Keep walkways wide enough for how you use them. A path for one person carrying plates needs less room than a route where two people walk side by side. Many homeowners find a width of about three to four feet comfortable, but the right size depends on the yard and the traffic.

Changes in elevation need their own plan. A sloped yard may call for stone steps or a low retaining wall to hold a level patio area near the house. That wall can double as extra seating when it’s built at the right height. Plan these features together so the stone, caps, and mortar colors match across the whole space.

Managing Drainage Near French Doors and Patio Edges

Water should always move away from the doors. A patio that slopes toward the house can push rainwater under the threshold and into the floor system. Many patios are built with a gentle fall of roughly 1/8 to 1/4 inch per foot, though the right slope depends on the site, soil, and design.

Height at the door matters just as much. The finished stone should sit below the door sill, and it should not bury siding, cover weep holes in brick walls, or trap water against the foundation. Heavy rain and clay-rich soil make these details even more important, since water tends to sit where it can’t soak in.

When the slope is tight, a channel drain near the doorway or along a patio edge can catch water before it reaches the house. Downspouts also need a plan so they don’t dump water onto the stone. Look at drainage early. Fixing it after the patio is built usually means pulling up stone.

Building Durable Stone Patio Transitions for Long-Term Maintenance 

A stone patio lasts only as long as the base under it.  Most stone patios start with excavation, a compacted gravel base placed in layers, and a bedding layer that sets the stone at the right height. Edge restraints keep dry-laid pavers from drifting outward over time.

The soil right next to a house needs extra attention. That area is often loose backfill from when the foundation was built, and it can settle for years. Careful compaction near the door helps keep the landing from sinking and leaving a gap or a step at the threshold.

Transitions deserve the same care. The points where stone meets the door, a step, a retaining wall, a brick patio, or the lawn are where shifting shows up first. Keep an eye on these spots each season, refill joints and sand when it washes out, and reset any paver that starts to rock. Small fixes early cost far less than a rebuilt section later.

Frequently Asked Questions

How far below French doors should a stone patio sit?

The finished stone should sit below the door sill so water can’t run inside. The exact gap depends on the door, the threshold design, and local building code. Your mason should also check siding, weep holes, and the foundation line before setting the height. Plan this step first, because it controls the grade for the rest of the patio.

Are stone pavers or brick pavers better near French doors?

Both can work well at a doorway when they’re installed on a solid base. Stone pavers offer natural color and a wide range of textures. Brick pavers often match the house and create a classic look. The best choice depends on your home’s existing masonry, style, upkeep, and budget.

How wide should a patio be outside wide French doors?

Many layouts make the landing a bit wider than the open doors. That extra room lets people step out, turn, and pass each other easily. The depth should leave space for traffic without crowding furniture. Your yard size and the way you entertain will guide the final size.

Can a new stone patio be built over an existing concrete slab?

It can work in some cases, but the slab needs to be sound, stable, and sloped away from the house. Cracks, settling, or poor drainage in the old slab can show through the new stone. Adding stone also raises the surface, which may crowd the door sill. A mason should inspect the slab before deciding.

How do I keep pavers near the door from shifting?

Shifting usually starts with a weak base, loose soil, or poor drainage. A well-compacted gravel base and solid edge restraints help hold pavers in place. Keeping joints filled with sand also limits movement. Check the area each season and reset any loose pavers before the problem spreads.

Outdoor Kitchen Masonry for Built-In Pizza Oven Bases

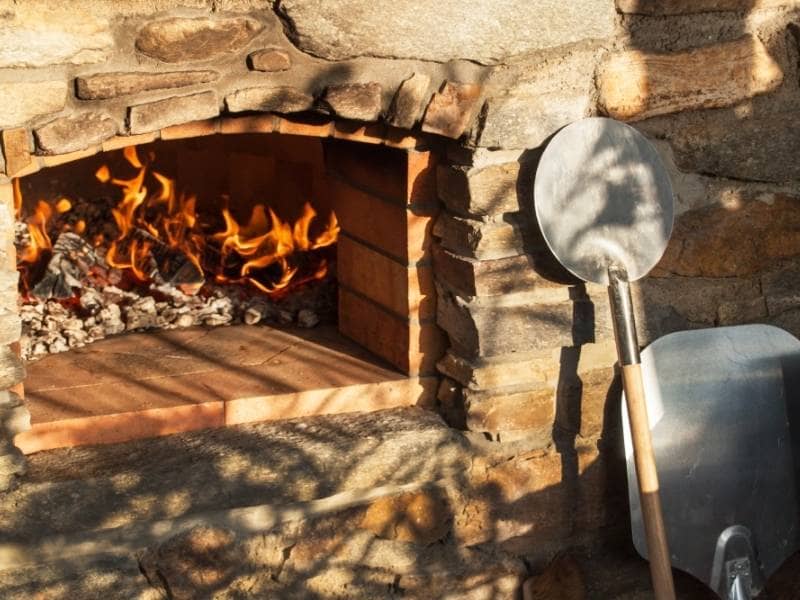
A finished outdoor kitchen masonry pizza oven can weigh well over a thousand pounds. All of that weight rests on the base below it, through every hot fire and every hard rain. A weak base shows its flaws slowly, with small cracks, a slight lean, or pavers that sink around the edges.

Most of those problems can be avoided during planning. For an outdoor kitchen with a built-in oven, the base needs a solid footing, materials that handle heat and weather, and a clear plan for water. Get those three things right, and the oven, the patio around it, and the brick masonry or stone masonry holding it up can serve you for decades.

Planning the Masonry Base for a Built-In Pizza Oven

The base is the structure that lifts the oven to a comfortable working height. It usually includes a footing, block or brick walls, a hearth slab on top, and an insulating layer under the oven floor. Each layer has a job, and skipping one tends to cause trouble later.

Start With the Footing

A built-in oven should sit on a reinforced concrete footing or slab sized for its full weight. Setting it on existing patio pavers is risky, because pavers are built for foot traffic rather than a heavy load in one spot. Footing depth and reinforcement can depend on your soil, frost depth, local code, and the oven maker’s specs, so confirm those details before anyone starts digging.

Set the Working Height and Insulation

Most cooks like the oven floor somewhere between waist and elbow height. Stand where you’ll cook and picture reaching in with a peel, because a few inches either way changes how the whole outdoor kitchen feels. The hearth slab also needs an insulating board or an insulating concrete layer under the oven floor, which keeps heat in the oven and out of the base.

Choosing Brick or Stone for the Outdoor Kitchen

Both brick and stone can make a strong, handsome oven base. The right pick depends on your house, your existing patio, your budget, and how much upkeep you want. Neither material is the best choice for every yard.

Brick gives a clean, even look and pairs well with a brick patio or a brick home. Standard clay brick handles weather well, though any surface that touches flame needs firebrick rated for high heat. Brick is also easier to match later if you add a seating wall or an outdoor fireplace.

Stone has a rugged, natural feel that suits yards with a stone patio, stone steps, or a stone retaining wall. Natural stone is heavy and uneven, so it takes longer to lay, which can raise labor costs. Stone veneer over a block core is another option, but it needs proper flashing and a drainage path behind it to stay attached.

Connecting the Oven Base to Patios and Walkways

The oven base should tie into the surfaces around it so people can move easily between the house, the cooking area, and the seating area. Good connections keep traffic moving and give the cook room to work. They also keep pavers from settling unevenly at the edges of the base.

Leave Room to Work

Plan a clear landing area in front of the oven opening. Walkways to the outdoor kitchen should let someone carrying a tray pass another person, and many designers aim for at least 4 feet of width. The surface right in front of the oven should handle heat and sweep clean, since embers and ash will land there.

Plan the Transitions

Where brick pavers or stone pavers meet the base, the joint needs a clean edge and firm support underneath. Pavers on compacted gravel can settle at a different rate than a concrete footing, so this seam should be planned rather than patched. On a sloped yard, a short step or a low retaining wall may be needed to keep the cooking area level.

Managing Drainage Around the Masonry Installation

Water is the biggest threat to outdoor masonry. It soaks into mortar joints, expands during cold snaps, and washes out the gravel under nearby pavers. Drainage should be part of the design from the first sketch.

Grade the patio so water flows away from the oven base and away from the house. A gentle slope is usually enough, though the right pitch depends on the paving and the site. Avoid placing the base in a low spot where runoff pools after heavy rain.

The top of the base needs protection too. A sloped cap or overhang sheds water off the hearth slab, and a weatherproof finish or small roof keeps rain out of the insulation. Wet insulation loses much of its value and can crack the oven when trapped moisture turns to steam.

Maintaining Durable Outdoor Kitchen Masonry

A well-built base needs less care than most people expect. Walk around it a couple of times a year and look for hairline cracks, loose mortar, or white chalky deposits called efflorescence. Those deposits are salts left behind by moving water, and they often point to a moisture problem worth tracing.

Cure a new oven with small fires before cooking at full heat, since fast heating can crack the dome or hearth. Keep the oven covered when idle, and clear out ash so it doesn’t hold moisture against the floor. Repoint worn mortar joints early, and choose a breathable masonry sealer if you seal at all, because the wrong product can trap water inside.

Frequently Asked Questions

Can I put a pizza oven on my existing patio?

It depends on what’s under the patio. Pavers on a gravel base usually aren’t built to carry the weight of a masonry oven in one spot. A thick, reinforced concrete slab may work, and a mason or engineer can check it. In many cases, the safest plan is to cut out a section and pour a proper footing.

Do I need firebrick for the whole base?

Firebrick is used for the oven floor and the parts that touch flame. The outer walls of the base can be regular brick, block, or stone. The hearth slab needs an insulating layer between it and the firebrick floor. Always follow the oven maker’s specs for materials inside the cooking chamber.

How long does a masonry pizza oven base last?

A well-built base can last for decades with basic care. Its life depends on the footing, drainage, material quality, and how well water is kept out. Bases that sit in wet spots or have cracked caps wear out faster. Regular checks and quick mortar repairs go a long way.

Does brick or stone hold up better in wet weather?

Both can perform well when the base has good drainage and proper flashing. Dense brick and many natural stones resist water on their own. The weak spots are usually mortar joints, caps, and gaps where water sits. Good design matters more than the material in most wet yards.

Should my pizza oven base match my outdoor fireplace?

Matching isn’t required, but it helps the yard feel connected. Using the same brick or stone, or a close color match, ties the features together. You can also match the cap or mortar color if the main materials differ. Set samples outside next to your existing masonry before you decide.

Built-In Firewood Storage Around a Stone Fireplace

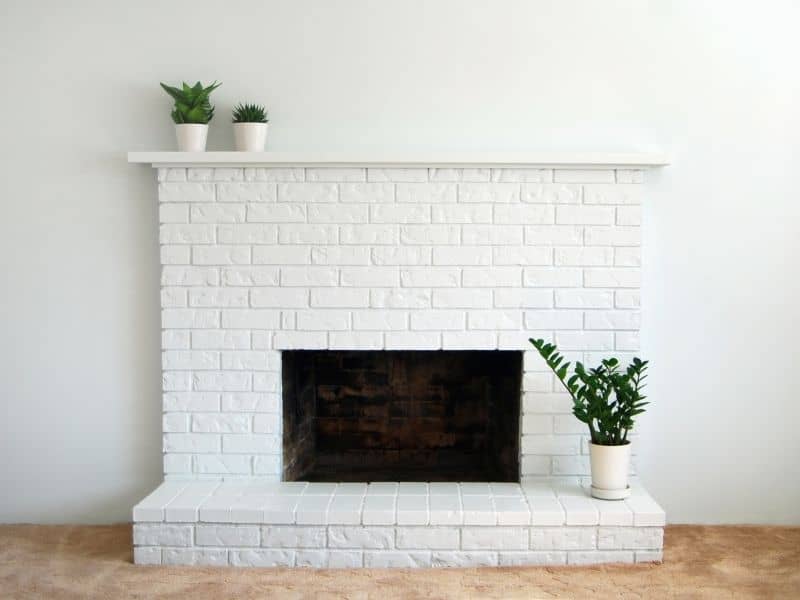
Stone fireplace with firewood stacked beside the hearth in a cozy indoor setting

A built-in firewood niche next to a stone fireplace does more than hold logs. It keeps wood dry, keeps bark off the floor, and gives the whole fireplace wall a finished look instead of a stack of logs shoved in a corner. Done right, the niche looks like it was always part of the design. Done wrong, it looks tacked on and it fills up with bark, dust, and bugs. The difference comes down to a few choices made early, before the first stone goes up.

Designing Built-In Firewood Niches Into the Stonework

A firewood niche works best when a mason plans it as part of the fireplace, not as an afterthought. That means picking the opening size, shape, and stone pattern before the wall gets built, not cutting a hole into finished stonework later.

The stone should wrap the opening the same way it wraps the firebox. Matching stone size, color, and joint pattern around the niche ties it to the rest of the fireplace instead of making it look like a separate box stuck on the side. A clean stone lintel or a simple arched top over the opening gives it a finished edge and keeps loose mortar from crumbling into the stored wood.

Some homeowners want the niche flush with the fireplace face. Others want it recessed a few inches so it reads as its own feature. Either works, but the mason needs to know which one before laying stone, since the wall thickness and header support depend on that decision.

Positioning Firewood Storage Without Crowding the Hearth

Where the niche sits matters as much as how it looks. It needs to sit close enough to the fireplace for easy loading, but far enough away that it doesn’t block the hearth or crowd the space where someone kneels down to build a fire.

A good rule is to keep the niche opening at least a foot away from the firebox opening. That gap protects the stored wood from direct heat and keeps someone from reaching past hot brick to grab a log. It also keeps the hearth extension clear, which most local fire codes require for a set distance in front of the firebox.

Think about how people actually move around the fireplace. If the niche sits on the side where people usually stand to add wood, it works. If it sits on the side people walk through to get to a chair or a doorway, it becomes a trip hazard and a dust magnet from foot traffic. Walking the space before construction starts, not just looking at a drawing, catches problems a flat plan misses.

Planning Storage Depth Around Common Split-Firewood Sizes

A firewood niche that looks great but only holds six logs isn’t doing its job. Depth and width should match the wood people actually burn, not just whatever looks balanced on paper.

Most split firewood for a home fireplace runs about 16 to 18 inches long. A niche needs at least that much depth, plus a couple of extra inches so logs aren’t jammed tight against the back wall. Jammed logs are harder to pull out and they knock bark loose every time someone tugs one free.

Width matters too. A narrow niche might look elegant, but it forces someone to stack wood in a single tall column that tips over easily. A wider opening, even just a few extra inches, lets wood sit in a stable low stack that’s easier to load and easier to grab from.

Height should stay practical as well. A niche that’s too tall wastes space at the top and makes the bottom logs hard to reach without bending awkwardly. Sizing the opening around real firewood dimensions, not a guess, is what makes the feature actually get used instead of ignored.

Managing Bark, Debris, and Moisture Inside the Storage Niche

Firewood sheds. Bark flakes off, sawdust collects, and small bugs sometimes ride in with the wood. A niche without a plan for that mess turns into a dusty problem fast.

A raised stone or metal base inside the niche keeps wood off any damp subfloor and makes sweeping out debris easier than trying to clean a floor-level opening. Some designs use a shallow lip at the front edge of the base to catch loose bark before it spills onto the room floor.

Moisture is the bigger concern. A niche built into an exterior-facing wall or near a chimney chase can pick up dampness if it isn’t sealed properly behind the stone. That dampness can make firewood mold instead of dry out, which defeats the whole purpose of indoor storage. A vapor barrier behind the niche stonework, matched to whatever barrier the rest of the fireplace wall uses, keeps moisture from working its way through the masonry.

Good airflow helps too. A niche that’s too enclosed traps humidity around the wood. Leaving a small gap at the top or back, or using an open-front design instead of a door, lets air move through and keeps logs seasoning properly instead of sitting in stale air.

Integrating Firewood Storage Into Custom Home Interiors

Auburn has seen a steady run of custom home upgrades where homeowners want their fireplace wall to feel like a designed feature, not just a functional heat source. A built-in firewood niche fits right into that trend when the proportions and finish match the rest of the room.

Stone choice plays a big part here. Homes going for a traditional look often pair the niche with the same fieldstone or cut stone used on the fireplace face, so the whole wall reads as one continuous design. More modern builds sometimes contrast the niche with a different stone texture or a darker mortar joint, using it as a deliberate accent instead of a match.

Proportion is what separates a niche that looks built-in from one that looks bolted on. A niche scaled too small next to a tall stone fireplace looks like an afterthought. One sized to echo the fireplace opening, even at a smaller scale, reads as intentional.

Details finish the look. A stone shelf above the niche, a matching header style, or trim that lines up with existing millwork in the room all help the storage space feel like part of the original architecture. For homeowners investing in a full fireplace build or renovation, that kind of planning is what turns a firewood spot into a feature worth showing off.

Outdoor Fireplace Chimney Height Near Covered Rooflines

Outdoor fireplace beneath a covered roofline, showing how the chimney relates to the roof

An outdoor fireplace under a covered patio does more than add warmth to a backyard. It also adds a chimney that has to clear the roof above it. Get the height wrong and smoke can drift back under the roof, stain the ceiling, or set off a smoke detector inside the house. Get it right from the start and the fireplace works the way it should for years.

How Covered Rooflines Affect Outdoor Fireplace Chimney Height

A chimney height can’t be picked in isolation. The covered roof next to or above the fireplace changes the math.

Once a chimney sits near a roof, the roof becomes part of the equation. The spot where the chimney passes through or near the roofline, along with any nearby roof sections, walls, or overhangs, all play a part in how tall that chimney needs to be. A short chimney that would work fine out in the open can fail badly once a roof is close by.

This matters most on covered outdoor living spaces, where a fireplace often sits tucked under an extended roof for shade and shelter from rain. That roof is exactly what can trap smoke if the chimney doesn’t clear it by enough.

Understanding the 3-2-10 Chimney Height Rule

Most chimney codes lean on a simple guideline masons call the 3-2-10 rule.

The rule works like this. The chimney has to rise at least 3 feet above the point where it comes through the roof. It also has to clear any part of the building within 10 feet by at least 2 feet. So a chimney could clear its own roof penetration by 3 feet and still fall short of code if a nearby wall or higher roof section within that 10 foot range isn’t cleared by 2 feet as well.

Both parts of the rule have to hold true. Meeting one part and missing the other still leaves a chimney that draws poorly or vents smoke where people don’t want it.

Why Roof Pitch and Ridge Distance Change the Final Height

Two outdoor fireplaces can look almost the same on paper and still need very different chimney heights. The difference usually comes down to the roof.

A steep roof pitch pushes the required chimney height up fast. As the roof rises more sharply per foot of run, the chimney has to rise with it to stay clear of that slope within the 10 foot radius. A shallow roof gives more breathing room, so the chimney can often stay shorter and still meet code.

Distance to the ridge matters too. A fireplace placed close to the highest point of the roof faces a taller obstacle nearby. Move the same fireplace farther from the ridge, or place the chimney penetration lower on the slope, and the numbers can shift enough to change the whole plan.

The location of the penetration point itself, meaning exactly where the chimney passes near or through the roof structure, shapes the surrounding roof geometry the chimney has to clear. Shift that point a few feet in either direction and the required height can change along with it.

Plan the Chimney Before Framing the Covered Patio

The order construction happens in matters just as much as the numbers do.

Fireplace location, roof shape, and expected chimney height should get worked out before a single roof truss goes up. Once framing is finished, changing any of those pieces gets expensive fast. A contractor might have to tear back roof sections, rebuild part of the structure, or add chimney extensions that look bolted on instead of built in.

Working out the chimney height early gives everyone room to adjust the layout instead of the chimney. Maybe the fireplace shifts a few feet away from the ridge. Maybe the roof over that section gets a slightly different pitch. Those changes are simple on paper and painful after the roof is closed in.

A few things worth confirming before framing starts:

  • Exact fireplace and chimney penetration location relative to the covered roof
  • Roof pitch over and near that section
  • Distance from the chimney to the ridge and to any nearby walls or roof breaks
  • Manufacturer height requirements if a prefabricated chimney system is going in

Verify Auburn Requirements Before Masonry Construction Begins

East Alabama’s outdoor living projects often pair a masonry fireplace with a covered patio, which makes this height question come up often around Auburn.

Before laying a single block, plans should be checked against the code requirements that apply to that specific project. Auburn lists the 2021 residential code among its adopted building standards, and manufacturer instructions for any prefabricated chimney components carry their own weight alongside that code. A masonry contractor familiar with local permitting can confirm which figures actually apply to a given roof and fireplace layout before the design gets locked in.

Skipping that check doesn’t save time. It just moves the problem to inspection day, when a chimney that falls short means reopening finished work. A short conversation with the local building department or a licensed mason early in the planning stage settles the question once, before concrete and block make changes costly.

An outdoor fireplace built next to a covered roofline can be a great addition to a backyard for years to come. The chimney just has to clear that roof the right way from day one.

How Mechanical Equipment Screens Benefit From a Brickmason

Brickmason built masonry equipment screen around commercial HVAC units with proper airflow and service access in Auburn, Alabama

Rooftop units, generators, and ground-level HVAC gear keep a building running. They also stick out and rarely look good from the street or parking lot. Proper equipment screening can hide that equipment while standing up to weather and time. The trick is building it so the units still breathe and stay easy to service.

A brickmason brings more to this job than a straight wall. The right screen protects airflow, foundation, and the look of the building all at once. This guide covers what to plan, check, and confirm before the first brick goes down. Get these details right and the screen works for years with little fuss.

Planning Equipment Screen Locations Before Masonry Construction

An equipment screen is a low wall that hides mechanical gear from view. Where it sits should be settled before any masonry begins. Move that decision to the end and you risk blocked access or wasted brick.

Start with the equipment layout and the sightlines that matter most. A brickmason works from those plans to place the wall where it screens the units without crowding them. Property lines, setbacks, parking flow, and wall stability all shape the final location. Confirm these limits early, since they can vary by municipality, zoning, and project scope.

Think about future equipment and commercial upkeep too. Units get swapped, serviced, or added over the life of a building, so a screen with a little room to spare can make maintenance easier and help avoid a rebuild later.

Maintaining Airflow and Service Access Around Equipment

Mechanical units need airflow to run and clearance to service. A screen that boxes them in too tightly causes trouble fast. Equipment can overheat, and technicians can’t reach the parts they need.

The maker of each unit lists minimum clearances on all sides. A brickmason uses those numbers to set the wall back the right distance. Vented brick patterns or open sections let air pass while still blocking the view. Gates or removable panels give crews a way in without tearing down brick.

Plan the service path along with the wall itself. Filters, coils, and access panels all need reach. A screen that looks great but traps the equipment ends up costing more in repairs.

Building Stable Foundations for Masonry Equipment Screens

Brick is heavy, and a screen wall is no exception. That weight needs a proper footing underneath, sized for the soil and the wall height. Skip this step and the wall can settle, crack, or lean over time.

A footing usually sits below the frost line so freezing ground does not heave it. Soil type matters too, since soft or wet ground calls for a wider or deeper base. A brickmason coordinates with the site plan to get the footing right. On rooftop screens, the support ties into the building structure instead, which an engineer should confirm.

Water control belongs in this step. Good drainage keeps the base dry and the mortar sound. A footing that stays wet is a footing that fails early.

Matching Brick Screens With the Existing Building Exterior

A screen wall reads best when it matches the building it serves. Brick color, mortar tone, and bond pattern all play into that match. Get them close and the screen looks built-in rather than tacked on.

A brickmason can source brick that blends with the existing exterior or choose a clean contrast on purpose. A coping or cap on top gives the wall a finished edge and sheds water. Small details like joint style carry the look across the whole property. These choices also help protect resale value on commercial sites.

For older buildings, matching brick takes some hunting. Older sizes and colors are not always on the shelf. A mason who knows local suppliers can save real time here.

Coordinating Screen Walls With Utilities and Final Site Grades

Equipment screens often land near gas lines, conduit, drains, and meters. A wall built without checking these can block access or sit right on top of a line. Call for utility locates and review the site plan before anyone digs.

Final grades matter just as much. The ground around the screen is often shaped late in a project, and the wall base has to match those grades. A brickmason coordinates with the grading and site crews so the wall meets the finished ground cleanly. Confirm elevations early, since regrading after the wall is up is slow and costly.

Access easements and right-of-way limits can affect placement too. These can vary by property, utility provider, and local code. A quick check against the site plans and with the surveyor keeps the screen clear of trouble.

Frequently Asked Questions

What is a masonry equipment screen?

A masonry equipment screen is a brick or block wall that hides mechanical gear from view. It commonly surrounds HVAC units, generators, transformers, or dumpsters. The wall blocks sightlines while still allowing air and service access when built right. Many commercial sites require these screens under local zoning or design rules, which can vary by municipality.

Why hire a brickmason instead of using a metal or wood screen?

A brickmason builds a screen that lasts far longer than metal or wood. Brick stands up to weather, sun, and impact with little upkeep. It also matches masonry buildings and holds resale value on commercial properties. Metal and wood can work, but they fade, rust, or rot in ways brick does not.

How much clearance does equipment need behind a screen wall?

Each piece of equipment lists its own minimum clearances on every side. These gaps allow airflow and give technicians room to service the unit. A brickmason sets the wall back to meet those numbers, often using vented brick or access panels. Always follow the manufacturer’s specs, since a tight screen can cause overheating or failed repairs.

Do equipment screens need a permit?

Many equipment screens do require a permit before construction. Rules depend on wall height, location, and whether the site is commercial or residential. Permitting and design standards can vary by municipality, county, and project scope. Check with local authorities and your site plans early so the schedule does not slip.

Can a screen wall be added after equipment is installed?

Yes, a screen can go in after the equipment is already in place. A brickmason works around the units, keeping the required clearances and service paths open. Utility locations and final grades still need a check before building. Adding the wall later is common, though planning it up front usually goes smoother.

Brick Fireplace Prep Before Adding a Gas Insert 

Brickmason built masonry equipment screen around commercial HVAC units with proper airflow and service access in Auburn, Alabama

A gas insert prep can turn a cold, dusty firebox into a warm room in seconds. But the insert only works well if the space around it is sound. Many homeowners focus on the insert model and forget the brick fireplace it sits inside. That older masonry does a lot of quiet work, and it needs to be ready first.

Good prep saves money and stress. It catches cracks, tight clearances, and hidden damage before the insert covers them up. This guide walks through what to check, measure, and fix before anything gets bolted in place. Do this work early and the install goes faster with fewer surprises.

Inspecting the Existing Firebox Before Gas Insert Installation

The firebox is the inner chamber where the fire burns. It takes the most heat over the years, so it tends to wear first. A gas insert slides right into this space, so its condition matters a great deal.

Look for cracked firebrick, crumbling mortar joints, and heavy soot buildup. Small gaps between bricks can grow with heat and let gases move where they should not. A mason can check the joints and the smoke chamber above the firebox for the same problems. Loose or flaking brick gets handled before the insert ever arrives.

The damper and flue above the firebox also need a look. Good installation planning includes checking these areas early because a gas insert usually vents through a liner. The old flue has to be clear and sound, and debris, old nests, or a stuck damper can all slow the work.

Confirming Fireplace Dimensions and Insert Clearances

Every gas insert has a size range it needs to fit. The firebox opening has to match those numbers, including front width, back width, height, and depth. A tape measure is your first tool here.

Take measurements at several points. Old fireboxes are rarely square, so the back is often narrower than the front. Write down the smallest opening, since that is what limits the insert. Share these numbers before you buy anything.

Clearance is the safe gap between the insert and anything that can burn. The maker lists minimum clearances for the mantel, the trim, and the surround. These measurements are also important for hearth safety, especially where heat reaches nearby finishes and materials. If your mantel sits too close, you may need to adjust it or pick a smaller unit. Confirm these gaps early so nothing has to be redone.

Planning Gas, Electrical, and Venting Routes Through Masonry

A gas insert needs three things fed to it: gas, power, and a vent path. Each one has to travel through or around solid brick. Planning these routes early keeps the masonry intact.

The gas line often runs from a nearby supply point into the firebox base. A licensed plumber or gas fitter sizes and connects it, and local code sets how it must be run. Many inserts also need a standard outlet for the blower and controls. An electrician can place that outlet where the cord reaches without showing.

Most gas inserts vent through a flexible liner that runs up the existing chimney. The liner carries exhaust out, and some models draw fresh air back in. The old flue must be clear and the right size for the liner to pass. A mason and the installer should confirm the chimney can take the liner before install day.

Repairing Masonry Before the Insert Covers Existing Damage

Once the insert is set, the brick around it gets hard to reach. Any damage left behind stays hidden and can quietly get worse. That is why repairs come before the install, not after.

Common fixes include repainting loose mortar joints, replacing cracked firebrick, and sealing gaps in the smoke chamber. Water damage is worth a close check, since moisture weakens brick and mortar over time. If the chimney crown or flashing leaks, that water can reach the firebox and the walls around it. Handling these issues now protects both the insert and the fireplace.

A tight, sound firebox also helps the insert run the way it should. Gaps let air move in ways the maker did not plan for. Sealing them keeps the heat and venting working right.

Reviewing the Fireplace Before Final Insert Installation

A final review is the last check before the insert goes in for good. It confirms the prep work held up and nothing got missed. This step is easy to skip and easy to regret.

Walk through the firebox, the clearances, and the routes one more time. Make sure the gas line is capped and pressure tested, the outlet works, and the liner is seated. Confirm the mortar repairs have cured and the surface is clean and dry. A mason or the insert installer can sign off on each item.

Ask for the paperwork too. Permits, inspection notes, and the insert manual all matter down the road. Keep them together in case you sell the home or need service. Requirements can vary by insert brand, chimney type, county, and local code, so confirm what applies to your project before work begins.

Frequently Asked Questions

Can I put a gas insert in any brick fireplace?

Most masonry fireplaces can hold a gas insert, but not all of them fit every model. The firebox size, the flue, and the clearances all decide what works. A mason or installer should measure and inspect before you choose a unit. Requirements can vary by insert brand, chimney type, and local code, so confirm early.

Do I need to repair my brick fireplace before adding a gas insert?

In most cases, repairs should come first. Once the insert is in place, the brick behind and around it is hard to reach. Cracked firebrick, loose mortar, and water damage only get worse when they are hidden. Fixing them before the install protects both the fireplace and the new insert.

How is a gas insert vented through a brick chimney?

Most gas inserts vent through a flexible metal liner that runs up the existing flue. The liner carries exhaust out of the home and can draw in fresh air on some models. The old chimney must be clear and the right size for the liner to fit. An installer and a mason confirm this before the liner goes in.

Will a gas insert damage my existing masonry?

A properly installed insert should not harm sound masonry. Problems usually start with damage that was already there, like cracks or moisture in the brick. That is why inspection and repair matter so much before the install. Good prep keeps the fireplace and chimney in good shape for years.

Should I hire a mason or a gas insert installer?

Both trades often play a part in this work. The installer handles the insert, the liner, and the gas connection with the right licenses. A mason inspects and repairs the brick, mortar, firebox, and chimney. On many jobs they work side by side so the masonry and the insert both end up right.

How Masonry Walkways Can Connect Separate Areas of the Yard

Curved masonry walkway winding through a landscaped yard with colorful flower beds, trees, and lawn

Big yards look great, but they can feel a little scattered. The patio sits over here. The garden hides way over there. The pool feels like its own island. A masonry walkway ties all of it together. It gives you one clear path from spot to spot, and it makes the whole yard read as a single space instead of a set of separate ones.

This matters a lot around Auburn, where many homes sit on larger residential lots. More land is a gift. It also means more distance between the places you actually use. The right walkway fixes that. A few smart choices make it simple to plan one that works with your yard and looks like it belonged there all along.

Why Larger Yards Often Need Better Connections

On a big lot, the useful spots often end up spread far apart. The back patio might sit near the house while the garden waits in a far corner. Walk out to the pool and you cross a wide stretch of grass to get there. Each area works fine on its own. Together, they can feel like little islands with no clear way between them.

A masonry walkway solves that. It gives you a set path that links the home to the garden, the patio, the pool and any other spot you visit often. You always know where to step, even after dark or after rain. The yard starts to feel like one connected place.

The best walkways follow how people already move. Watch your family for a week and you’ll see the same routes worn into the grass. Those worn lines show you where a path belongs. When you build along the way people naturally walk, the walkway feels right from day one.

Planning a Masonry Walkway Around Existing Yard Features

Before you lay a single stone, look at what’s already there. Slopes, big trees, garden beds, low wet spots and any sheds or fences all shape where a path can go. A good plan works around these features instead of fighting them. That saves money and keeps your yard healthy.

The shortest route is not always the smart one. A straight line might cut right through a tree’s roots or run across a soggy patch that never dries. Curving the path a few feet to one side can dodge both problems. So the goal is a route that flows well and avoids trouble, even if it bends a little.

You also want the walkway to fit the yard as a whole. Too many hard paths can chop the lawn into small, awkward pieces. One well placed walkway, with maybe a short branch or two, keeps things open and simple. That way the yard still feels roomy, and every area stays easy to reach.

Choosing Masonry Materials for a Cohesive Outdoor Look

Material sets the whole mood of the path. Brick brings a warm, classic feel and lays out in neat patterns. Natural stone looks more rugged and rarely repeats the same shape twice. Concrete pavers cost less and come in many colors and styles. Each one holds up well outdoors with the right install.

A few things guide the choice:

  • Color that works with your home and won’t clash with your roof or siding
  • Texture that gives grip but still feels smooth under bare feet
  • Pattern and size that suit the scale of your yard, since large stones can overwhelm a narrow path

Tie the walkway to what’s already on your property. If your house has red brick, a brick or warm stone path echoes it nicely. If you already have a stone patio, matching or blending that stone makes the two areas read as one design. A matched path looks planned from the start.

How Walkway Design Affects Comfort, Safety, and Maintenance

Good design shows up every time you use the path. Width comes first. A walkway meant for two people to pass should run about four feet wide, while a simple garden path can be narrower. A steady, even surface keeps toes from catching, and smooth changes from one section to the next stop the little trips that a raised edge can cause.

Water is the other big factor. A path should shed rain to the sides so puddles don’t sit on top or freeze in winter. A slight slope built into the surface does this without you ever noticing it. Good drainage also protects the base underneath, and that base is what keeps the whole walkway from shifting over the years.

Every masonry walkway needs some care, but a well built one needs very little. Weeds can sprout in the joints, so tight joints or the right filler cut that down. Stains from leaves or spills wipe off faster on sealed stone. Freezing and thawing can nudge units loose, yet a solid base and clean drainage keep movement small. A quick sweep and a yearly look-over handle most of it.

Creating a Masonry Walkway That Feels Like Part of the Landscape

The best paths do more than move you from spot to spot. They add something to the view along the way. A gentle curve feels more natural than a stiff straight line, and it pulls your eye through the yard. Small planting pockets beside the path, or a birdbath or bench at a bend, give you a reason to slow down and enjoy the walk.

Plants do a lot of the work here. Low flowers, grasses or ground cover along the edges soften the hard lines of brick or stone. Set them back a bit so leaves and stems never crowd the walking surface. The path stays clear and safe while the greenery makes it feel settled into the yard.

On a larger property, all these pieces get harder to juggle. More distance means more slope changes, more drainage to manage and more ways for a path to go wrong. A skilled mason reads the land, picks the right base for your soil and lays a walkway that stays level and looks good for decades. Smart planning up front turns a long walk across the yard into one of the best parts of your day.

Frequently Asked Questions

How wide should a masonry walkway be?

It depends on how the path gets used. A main route where two people walk side by side works well at around four feet. A quiet garden path can drop to two or three feet. Match the width to the traffic it carries and to how the space around it feels.

What’s the best material for a backyard walkway?

There’s no single best pick. Brick suits a classic home, natural stone fits a relaxed look, and pavers stretch a tight budget. Choose the one that matches your house and patio so the whole yard looks like one plan rather than a mix of leftover parts.

Do masonry walkways need much upkeep?

Not much when they’re built well. Sweep off leaves and debris now and then, pull any weeds that pop up in the joints, and seal the surface if you want easier stain cleanup. A yearly check for loose or lifted pieces catches small problems before they grow.

Can a walkway be built on a sloped yard?

Yes. A mason can grade the path, add steps where the slope gets steep, and build in drainage so water runs off to the sides. Planning for the slope early keeps the finished walkway safe and steady for years.

Why hire a professional instead of building it myself?

A pro handles the parts that are easy to get wrong, like the base depth, the drainage and keeping everything level over a long run. On a big lot with slopes and trees, that skill is what keeps the path from sinking or cracking within a few seasons.

Stone Exterior Trim Details That Give Homes a More Finished Look

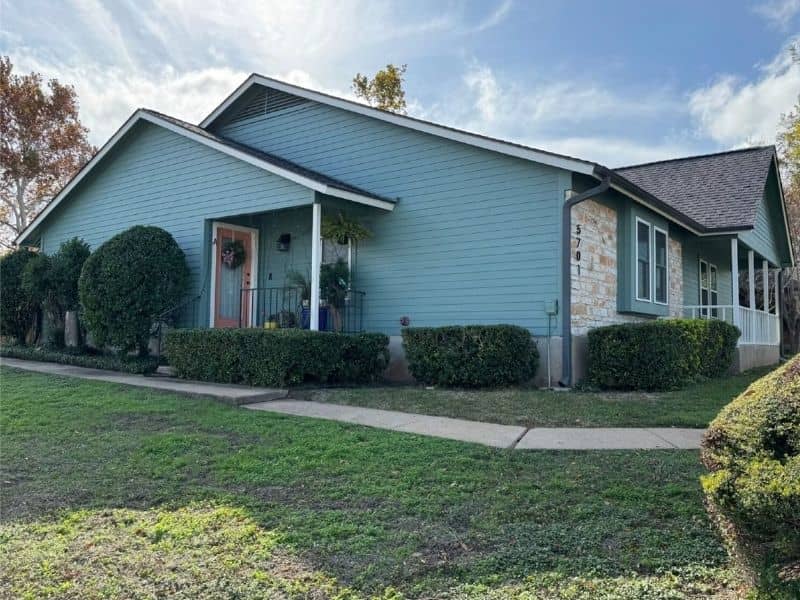
Teal home with stone exterior accents and a landscaped front yard

A little stone in the right spot can change how a whole house reads. Stone exterior trim has become one of the easier ways homeowners freshen an older exterior without redoing the entire front of the house. You choose one section, add stone texture there, and let the siding or brick around it stay the same. That one move can give a plain exterior a more finished look.

An accent wall works this way. It brings stone into the picture on a single part of the house instead of wrapping every wall in it. The contrast carries the effect. A small run of stone stands out far more when the surfaces around it stay quiet. In a home that already exists, that fits how the work usually goes. You aren’t starting from a blank plan. You’re adding to what the house already has.

Four things decide whether the stone looks right: where you place it, how big the area is, which stone you pick, and how it meets the rest of the exterior. Line those up and the accent looks planned. Miss them and it can look stuck on after the fact. Each section below takes one of them.

Start With the Part of the Exterior That Needs More Visual Weight

Pick the wall that feels flat, not the wall that happens to be the largest. An accent wall gives one part of the exterior more presence, so it belongs where the house looks thin or unfinished. Maybe that’s the section beside the front door. Maybe it’s a gable that reads as empty. The goal is to add weight where the eye wants something to land.

Look at the home’s proportions before you choose. A stone section should sit in balance with the walls, windows and roofline around it. Siding, brick and stucco each change how the stone will look next to them. A bright wall of siding makes the stone read darker. A busy brick pattern can crowd it. Study the whole face of the house first, then decide.

Covering too much undoes the point. When stone spreads across most of the exterior, the contrast that made it feel special goes flat. For homeowners updating a house that’s already built, restraint tends to win. One well-placed section says more than stone on every wall.

Let Existing Exterior Materials Set the Tone for the Stone

Let what’s already on the house guide the stone you choose. A stone accent wall should feel related to the exterior around it, not dropped in from a different house. Match the mood first. Warm brick pairs with warm stone tones. Cool gray siding sits better with cooler stone. Color, texture, scale and pattern all play into whether the two read as one exterior or two.

Walk the full exterior before you settle on a stone. Front, sides and any spot where materials change all shape the choice. A heavily textured stone throws deep shadow and reads rugged. A smoother, more even stone feels calmer and more modern. Neither is wrong. They just send different signals, so pick the one that suits the house.

Think about the seams too. The line where the new stone meets the old siding or brick is part of the design, not an afterthought. When you’re gathering exterior accent wall ideas, keep the transition in mind from the start. A clean meeting point is what makes an accent wall look like it belongs.

Use Scale and Joint Patterns to Keep the Feature From Feeling Heavy

Stone size and joint pattern control how heavy the wall feels. Large stones with wide joints read bold and solid. Smaller stones with tight, busy joints pack in more lines and can feel restless. On a modest accent area, a calmer arrangement usually looks more intentional.

A very busy pattern fights with the rest of the house. If the exterior already has trim lines, window grids and brick coursing, dense stonework adds one more layer of noise. The eye has nowhere to rest. A more controlled layout lets the stone hold its spot without shouting over everything else.

Controlled texture beats piled-on texture. The point is to add just enough, in a pattern that stays calm. A few signs the pattern may be doing too much:

  • Stones so small the wall looks speckled from the curb
  • Joint lines so busy they blur into one gray mass
  • A pattern that pulls attention away from the front door or windows
  • Texture so deep it clashes with a simple, clean exterior

Scale the pattern down and a small accent can feel confident instead of crowded.

Plan the Edges Where Stone Meets the Rest of the Exterior

The edges are where a stone accent looks finished or unfinished. The start and stop points deserve real thought, not whatever happens when the stone runs out. Plan where the stone begins and ends before anyone sets the first piece.

Clean transitions matter most at corners, around openings and anywhere the exterior material changes. Stone that dies into a wall with no clear edge looks like a job someone left half done. A section framed by a corner, a trim line or a change in material looks deliberate. The house tells you which shape fits. A tall narrow home may want a vertical stone band. A wide low home may suit a contained horizontal panel.

On existing homes, the new stone has to meet materials that are already there. That’s the hard part of renovation work. The old siding, brick or stucco won’t move, so the stone has to join them cleanly. Good installation matters as much as the idea. A smart design still fails if the edges are sloppy where the two surfaces meet.

Decide Whether the Accent Should Blend In or Stand Apart

Decide early whether you want the stone to whisper or to speak up. A subtle accent uses stone close in tone to the rest of the house, so it adds texture without much contrast. A high-contrast accent uses stone that clearly differs in color or texture, so it becomes the thing you notice first. Both can look great. They just do different jobs.

Light changes everything. Morning sun hits textured stone at an angle and deepens every shadow. Flat afternoon light softens the same wall. The siding, plants and paint around the stone shift its look too. A stone that seemed bold on a sample board can read quiet once it’s up on the house.

Step back and check it from the street, from the driveway and from up close. Stone that looks rich at arm’s length can turn muddy from the curb. This is where planning with a mason or designer pays off. A pro can look at the stone, the spot you have in mind and the size of the area, then tell you whether the three work together before the work begins.

Brick Privacy Walls That Balance Security and Curb Appeal

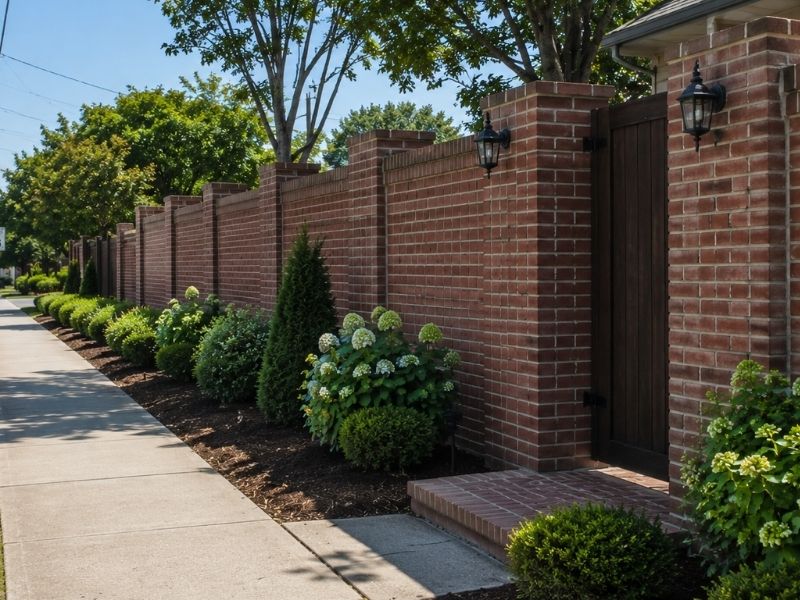
Brick privacy wall providing security and curb appeal for a home near a busy road in Auburn, Alabama.

A privacy wall does two jobs at once. It blocks the view from the street, and it still has to look good sitting in front of your house. This balance matters more than people think. Many local lots sit close to busy roads, so a brick wall has to do real work without turning the yard into a fortress. Before any brick goes up, most builders start with a construction survey. This step maps the lot lines, checks the slope, and marks where utilities run underground.

Choosing the Right Location for a Brick Privacy Wall Near a Busy Road

Placement decides almost everything about how well a wall works. Put it too close to the road, and it might block sightlines for drivers backing out of the driveway. Put it too far back, and it loses its whole point.

Walk the property at different times of day first. Watch where headlights sweep across the yard at night. Notice which spots catch the most road noise. These details tell you where the wall needs to sit.

Corners deserve extra care. A wall that wraps a corner lot has to stay low near the intersection so drivers can see each other clearly. Most cities, including Auburn, have rules for this called sight triangles. A quick call to the local planning office clears up any confusion before construction starts.

Driveway access matters too. The wall should frame the entrance, not fight against it. Leave room for cars to turn without scraping brick, and think about how delivery drivers and guests will move around the barrier.

Privacy Wall Height and Layout: Creating Separation Without Blocking Curb Appeal

Height is where most homeowners get stuck. Go too tall, and the house looks boxed in. Go too short, and the wall barely does anything.

A wall between four and six feet tall usually strikes the right balance for front yards. It blocks eye-level views from the sidewalk and street while still letting light and air move through the space. Anything taller starts to feel like a compound, especially on a smaller lot.

Layout matters as much as height. A single straight run of brick can look flat and heavy. Breaking the wall into sections, with small gaps or staggered heights, softens the look and keeps the yard from feeling sealed off. Some homeowners add a lower section near the front door and a taller run along the road side. This mix gives privacy where it counts and openness where it does not.

Length matters too. A wall that only covers part of the yard often looks unfinished. Plan the layout so it wraps naturally around the space you want to shield, not stopping at an odd point.

Brick Colors and Wall Details That Complement the Home

A privacy wall should look like it belongs to the house, not like something dropped in afterward. Matching the brick color and texture to the home’s exterior is the fastest way to pull that off.

If your house uses a warm red brick, a wall in a cooler gray tone will stand out for the wrong reasons. Pulling a sample brick from the house and testing it against wall options in daylight avoids surprises later. Texture matters too. A smooth, modern brick paired with a rough, traditional facade creates a visual clash that’s hard to fix after the mortar sets.

Small details finish the look. Capstones along the top edge give the wall a clean line instead of a raw, unfinished edge. Soldier courses, where bricks stand on end in a row, add texture without much extra cost. Mortar color plays a part too. Light mortar makes individual bricks pop, while dark mortar blends everything into one solid mass.

Using a Brick Privacy Wall to Reduce the Visual Impact of Nearby Traffic

Homes along busier Auburn streets deal with a specific problem. Headlights sweep across windows at night, and passing cars pull the eye away from the yard during the day. A solid masonry wall handles this better than fencing or hedges because it blocks the view completely instead of just filtering it.

Masonry also cuts down on road noise. The dense material absorbs and deflects sound, which matters near roads with steady traffic. A wood fence might block the view, but it won’t do much for the noise. Brick handles both.

The point isn’t to shut the house off from the world. It’s to give the front yard a sense of separation from the road, so the space feels like part of the home rather than an extension of the street.

Planning Drainage, Access, and Long-Term Care Around a Brick Privacy Wall

A privacy wall changes how water moves across a yard, and ignoring that early on causes problems later. Water needs a clear path away from the wall’s base. Without it, standing water can weaken the foundation over time and lead to cracking.

Weep holes, small gaps left in the lower courses of brick, let trapped moisture escape instead of building up behind the wall. Grading the ground so it slopes away from the base also helps keep water from pooling.

Access points need thought too. A gate built into the wall should line up with existing walkways, not force people to cut across the lawn. Hinges and hardware built for outdoor use hold up far longer than standard indoor fittings.

Once the wall is up, a simple check twice a year keeps small issues from turning into big ones. Look for cracks, loose mortar, or plants growing too close to the base. Trim back landscaping that presses against the brick, since roots and vines can loosen mortar joints faster than most people expect.

Frequently Asked Questions

What is the best height for a brick privacy wall? 

Most front yard privacy walls work best between four and six feet. This height blocks eye-level views from the street without making the yard feel closed in.

Can a brick privacy wall help block views from a busy road? 

Yes. Solid brick blocks both the view and a good amount of road noise, which makes it more effective than fencing or hedges along busy streets.

Will a brick privacy wall make a front yard look too closed off? 

Not if the layout includes breaks, staggered heights, or open sections. A wall built as one flat, uniform run is what usually creates that closed-in feeling.

How can a brick privacy wall match the style of an existing home? 

Matching the brick color and texture to the house is the first step. Details like capstones, soldier courses, and mortar color help tie the wall into the home’s existing look.

Do brick privacy walls need drainage planning? 

Yes. Weep holes and proper grading keep water from pooling at the base, which protects the wall’s foundation over time.

Masonry Grill Areas That Fit Naturally Into the Backyard

Natural-looking grill masonry area in an Auburn backyard with a built-in stone grill, outdoor counter, seating, and landscaped patio.

A backyard grill built from brick or stone changes how a family uses the outdoor space. Grill masonry gives homeowners a sturdy cooking spot that lasts through hot summers and mild winters. Before any project starts, a construction survey helps confirm property lines, soil conditions and utility lines so the grill sits in a safe, legal spot. Once that step is done, the real planning begins: where the grill goes, what it’s made of and how it connects to the rest of the yard. This guide walks through those choices step by step, with a focus on details that matter in Auburn’s climate and typical lot sizes.

Choosing the Right Location for a Backyard Masonry Grill

Picking a spot for a masonry grill starts with watching how people actually move through the yard. Homeowners often trace the path from the kitchen door to the patio, then check if that path stays clear once a grill takes up space. The grill should sit close enough to the house that carrying plates and tools isn’t a chore, but far enough that smoke and heat don’t drift toward windows or doors.

Seating areas matter too. A grill placed too close to a dining table can crowd the cook and make guests dodge smoke. In Auburn yards, where lots can be tight or oddly shaped, it helps to sketch the layout on paper first. Mark the grill, the seating, the walkways and any trees or slopes. This simple step catches problems before concrete gets poured.

Selecting Materials That Complement the Home and Landscape

The materials used for a grill masonry structure should match what’s already on the house. If the home has brick siding, a brick grill surround ties the two together without much effort. Stone homes pair well with natural stone veneer, while stucco houses often look good with a smooth stucco finish on the grill base.

Color matters as much as material type. A grill built from stone that’s too light or too dark compared to the house can look out of place, even if the material itself is right. Mortar color is easy to overlook, but it changes the look just as much as the brick or stone. Homeowners in Auburn often walk their yard at different times of day to see how sunlight hits the brick or siding before picking a final color. That small step avoids a mismatch that shows up once the sun changes angle.

Planning Counter Space and Built-In Features Around the Grill

Storage matters too. A cabinet or drawer built into the masonry base keeps grilling tools, charcoal or propane tanks out of the weather. Some homeowners add a small prep sink nearby, though that requires extra plumbing work and isn’t needed for every setup. The goal is a cooking zone that works on its own, not a mini kitchen with every possible feature. Keeping the counter space simple and functional often serves a family better than cramming in extras that rarely get used.

Designing a Grill Area for Comfortable Year-Round Outdoor Cooking

Auburn’s weather swings from humid summers to cool winter evenings, and a grill area built for one season only gets used for part of the year. Shade matters most in summer. A pergola, a tall tree or even a simple roof over the grill keeps the cook from standing in direct sun during the hottest months.

Airflow matters just as much. Smoke needs somewhere to go, so the grill shouldn’t sit in a tight corner boxed in by walls on three sides. Lighting extends the usable hours into the evening, especially in fall and winter when it gets dark early. A few well-placed lights near the counter and grill grates make cooking after sunset much safer. Space for people to stand and talk without crowding the cook rounds out a design that works no matter the season.

Connecting a Masonry Grill Area With the Rest of the Backyard

A masonry grill that feels tacked onto the yard usually has one problem: nothing links it to the rest of the space. A short paver path between the patio and the grill fixes this quickly. Matching the grill’s base material to a nearby retaining wall or fire pit also helps the eye read the yard as one connected space instead of separate pieces.

Spacing plays a role too. A grill crammed right against a fence or squeezed between two other structures can feel like an afterthought, even if the materials are chosen well. Leaving a few feet of breathing room around the grill area lets it read as its own spot within the yard, not just a leftover corner. Simple choices like these help a single feature feel like part of the whole backyard, not a separate project stuck onto the side.

Frequently Asked Questions

What is grill masonry? 

Grill masonry is a grill area built with brick, stone or block instead of a portable metal unit. It creates a permanent or semi-permanent cooking structure that can include a countertop, storage and a built-in grill insert.

What materials are commonly used for a masonry grill area? 

Brick, natural stone and stucco are the most common choices. The right pick usually matches whatever material already covers the house, so the grill area looks like it belongs rather than standing apart.

How much space is needed for a masonry grill area? 

Space needs depend on the grill size, how much counter room is included and whether seating is part of the plan. A basic setup might fit in a small corner, while one with seating and storage needs more room for people to move around comfortably.

Can a masonry grill be designed for year-round outdoor cooking? 

Yes. Adding shade, good airflow and lighting lets a masonry grill get used through most of the year, including cooler months when a portable grill might get left in the garage.

How can a masonry grill area fit naturally into an existing backyard? 

Matching materials to the house, planning clear paths to and from the grill and leaving enough open space around it all help a grill area feel like part of the yard instead of an add-on.