When Brick Columns Need More Than a Surface Repair

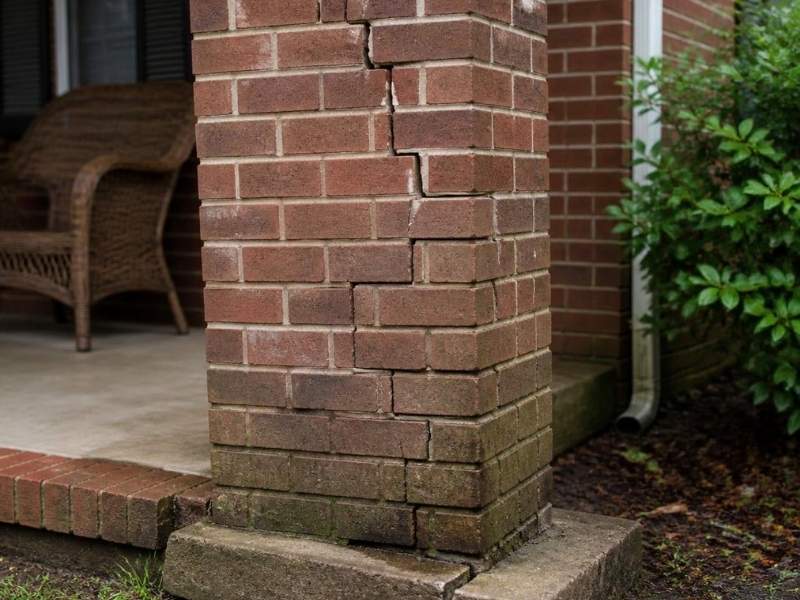
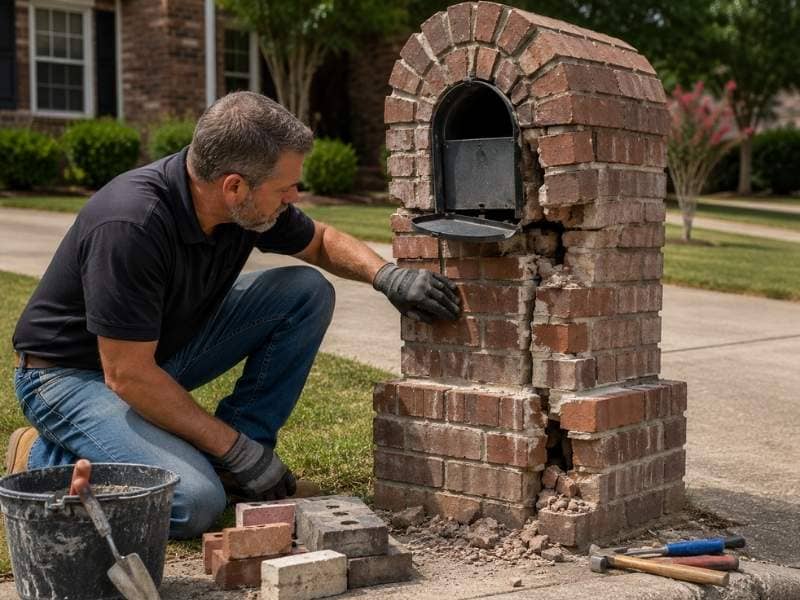
Cracked brick porch column with footing damage and water staining in Auburn, Alabama.

A brick column can look fine on the outside and be failing on the inside. That’s the trap. Brick columns hold up porches, gates, fences and mailboxes, so a hidden problem can turn into a safety issue fast. A quick patch or a fresh coat can cover the signs for a while. It won’t fix what’s really going on.

Some column problems are skin deep. A patch handles those fine. Others start at the footing or deep in the core, and no surface fix will hold. Knowing the difference saves you from paying twice.

What Surface Repair Actually Fixes

Surface repair fixes what stays on the surface. That covers a narrow set of problems.

A mason can repoint crumbling mortar joints. They can swap a cracked face brick or patch a chipped edge. They can clean stains and seal a fine crack. These jobs work when the column below is still sound.

The catch is simple. Surface work assumes the core and the base are solid. If they aren’t, you’re painting over a problem that keeps growing. On a project with a row of matching columns, that hidden growth can spread from one to the next before anyone notices.

Cracks That Warn of Real Movement

Not every crack is skin deep. Some point to real movement in the column.

A thin hairline crack is often just age. A wide crack, a stair-step crack through the mortar, or a gap that keeps growing is a warning. That kind of crack means something shifted. The fix has to reach the cause, not fill the gap and hope.

Watch for these signs:

  • Cracks wider than a coin’s edge
  • Stair-step cracks that follow the mortar lines
  • Gaps that grow month to month
  • One side of the column pulling away

Fill a moving crack and it comes back fast. The column keeps shifting under the patch, and the new mortar just splits again. Mark the ends of a crack with a pencil and a date, then check it in a month. If the line has moved past your mark, the column is still on the move.

A Leaning or Bulging Column Means Trouble Below

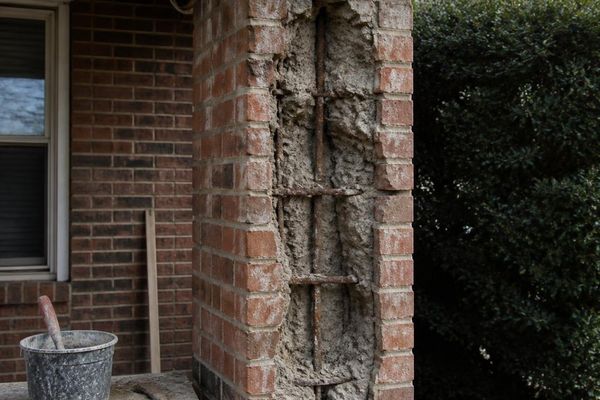
Brick column opened for structural repair, revealing rusted steel reinforcement and a deteriorated masonry core in Auburn, Alabama.

A column that leans or bulges has a problem at the base. No surface fix will straighten it.

Columns sit on a footing below the ground. When that footing settles, sinks or heaves, the column tips with it. Poor drainage around the base is a common cause. Water softens the soil, and the weight does the rest.

A bulge is its own warning. It can mean the core is breaking apart or the brick is pushing outward. Either way, the load path is failing. That calls for a mason to open it up and look, not smear on more mortar. A quick way to gauge a lean is to hold a level against two sides, since a column should read plumb top to bottom.

Water and Rust Inside the Column

Many brick columns aren’t solid. Some have a hollow core. Others hide a steel post or rebar inside. Water is the enemy of both.

A Failed Cap Lets Water In

The cap is the column’s roof. When it cracks or goes missing, rain runs straight into the core. That water sits, freezes and expands. Over a few winters, it pushes the brick apart from the inside.

Rusting Steel Breaks Brick Apart

Hidden steel rusts once water reaches it. Rust takes up far more room than clean steel. As it swells, it cracks the brick around it and pushes the faces outward. A patch on the surface does nothing to stop the rust working below it. Left alone, the swelling can split a column open along its full height.

Repair or Rebuild: How to Make the Call

When the damage reaches the base or the core, a rebuild often beats another patch. Repeated patching costs more over time.

A mason may rebuild just the top section down to sound brick. A worse case needs a full teardown and a new footing. Good rebuilds also fix the cause. That means a solid cap, better drainage and rust-free steel or ties.

Signs a rebuild is the smart call:

  • Cracks that return after every repair
  • A clear lean or a growing bulge
  • A soft or crumbling core
  • Rust stains bleeding through the brick

Have a mason inspect before you decide. A short look now can keep a column from coming down later. Ask them to price both the patch and the rebuild, so you can weigh the real cost of each against how long you plan to keep the property.

Frequently Asked Questions

What causes a brick column to crack? 

Cracks come from movement, water or age. A settling footing or shifting soil pulls the brick apart. Trapped water freezes and expands inside the column. Rusting steel in the core can also crack the brick outward.

Can I just patch a cracked brick column myself? 

You can patch small, stable cracks that are only cosmetic. A moving crack, a lean or a bulge needs a mason. Those signs point to damage below the surface. Patching them only hides the problem while it grows.

How do I know if my column has steel inside? 

Many columns built as gate or fence posts hide a steel post or rebar. Rust stains on the brick are a strong clue. A mason can check with a probe or a metal scanner. Knowing what’s inside changes how the repair is done.

Why does water damage a brick column so fast? 

A column takes water from the top and the sides. A cracked or missing cap lets rain pour into the core. That water freezes, expands and works the brick loose. It also rusts any steel hidden inside.

Is it cheaper to repair or rebuild a brick column? 

Small surface repairs are cheaper up front. But if the base or core is failing, repeated patches add up fast. A proper rebuild fixes the cause and lasts far longer. Over time, that usually costs less than patching again and again.

Why Brick Steps Become Loose and Uneven Over Time

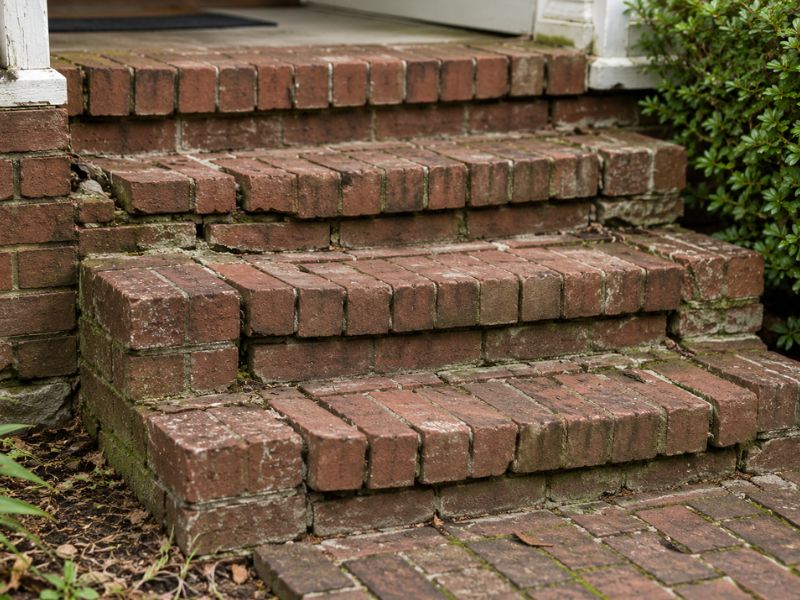
Loose and uneven brick steps with cracked mortar, shifted treads, and visible settlement near a home entrance in Auburn, Alabama.

Brick steps can look solid for years and then start to wobble underfoot. One tread rocks a little, a corner sits higher than it used to, and the whole staircase suddenly feels off. Most of the time, the loose brick you notice is only the surface of the problem. The real cause usually sits below the steps or inside the joints holding them together. Knowing what actually moves your brick steps helps you fix them once instead of patching the same spot every year. Here is what tends to go wrong, and why.

How Settlement Beneath Brick Steps Creates Uneven Treads

Every set of brick steps rests on a base of packed soil or fill. When that base wasn’t compacted well during the build, it slowly gave way under the weight above it. Different parts of the ground can sink at different speeds, so one section of the stairs drops while another stays put. That uneven drop is what leaves you with tilted treads and a gap where things used to line up.

Water makes this worse over time. Rain that flows under or around the steps can wash out small amounts of soil with every storm. As that soil disappears, the support beneath the bricks shrinks, and the masonry follows it down. This is why erosion often shows up as sinking on the side that faces the downhill flow.

Resetting only the bricks you can see rarely fixes this kind of movement. The bricks look fine again for a while, but the ground below keeps shifting. Unless the base gets rebuilt or re-supported, those same treads will sink again.

Why Mortar Joints Lose Their Grip on Individual Bricks

Mortar is the glue that holds each brick in place, and it doesn’t last forever. Years of foot traffic send small shocks through the steps every single day. Add in weather, freeze and thaw cycles, and plain age, and the mortar slowly turns brittle and starts to crumble. Once the bond weakens, a brick that used to sit tight begins to rock.

The bricks at the edges usually loosen first. Step corners and the front lip of each tread take the most direct pressure from feet landing on them. Landing areas at the top and bottom of the stairs also get heavy use, so their joints wear down sooner than the ones in the middle. Crumbling mortar is one of the most common reasons masonry units drift out of position.

You can often catch this early. Look for thin cracks in the joints, missing bits of mortar, or a light gray dust near the base of a brick. Those small signs tend to show up before a brick actually comes loose.

How Poor Step Geometry Concentrates Pressure

Not every problem starts underground. Sometimes the way the steps were built puts too much weight on too little support. Treads that vary in depth, risers that don’t line up, and mortar beds spread too thin all create weak points. When one small area carries more load than it should, that area gives out first.

Picture a tread whose front edge hangs out past its support. Every footstep presses down on that unsupported lip with nothing solid beneath it. Over months and years, the repeated pressure cracks the joint and lets the brick begin to rock. A staircase built with uneven geometry basically picks its own failure points.

These flaws often hide until the steps see real use. A stair that feels fine when new can develop rocking bricks and cracked joints once thousands of footsteps have done their work. The uneven walking surface you feel later was usually built into the stairs from the start.

When Nearby Structures Pull Brick Steps Out of Alignment

Brick steps rarely stand completely on their own. They usually connect to a porch, a foundation, a walkway, a landing, or a railing post. Each of those pieces may have been built at a different time and on a different base. When two connected structures settle at different rates, something has to give at the point where they meet.

That meeting point is where cracks and height changes tend to appear. You might see the steps pulling away from the porch, or a lip forming where the walkway meets the bottom tread. A railing post that shifts can drag nearby bricks along with it. These gaps are a sign that the movement is coming from the connection, not just the steps.

Fixing the visible crack alone usually misses the real story. If the porch or foundation keeps moving, the same separation opens back up. That connection needs to be checked before anyone patches the masonry between them.

Why Earlier Spot Repairs Sometimes Fail Again

Patching one loose brick feels like a quick win, and for a little while it is. A mason scrapes out the old mortar, packs in fresh material, and the brick sits tight again. The trouble comes when the base, the neighboring bricks, or the step structure is still moving. Fresh mortar can’t hold a brick still while everything around it keeps shifting.

That’s why the same brick, or the one right beside it, often loosens again within a season or two. Each repair treats the symptom while the real cause sits untouched below or beside it. Homeowners can end up paying for the same small fix over and over.

When looseness keeps spreading across several bricks, the stairs are telling you something bigger. At that point, a full look at the base, the connections, and the step layout makes more sense than another patch. A mason who inspects the whole assembly can find the source instead of chasing it one brick at a time.

Frequently Asked Questions

Why does only one brick step move when the others feel solid? 

One brick can move on its own for a few reasons. It may have a failed mortar bond, weak support directly beneath it, or more foot pressure than the bricks around it. Corner and edge bricks are especially prone to this because they take concentrated weight. Still, a single moving brick can be an early warning of a wider support problem, so it’s worth watching.

Can loose brick steps be caused by foundation movement? 

Yes, movement in a nearby foundation or porch can travel into attached steps. This happens most when the two structures sit on different bases and settle at different rates. As one side shifts, it pulls or pushes the steps connected to it. The source of the movement should be found before the visible brick gets repaired.

Does repointing always fix loose brick steps? 

No, repointing only replaces worn mortar in the joints. That helps when tired mortar is the whole problem, but it does nothing for a sinking base, lost support, or movement between connected structures. If the ground or the porch keeps shifting, fresh joints will crack again. The repair has to match the real cause, not just the surface.

When should several uneven steps be rebuilt rather than patched? 

Rebuilding starts to make sense when the problems stack up. Multiple treads have shifted, the base has settled, joints keep failing, or the steps no longer hold even tread and riser heights. At that stage, patching one brick at a time rarely keeps up. A mason should inspect the full staircase before deciding between a repair and a rebuild.

What Homeowners Should Consider Before Building a Retaining Wall

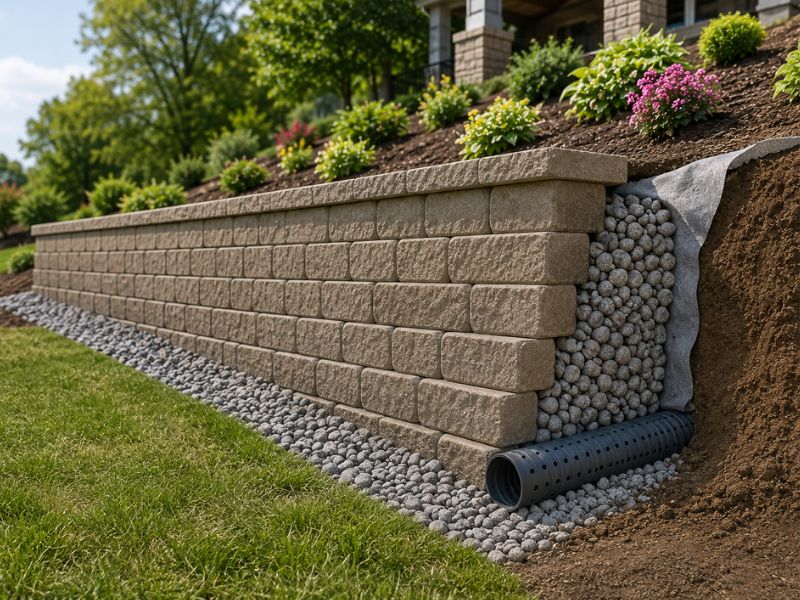
Retaining wall cutaway showing drainage stone, filter fabric, and a perforated pipe installed behind the wall on a landscaped slope in Auburn, ALabama.

Water is the number one reason a retaining wall fails. Even a well-built wall can lean, crack, or slide once water starts building up behind it, and that risk climbs on a slope where rain runs downhill and presses against the soil. So before you build a retaining wall, you need a solid plan for where all that water will go. Good drainage is what keeps the wall standing straight for years instead of months. Here are the main things smart homeowners should think through before the first block goes down.

Send Hillside Runoff Away Before It Hits the Wall

Rain running down a slope carries real force, and when it reaches the soil behind your wall, that soil grows heavy and waterlogged. Saturated soil pushes hard against the structure, and that constant pressure is what breaks walls over time. The smartest approach is to stop the water before it reaches the back of the wall.

You have several simple tools for this. A swale is a shallow dip that guides water off to the side, while a berm is a small raised mound that blocks the flow and steers it away. Careful grading shapes the ground so rainwater travels around the wall instead of into it, and a surface drain can capture runoff near the top of the slope.

None of these features expect the wall to handle everything alone. The wall’s internal drain still plays a role, but it should only deal with whatever water slips past your first line of defense. When you reduce how much water reaches the soil, the entire system holds up far longer.

Build a Free-Draining Layer Behind the Wall

Behind every well-designed retaining wall sits a column of clean drainage stone. This is not ordinary dirt or fine sand, but washed rock with plenty of open space between each piece, so water moves through it quickly and drops toward the base.

That open stone gives water a fast, direct path to the bottom of the wall. Without it, moisture lingers in the soil and presses steadily against the blocks, and over time that pressure can bow the wall outward or crack the masonry units. Think of the stone as a dedicated fast lane that keeps water from pooling against the structure.

Many builders wrap this stone zone in filter fabric for extra protection. The fabric prevents fine soil particles from washing into the rock and clogging the gaps that let water escape. As a result, the drainage layer keeps working properly for years rather than slowly filling with silt.

Place the Drainpipe Low on a Sloped Yard

A perforated pipe usually runs along the base of the wall, and this is known as a toe drain. Perforated simply means the pipe is lined with small holes that let water seep inside. Because water collects at the lowest point, the pipe must sit low enough to catch it, since a pipe placed too high leaves water pooling underneath where pressure keeps building.

On a slope, the type of soil changes how carefully you have to plan. Poorly draining soil such as heavy clay holds onto water and demands extra attention, while tall walls and reinforced walls carry heavier loads that often call for a fully designed system. In those situations, a professional should map out both the pipe layout and its depth.

Getting the pipe height correct is not something to eyeball. Even a few inches too high can quietly undo the entire drainage plan, so this is a step worth slowing down for. A little care now can save you from an expensive rebuild later.

Give the Water a Safe Way Out Downhill

A drainpipe only earns its keep when the water it collects has somewhere useful to go. Ideally the pipe leads to a lower spot on the property, a stormwater system, or another approved outlet that can handle the flow. If it simply ends in the same soil it was draining, you have relocated the problem rather than fixing it.

You also need to protect wherever that water comes out. Erosion can wear away the ground around the outlet, while leaves, mulch, and dirt can clog the opening, and animals sometimes build nests inside an open pipe. A simple grate or screen goes a long way toward keeping everything clear.

Landscaping work is another threat that people often overlook. A crew planting shrubs might bury or crush the outlet without ever realizing it was there. Marking the spot and checking on it once in a while keeps the whole system flowing.

Handle Water Between Stacked Walls

Some yards rely on two or more walls stacked up the slope, and these tiered walls end up sharing their water. Rain landing on the upper level runs down toward the level below it, so ignoring that flow puts real strain on the lower wall.

Each tier deserves its own plan for catching and moving water. Runoff from the upper terrace should be intercepted and redirected before it reaches the next wall down, and a swale or drain set between the levels handles this nicely. The main goal is to keep the soil separating the tiers from turning into saturated mud.

When that middle soil soaks through, both walls feel the added weight and pressure. The lower wall tends to fail first because it carries the greatest load. Planning each level as its own drainage system spreads the risk instead of piling it onto a single wall.

Frequently Asked Questions

Does every hillside retaining wall need a drainpipe? 

Not every small wall relies on the same drainage setup. Even so, walls built on slopes, walls sitting in poorly draining soil, and reinforced walls usually need extra help with water. Many walls taller than four feet also call for a toe drain or a professionally designed drainage plan. When you are unsure, a qualified professional can tell you what your particular site requires.

Can surface grading replace drainage behind the wall? 

No, because the two systems handle different jobs. Surface grading steers rainwater away before it soaks into the retained soil, while the drainage layer and pipe manage whatever water still reaches the wall. The two work best as a team, so leaving one out creates a weak point. Relying on grading alone usually means water builds up where you cannot see it.

Where should retaining wall drainage water discharge? 

The outlet should lead to a safe, lower area of the property or an approved point designed to receive the flow. A stormwater connection often works well for this purpose. The key rule is that the discharged water should never cause erosion or flooding somewhere else. A good outlet solves your problem without quietly creating one for a neighbor.

Why is filter fabric used in retaining wall drainage? 

Filter fabric keeps fine soil separated from the clean drainage stone behind the wall. Without it, tiny dirt particles wash into the rock and clog the open spaces that let water pass. Once those gaps fill in, the stone can no longer move water quickly. The fabric preserves that clear drainage path for the long haul.

Should downspouts empty behind a hillside retaining wall? 

No, roof water should never be dumped directly behind the wall. A downspout delivers a large, concentrated rush of water into one spot, and that surge saturates the retained soil almost instantly. Instead, route the roof runoff well away from the wall toward a safe area. Every concentrated water source deserves a place in your overall drainage plan.

Brick Mason Review for Commercial Properties

Brick mason review for commercial properties showing a professional inspecting brickwork, mortar joints, and masonry conditions on a commercial building.

Brick masonry often appears durable, but visible surfaces do not always reveal the condition of the wall system. A brick mason review provides a professional assessment of the brickwork, mortar joints, and other visible masonry components to identify signs of deterioration, damage, or maintenance needs. For property owners, buyers, and managers of commercial buildings, this review can help identify issues early, support maintenance planning, and determine whether additional evaluation or repairs may be needed before problems become more extensive. 

What a Brick Mason Review Covers

A brick mason review is a hands-on inspection of a building’s masonry. The mason walks the walls and checks the brick, the mortar and the way the wall is put together. This is different from a general building inspection. A mason knows brick deeply and spots issues a general inspector may walk right past. Years of laying and repairing brick teach a trained eye where trouble hides.

The review looks at the whole masonry system, not just the surface. Brick walls rely on mortar, flashing and support to stay sound. A mason checks how these parts are holding up and where they’re starting to fail. The mason also looks at the details that matter on commercial buildings, like control joints, lintels over openings and the ties that hold a brick face to the wall behind it. The result is a plain report on the wall’s condition and what it will take to keep it standing.

Common Problems a Mason Finds

Older commercial masonry tends to share a set of problems, and a mason knows where to look. Failing mortar is near the top. Over decades, mortar joints crack, crumble and wash out, which lets water in and weakens the wall. A mason can tell how far the decay has gone by testing the joints and checking how deep the damage runs.

Water damage is another common find. Bricks that trap water can crack and flake as they freeze and thaw, a process that slowly breaks the face off the brick. Bulging or leaning sections point to deeper structural trouble, often a sign that the ties or supports behind the face have failed. The mason also checks for past repairs done with the wrong materials. A hard modern mortar used on soft old brick, for example, can trap stress and crack the brick faces around it. These bad fixes often cause more harm than the original problem.

Why the Review Matters Before You Buy

For a developer, the timing of the review is everything. Done before a purchase, it tells you what you’re really buying. Masonry repair on a commercial building can run into serious money, and that cost belongs in your offer. A wall that needs full repointing or rebuilding changes the math on a deal, sometimes by a lot.

The review also gives you leverage. If the mason finds real problems, you can ask the seller to fix them, drop the price or plan the repair into your budget with eyes open. Without the review, you inherit whatever the walls hide and pay for it later. A few hours of a mason’s time can save you from a purchase that looked fine and turned into a money pit.

Why It Matters Before a Renovation

The review shapes a renovation just as much as a purchase. You need to know the wall’s condition before you attach new work to it or change how it carries load. Cutting a new opening or adding weight to a wall that’s already weak invites failure. A mason’s read tells you what the existing masonry can handle.

Skipping this step can mean building on top of a problem. New finishes over failing brick just hide the decay while it keeps spreading. A mason’s review lets you fix the masonry first and build on something sound. That order protects both the new work and the money you put into it.

Turning the Review Into a Repair Plan

A good review doesn’t just list problems. It points toward fixes and their rough order of importance. Some issues, like a small area of loose mortar, can wait and be watched. Others, like water getting behind the wall, need quick action before they spread. The mason helps you tell the two apart, which keeps you from spending on the wrong things first.

This lets you plan repairs by priority and budget. You can tackle the urgent safety and water issues first, then schedule the rest over time as cash allows. Knowing the full scope also helps you get accurate bids instead of vague guesses, since contractors can price a clear list of work. A clear plan keeps a masonry problem from turning into an emergency down the road, which is always the most expensive way to fix anything.

Masonry Mailbox Repairs After Property Damage

Professional mason inspecting a damaged masonry mailbox with cracked bricks, loose mortar, and a shifted mailbox insert after property damage.

A masonry mailbox can take a real beating from cars, storms or simple age. When one gets damaged, a good repair depends on knowing exactly what went wrong. A quick check of the whole structure points you toward the right fix.

These mailboxes are heavier and sturdier than the metal kind, so repairs work a bit differently. The brick or stone, the mortar and the mailbox unit inside all need review. Careful work now helps the finished result stand strong for years.

Assessing Damage Before Repairing a Masonry Mailbox

The first step is a full inspection of the mailbox from top to bottom. Look for cracked brick or stone, loose or missing mortar and any leaning in the structure. Impact from a vehicle can also bend or jam the metal mailbox unit inside.

Checking everything before you start guides the whole repair. A problem that looks small on the surface may reach deeper into the base. A clear read on the damage helps you choose the right method and avoid a patch that fails later.

When a Masonry Mailbox Can Be Repaired Instead of Rebuilt

Not every damaged mailbox needs to come down. Minor cracks, worn mortar joints, a loose unit or a single dented spot can often be repaired. In these cases, a mason can fix the affected area and leave the rest in place.

Bigger trouble calls for a rebuild. A strong lean, a failing base or damage spread across the whole structure usually points that way. Rebuilding may cost more up front, yet it gives you a safer and steadier result when the old base can no longer hold.

Matching Brick, Stone, and Mortar During Masonry Mailbox Repairs

A good repair should blend in, not stand out. The replacement brick or stone needs to match the color, size and texture of the original. The mortar and the style of the joints should line up as well.

This attention to detail keeps the mailbox looking whole. A mismatched patch draws the eye and can lower the look of the whole entrance. Taking time to match the materials helps the repair disappear into the rest of the work.

Insurance and Documentation After Masonry Mailbox Damage

Good records can make a real difference after an accident. Photos of the damage, notes on when and how it happened and copies of repair estimates all help your case. Keep any receipts once the work is done.

This paperwork supports a few possible steps:

  • Filing a claim with your homeowners insurance
  • Seeking payment from a driver who caused the damage
  • Showing the cost and cause if a dispute comes up

Solid documentation protects you if questions arise later. It shows what the mailbox looked like, what the repair cost and who may be responsible. That record can save you money and hassle down the line.

Preventing Future Damage to a Masonry Mailbox

A few simple steps can lower the odds of another hit. Better visibility helps drivers see the mailbox, so trimming nearby plants and adding reflective markers can help. Keeping the base solid and fixing small cracks early also builds long-term strength.

Some care is needed with any changes near the road. Adding heavy barriers can break local roadside or postal rules. Simple, safe upgrades protect the mailbox without crossing those lines.

Frequently Asked Questions

Can a Damaged Masonry Mailbox Usually Be Repaired?

Often, yes, especially when the damage stays in a small area and the base is still sound. A mason should study the structure to decide between a repair and a rebuild. The condition of the foundation usually tips the choice.

Should a Leaning Masonry Mailbox Be Rebuilt?

A slight lean may be fixable if the base underneath is still solid. A large or growing lean often signals movement in the foundation. That kind of shift usually calls for a partial or full rebuild.

Will Homeowners Insurance Cover Masonry Mailbox Damage?

It depends on your policy and the cause of the damage. A vehicle strike, a storm or vandalism may be covered. Normal aging or poor upkeep usually is not.

How Long Do Masonry Mailbox Repairs Typically Take?

Small fixes can wrap up in a single day. Larger repairs or a full rebuild take longer, since they involve demolition, material matching and foundation work. The mortar also needs time to cure before the job is truly done.

Painted Brick Problems Homeowners Should Understand Before Recoating

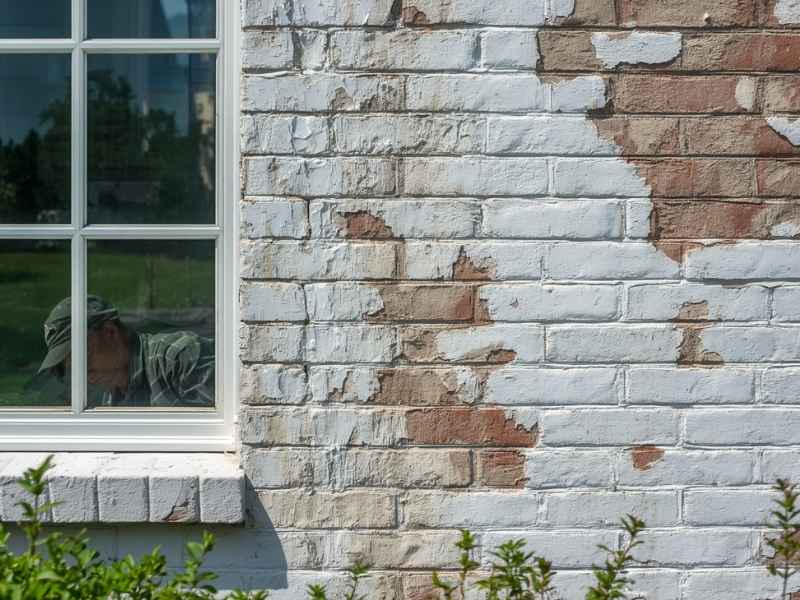
Close-up of a painted brick exterior wall with peeling white paint exposing the original brick, showing common moisture-related paint failure before recoating.

Painted brick looks fresh and clean the day it’s finished. A few years later, that same paint can peel, bubble, or trap moisture inside the wall. Before you recoat painted brick, it helps to understand what’s actually happening under that layer of color.

Auburn’s mix of hot, humid summers and heavy rain makes this an easy trap for homeowners to fall into. A quick coat of paint can hide a problem instead of fixing it.

Painted brick can trap moisture, peel, and hide underlying damage. Before recoating, check for trapped water, existing paint failure, and the brick’s original condition, or you risk locking in bigger problems.

Why Painted Brick Behaves Differently Than Bare Brick

Bare brick breathes. Water that gets into the brick during a rainstorm can slowly evaporate back out. Paint changes this. Most standard paints form a layer that blocks some of that natural movement.

This creates a tricky balance. Paint that’s too thick or the wrong type can trap water inside the brick instead of letting it escape. Over time, this trapped moisture becomes the root cause of many painted brick problems.

The Peeling Paint Problem Almost Everyone Sees Eventually

Peeling paint on brick is common, and it rarely means the paint job itself was bad. More often, it means water got trapped behind the paint and pushed its way back out.

Signs this is happening include:

  • Paint bubbling or blistering, especially after a heavy rain
  • Peeling that starts near the ground or near downspouts
  • Flaking sections that reveal a chalky or damp surface underneath

Recoating over peeling paint without addressing the moisture source usually leads to the same problem showing up again within a year or two.

What’s Really Happening Under a Layer of Paint

Painted brick can hide issues that would be obvious on bare brick. Cracks, old repairs, and even minor structural shifts can get covered by a fresh coat without anyone noticing.

Before recoating, check for:

  • Hairline cracks running through mortar joints, not just the brick itself
  • Old patch jobs where mortar color or texture doesn’t match
  • Soft or crumbling brick edges hidden just under the paint surface

A quick visual check from a few feet back often misses these details. Getting closer, or having a mason take a look, catches problems before they get sealed under new paint.

Why Moisture Trapped Behind Paint Causes Long-Term Damage

When water gets into brick and can’t escape through the surface, it looks for another way out. This often means pushing through weak points, cracking the brick face, or breaking the paint bond entirely.

This process, sometimes called spalling, can chip away at the brick’s outer layer over repeated freeze-thaw cycles or repeated wet-dry cycles. Auburn doesn’t see hard freezes often, but the wet-dry cycle alone is enough to cause slow damage over several years.

Checking for Trapped Moisture Before You Recoat

A simple check can save a lot of trouble later. Press your hand against the brick on a dry day, ideally after several days without rain.

Signs of trapped moisture include:

  • A cool, damp feel to the brick surface
  • A musty smell near the wall, especially indoors on the other side
  • Visible white, powdery residue called efflorescence forming on or near the paint

If any of these show up, painting over the surface without solving the moisture issue first is likely to fail again.

Choosing the Right Product Matters More Than Most Homeowners Expect

Not all paint is designed for masonry. Standard latex paint made for wood or drywall doesn’t handle brick’s natural moisture movement well.

Masonry-specific paints and breathable coatings allow some vapor to escape while still protecting the surface. Using the wrong product is one of the most common reasons painted brick fails again within a short time.

Before choosing a product, ask:

  1. Is this coating rated specifically for masonry surfaces?
  2. Does it allow vapor transmission, or is it a solid, non-breathable barrier?
  3. What is the expected lifespan compared to standard exterior paint?

Prepping the Surface Properly Before Any Recoat

Skipping prep work is one of the fastest ways to guarantee an early paint failure. Proper prep usually includes:

  • Removing any loose, peeling, or flaking paint completely
  • Cleaning the surface to remove dirt, mildew, or efflorescence buildup
  • Repairing any cracked mortar joints before applying new paint
  • Allowing the brick to fully dry before any new coating goes on

Rushing this stage to save time almost always costs more later, once the new paint starts failing in the same spots as before.

When Painted Brick Should Be Left Alone Instead of Recoated

Sometimes the better move is stripping paint entirely rather than adding another layer. This makes sense when:

  • The brick has failed multiple paint jobs in the same area
  • There’s clear evidence of ongoing moisture problems that haven’t been fixed
  • The underlying brick shows signs of spalling or crumbling

In these cases, a mason may recommend full paint removal and brick restoration instead of another coat that’s likely to fail again.

Questions to Ask Before Hiring Someone to Recoat Painted Brick

  • Will you check for trapped moisture before applying any new paint?
  • What specific product do you recommend for masonry, and why?
  • How will you handle any cracked mortar or damaged brick found during prep?
  • What is the expected lifespan of this coating compared to what’s currently on the wall?
  • Do you recommend recoating, or does this wall need paint removal instead?

Frequently Asked Questions

Why does paint on brick peel more than paint on wood siding?

Brick absorbs and releases moisture differently than wood. When paint prevents that natural moisture movement, trapped water can force the paint to peel away from the surface.

Can I paint over brick that already has some peeling paint?

No. Applying new paint over peeling areas usually traps the same moisture problem underneath, causing the new coating to fail much sooner.

What is efflorescence, and does it affect painted brick?

Efflorescence is a white, powdery mineral deposit left behind when moisture moves through brick and evaporates. On painted brick, it often indicates trapped moisture that should be addressed before repainting.

How do I know if my painted brick has moisture trapped behind it?

Signs include damp or cool areas on the wall, a musty odor, bubbling or peeling paint, and white mineral deposits around cracks or edges. These are common indicators of excess moisture behind the paint.

Is it better to strip painted brick completely instead of recoating it?

It depends on the condition of the brick. If multiple paint layers have failed or the wall shows signs of moisture damage or deteriorating masonry, removing the paint completely is often the better long-term solution.

When Brick Repair Helps Protect Long-Term Value

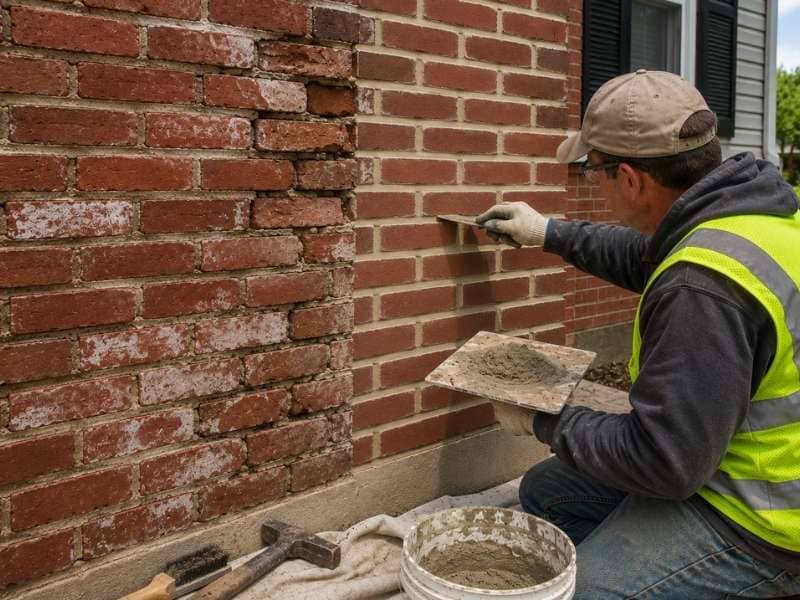
When Brick Repair Helps Protect Long-Term Value by showing a mason repairing damaged mortar joints on a brick wall to prevent water damage and structural deterioration.

Brick repair is one of those jobs that quietly protects the value of your home. Brick looks tough, and it is, but the mortar holding it together wears down over time. Once water finds a gap, small problems can spread into costly ones. Fixing the brick early keeps damage out and keeps your property strong. That’s why a little repair at the right time pays off for years.

Small Brick Problems Don’t Stay Small

A hairline crack or a bit of crumbling mortar looks harmless at first. The trouble is that brick problems rarely stay put. A small gap lets water seep behind the wall, and water is what does the real damage. Left alone, that one weak spot can spread along a whole section.

Time and weather speed things up. Water that gets in can freeze, expand and push the brick apart even more. Each cold spell makes the gap a little wider. What started as a minor fix can grow into a major repair if you wait too long.

The Damage Hiding Behind Cracked Mortar

The mortar between bricks does more than look neat. It seals the wall and holds the whole pattern together. When that mortar crumbles, the wall loses both its seal and some of its strength. From the street, the brick may still look fine while trouble builds behind it.

Water is the quiet culprit here. Once it slips past failing mortar, it can rot framing, stain interior walls and feed mold. It can also make the brick face flake off, a problem called spalling. By the time you see those signs inside, the repair is usually bigger than it had to be.

Signs Your Brick Is Ready for Repair

You don’t need to be an expert to spot early warning signs. A quick look at your walls a couple of times a year goes a long way.

Watch for these:

  • Mortar that’s cracked, crumbling or missing between bricks
  • Bricks that feel loose or have shifted out of line
  • Flaking or chipping on the face of the brick
  • White, powdery stains spreading across the surface
  • Damp spots or cracks showing up on the inside wall

Any of these means it’s time to take a closer look. One or two small spots may be a quick fix. Several together often point to a bigger issue that’s worth a professional’s eye.

How Timely Repair Pays You Back

Brick repair is cheaper than almost any problem it prevents. Repointing a section of mortar costs far less than fixing a water-damaged wall or frame. Catching trouble early is the difference between a small bill and a big one. That math is why smart owners don’t put it off.

There’s a value side too. Brick that looks cared for tells buyers the home was maintained. Crumbling mortar and flaking brick do the opposite, and they show up in inspections. Keeping the brick solid protects both the structure and the price your home can fetch later.

Knowing When to Repair and When to Wait

Not every mark on a brick wall is an emergency. Tiny, stable hairline cracks may just need watching for a while. The key is whether the problem lets water in or keeps growing. Those are the signs that repair shouldn’t wait.

A few situations call for quick action. Loose bricks, large or spreading cracks and missing mortar all let water reach places it shouldn’t. Damage near the ground or around chimneys deserves fast attention too. When in doubt, a quick check by a mason beats guessing and hoping it holds.

Frequently Asked Questions

What is brick repair?

Brick repair is fixing damaged brick and the mortar that holds it together. The work can mean replacing crumbling mortar, swapping out broken bricks or sealing gaps. The goal is to keep the wall strong and keep water out.

What causes brick and mortar to break down?

Water and time are the main causes. Rain seeps into small gaps, then freezing and thawing pry them wider. Age, poor drainage and old mortar all speed the wear along.

How do I know if my brick needs repair?

Look for crumbling mortar, loose or flaking bricks and white stains on the surface. Damp spots or cracks on the inside wall are warning signs too. Several of these together usually mean it’s time to call a pro.

Is brick repair worth the cost?

In most cases, yes. A small repair now costs far less than the water or structural damage it prevents. Well-kept brick also helps hold your home’s value and looks better to buyers.

What is tuckpointing?

Tuckpointing is the job of removing old, failing mortar and packing in fresh mortar. It restores both the seal and the look of a brick wall. It’s one of the most common ways to repair aging brickwork.

Brick Mailbox Repair: What Homeowners Should Know

A damaged brick mailbox is easy to ignore. It sits at the edge of the property, gets bumped by a car or battered by rain, and most homeowners put off dealing with it. That’s a mistake. Brick mailbox repair is a lot cheaper when problems get caught early. Wait long enough and you’re looking at a full rebuild instead of a simple fix.

Common Signs That a Brick Mailbox Needs Repair

The signs are usually obvious once you know what to look for.

Loose or wobbly bricks are the clearest signal. If any brick shifts when you press it, the mortar holding it has failed. Crumbling or missing mortar in the joints is another warning. You might see white powder on the brick surface, which is called efflorescence, and that means water is moving through the structure.

A leaning brick mailbox is more serious. Some lean is caused by soil movement beneath the base. A small lean can sometimes be corrected. A severe lean usually means the base has shifted too much to repair without rebuilding.

Vehicle impacts are common. Even a slow clip from a delivery truck or a car pulling too wide on a curve can crack bricks or knock a mailbox off-center. Weather plays a role too. Auburn gets heat, heavy rain and occasional freezes, and that cycle pulls mortar apart over years.

Don’t wait for a brick to fall off. A loose brick means water is already getting in, and water speeds up every other problem.

What Causes Brick Mailboxes to Deteriorate Over Time

Moisture is the main culprit. Water gets into small cracks in the mortar, sits there, expands during temperature drops and slowly breaks the joint apart. A mailbox that holds standing water at its base will deteriorate faster than one with proper drainage around it.

Soil movement is the second big factor. Auburn’s clay-heavy soil shifts with moisture changes. Wet seasons swell the ground, dry seasons shrink it, and over years that movement can tilt or crack a mailbox base. If the original base wasn’t poured deep enough or wide enough, movement happens faster.

Aging mortar is a natural part of the process. Standard mortar has a useful life of 20 to 30 years under good conditions. A mailbox exposed to direct sun, rain and vehicle exhaust may show joint failure in 10 to 15 years. That’s not a defect. It’s just wear.

Knowing the cause matters because it changes the repair. A mailbox with failed mortar but solid bricks needs repointing. A mailbox with a shifting base needs foundation work first, or the new mortar will crack again within a season.

When Minor Repairs Are Enough and When Rebuilding Makes More Sense

Minor repairs cover most situations. If the bricks are intact, the structure is plumb, and the damage is limited to cracked or missing mortar joints, repointing is the right call. A mason removes the failed mortar to a depth of about three-quarters of an inch, packs in fresh mortar that matches the original, and the repair can last another 20 years if done correctly.

Replacing one or two cracked bricks also falls into the minor repair category. The work takes a few hours and costs a fraction of a full rebuild.

Rebuilding makes sense when the mailbox leans more than a few degrees and the base has shifted. It also makes sense when multiple bricks are cracked through, not just chipped. A mailbox that’s been hit by a vehicle and has structural damage at the base is often cheaper to rebuild than to try to salvage.

One honest piece of advice: if a contractor tells you a leaning mailbox needs to be torn down and rebuilt without first checking the base condition and how many bricks are actually compromised, get a second opinion. Sometimes a base reset and repointing is all that’s needed.

Why Matching Existing Bricks and Mortar Matters

A repair that uses the wrong brick or the wrong mortar color looks bad. That sounds obvious, but it’s a more common problem than most homeowners expect.

Brick color varies by manufacturer, batch and age. A new brick from the same product line can look noticeably different next to weathered bricks that have been sitting in Alabama sun for 15 years. A good mason will source reclaimed or closely matched bricks before starting work, not after.

Mortar color and hardness matter too. Using a mortar that’s harder than the original bricks is a documented problem in masonry repair. Hard mortar doesn’t flex with the structure. Instead of the mortar cracking under stress, the brick faces crack. For most residential mailboxes, a Type N mortar is the right choice. It’s softer than Type S and lets the structure move slightly without damage.

A mismatched repair on a brick mailbox draws attention in the wrong way. The goal is for the repair to disappear into the existing structure. That takes time and care in material selection.

How Regular Maintenance Can Extend the Life of a Brick Mailbox

Most brick mailboxes that fail early didn’t have to. A little attention once a year catches the problems that turn into expensive repairs.

Walk up to the mailbox and press on a few bricks. None of them should move. Run your finger along the mortar joints. If mortar comes off in your hand or feels sandy rather than solid, repointing is due. Check for cracks running through the brick face itself, not just the joints.

Look at the ground around the base. Water should drain away from the structure, not pool against it. Soil that’s built up against the base over the years can hold moisture and accelerate deterioration. Pull it back and make sure the base is visible.

Cleaning the surface once a year keeps efflorescence from building up and gives you a clear look at what’s happening with the brick. Use water and a stiff brush. Avoid pressure washing at close range because it can force water into joints and erode mortar that’s still in decent shape.

If you see a crack or a slightly loose brick, fix it that season. A small repointing job on one or two joints costs very little. The same damage ignored for two or three winters can spread to surrounding joints and turn a minor fix into a full section repair.

Frequently Asked Questions

How much does brick mailbox repair cost?

Minor repairs, such as repointing a few joints or replacing one or two bricks, typically cost between $150 and $400. More extensive repairs involving multiple damaged areas may range from $600 to $900. A complete rebuild of a standard brick mailbox generally costs between $800 and $2,000, depending on its size and design.

Can I repair a brick mailbox myself?

Replacing mortar in a small area is something a handy homeowner may be able to do. However, matching the mortar color, achieving the correct joint depth, and finishing the joints properly require experience. For anything beyond a minor repair, hiring a professional mason is usually the better option.

How long does brick mailbox repair last?

A properly completed repointing job using the correct mortar type can last 20 to 30 years under normal conditions. Repairs performed with mismatched or overly hard mortar may fail much sooner.

Does homeowners insurance cover brick mailbox damage?

Coverage depends on the cause of the damage. Damage caused by a vehicle collision may be covered under the at-fault driver’s insurance policy. Damage from weather or normal wear and tear is generally not covered. Homeowners should review their policy details before filing a claim.

Do I need a permit to repair or rebuild a brick mailbox in Auburn?

Minor repairs typically do not require permits. A full rebuild may require a review of setback requirements, especially if the mailbox is located close to the road. Homeowners should contact the City of Auburn or Lee County to confirm any local requirements before beginning a major rebuild.

Brick Masonry Repair Before Listing a Home: Small Issues Buyers Notice FastĀ 

Brick Masonry issues near the front steps being inspected before listing a home for sale.

Buyers form opinions quickly. Before they step inside, they’ve already looked at the front of the home, the steps, the chimney, and the walls. Brick masonry is one of the first things they see, and damaged or worn masonry sends a message that’s hard to walk back. Fixing brick masonry problems before listing gives a home a better shot at making a strong first impression from the moment a buyer pulls up.

Why Small Brick Masonry Problems Catch a Buyer’s Eye Fast

Small problems in brick masonry stand out more than most sellers expect. A hairline crack in a mortar joint, a chipped corner on a step, or a patch of crumbling mortar near an entryway are all easy to spot from a few feet away. Buyers walk up slowly. They look at everything.

What makes these details matter is not just how they look. It’s what they suggest. A buyer who sees worn or damaged masonry right at the front of a home starts wondering what else hasn’t been kept up. That kind of doubt is hard to shake once it sets in. Fixing small issues before the first showing prevents that reaction before it starts.

Areas of Brick Masonry Buyers Notice Right Away

Some areas of a home’s exterior get more attention than others. Front steps are one of the first things a buyer touches, literally, on the way to the door. Chipped edges, loose bricks, or crumbling mortar on steps are impossible to miss and feel like a safety concern on top of a cosmetic one.

Entryways draw the eye because buyers spend time there waiting for the door to open. Any brick or mortar damage near the front door is right in their line of sight. Chimneys get noticed from the street, and visible cracks or missing mortar near the top signal a potential repair that buyers will want to price into any offer. Exterior walls along the front of the home also matter more than walls in the back or sides, because they’re part of what buyers photograph, share, and remember.

How Well-Kept Brick Masonry Can Improve Curb Appeal

Clean, repaired brick masonry changes how a home looks from the street. Freshly pointed mortar joints bring the brickwork back to a sharp, finished appearance. Replaced or repaired chipped bricks remove the worn patches that break up an otherwise clean exterior. Power washing the brick face to remove dirt and surface staining can make a significant difference without any structural work at all.

These repairs don’t need to be extensive to make a visible difference. A few hours of repointing along the front steps and entryway, combined with a thorough cleaning of the brick face, can make a home look noticeably more cared for. Buyers respond to that. A home that looks maintained on the outside gives them more confidence about the inside.

Why Ignoring Brick Masonry Damage Can Worry Buyers

Visible damage in brick masonry doesn’t just affect how a home looks. It affects how buyers think about the whole property. When a buyer sees cracked mortar or broken bricks at the front of a home, they start making assumptions about what else might be deferred or overlooked.

That concern can show up in lower offers, more aggressive inspection requests, or buyers walking away entirely. A buyer who spots a problem with the masonry before the inspection has already started building a mental list of concerns. Addressing brick masonry issues before listing removes that opening. It tells buyers, without saying a word, that the home has been looked after.

Signs Your Brick Masonry May Need Repairs Before Selling

A quick walk around the exterior before listing can catch most of the issues buyers will find during a showing. Loose or crumbling mortar in the joints is one of the most common problems and one of the easiest to miss if you stop looking at your own home closely.

Cracked bricks, especially ones with visible gaps or pieces that have broken off, are harder to overlook but worth checking for along steps, walls, and chimney sections. Uneven surfaces where bricks have shifted slightly out of alignment, or areas where mortar has pulled away from the brick face, also show up clearly to a careful eye. Checking all of these areas before listing, and repairing what needs attention, means buyers see the home at its best rather than finding problems you didn’t know were there.

Frequently Asked Questions

Why should brick masonry be repaired before selling a home?

Small problems in brick masonry are easy for buyers to spot during a showing. Fixing them before listing helps the home look well cared for and creates a better first impression from the moment buyers arrive.

What parts of brick masonry do buyers notice first?

Buyers tend to notice brick masonry around front steps, entryways, chimneys, and exterior walls facing the street. These areas are easy to see and get a lot of attention during showings.

Can damaged brick masonry hurt curb appeal?

Yes. Cracked mortar, chipped bricks, and worn surfaces make a home look less maintained. Repaired and clean brick masonry improves how the home looks from the street and gives buyers a better first impression.

Do small brick masonry problems matter to buyers?

Yes. Even small problems can make buyers wonder about the overall condition of the home. Visible damage at the front of a property raises questions that can affect how buyers feel about making an offer.

What are signs that brick masonry needs repairs before listing?

Look for cracked bricks, loose or crumbling mortar, chipped areas along steps and entryways, and surfaces where bricks have shifted out of alignment. Finding and fixing these before listing means buyers see the home in its best condition.

Why Brick Masonry Cracks Show Up After a Hot, Wet Summer

Brick Masonry cracks on an exterior wall being inspected after heavy summer rain and changing soil conditions.

Summer heat and heavy rain don’t just make yards muddy. They can stress the structure of a home in ways that aren’t obvious until the season ends. One of the most common signs is brick masonry cracks. They seem to appear out of nowhere, but the conditions that cause them build up slowly over weeks of wet heat. Understanding why brick masonry cracks form after a hot, wet summer makes it easier to catch problems early and know when to act.

How Clay Soil Affects Brick Masonry After Heavy Summer Rain

Many homes sit on clay-heavy soil. Clay behaves differently from other soil types because it changes size depending on how much water it holds. When rain soaks into clay soil, it swells. When dry heat follows, it shrinks back down. This back-and-forth happens repeatedly through a wet summer.

That movement puts stress on everything above it, including the foundation and the brick masonry attached to it. When the ground shifts even slightly, the structure above shifts too. Brick is strong but not flexible. Under repeated stress from soil movement, small cracks form in the mortar joints or across the face of the brick itself.

Why Hot Weather and Extra Moisture Can Stress Brick Masonry

A hot, wet summer creates conditions that work against brick masonry in two ways at once. Heat causes building materials to expand. Moisture works into small gaps and softens mortar over time. When both happen together and then reverse, the cycle puts constant pressure on the wall.

After a stretch of heavy rain followed by dry heat, mortar joints that were already slightly weak can crack open further. Bricks that absorbed moisture and then dried out quickly are more likely to show surface damage. Cracks that were too small to notice in spring can become visible by late summer because the wet-dry cycle has widened them. This is why many homeowners notice new cracks right after the hottest and wettest part of the year.

Signs That Brick Masonry Cracks Are Getting Worse

Not every crack in brick masonry needs immediate attention. But some signs point to a problem that’s growing and shouldn’t wait.

Watch for cracks that are wider than they were before, especially ones that now have a visible gap rather than a hairline split. Gaps in mortar joints, where the mortar has crumbled or pulled away from the brick, are another sign that water and movement have done real damage. If doors or windows near an exterior brick wall start sticking or won’t close smoothly, that can mean the wall or frame has shifted. Cracks that run diagonally from the corners of windows or doors are worth taking seriously. They often point to foundation movement rather than surface damage alone.

How Poor Drainage Around a Home Can Affect Brick Masonry

Water that sits near a home’s foundation keeps the soil wet long after rain stops. Gutters that overflow because of clogs dump large amounts of water right along the base of the home. Downspouts that are too short deposit water only a foot or two away from the foundation instead of directing it away from the structure. Low spots in the yard that collect standing water keep the soil saturated in those areas.

All of that extra moisture makes the soil movement worse. Clay soil that stays wet longer swells more and for longer periods. When it dries, it pulls back more sharply. The more extreme that cycle is, the more stress it puts on the brick masonry above. Keeping water away from the base of the home is one of the most direct ways to reduce that stress.

When to Have Brick Masonry Cracks Checked by a Masonry Expert

Small cracks that stay the same size and appear in only one spot may not require immediate repair. But some situations call for a professional look sooner rather than later.

If cracks keep coming back after being patched, the underlying cause hasn’t been fixed. If a crack has grown noticeably wider over a single season, the movement driving it is still active. If multiple cracks appear at the same time, especially after a wet summer, that pattern often points to soil movement or drainage problems rather than normal settling. A masonry expert can identify whether cracks are cosmetic or structural, find the source of the movement, and recommend repairs that address the cause rather than just the surface.

Frequently Asked Questions

Why do brick masonry cracks show up after a hot, wet summer?

Heavy rain and high heat cause soil and building materials to expand and contract. That repeated movement puts stress on brick masonry and can make existing cracks more visible or cause new ones to form.

Does clay soil cause brick masonry cracks?

Yes. Clay soil swells when wet and shrinks when dry. That movement shifts the ground beneath a home’s foundation, which puts pressure on brick masonry and can lead to cracking over time.

Can water around the house damage brick masonry? 

Too much water near the foundation keeps clay soil swollen longer and causes more dramatic shrinkage when it dries out. Over time, that cycle increases stress on brick masonry and raises the risk of cracking.

How can I tell if a brick masonry crack is getting worse?

Look for cracks that are wider than before, gaps where mortar has crumbled away, or doors and windows near the wall that stick or don’t close properly. These signs suggest the movement causing the crack is still active.

Should I have brick masonry cracks inspected? 

Yes, especially if cracks keep returning, have grown wider over a single season, or appear alongside other signs of movement. A masonry professional can find the cause and recommend repairs that fix the problem at its source.