Retaining Wall Planning Around Backyard Sport Courts
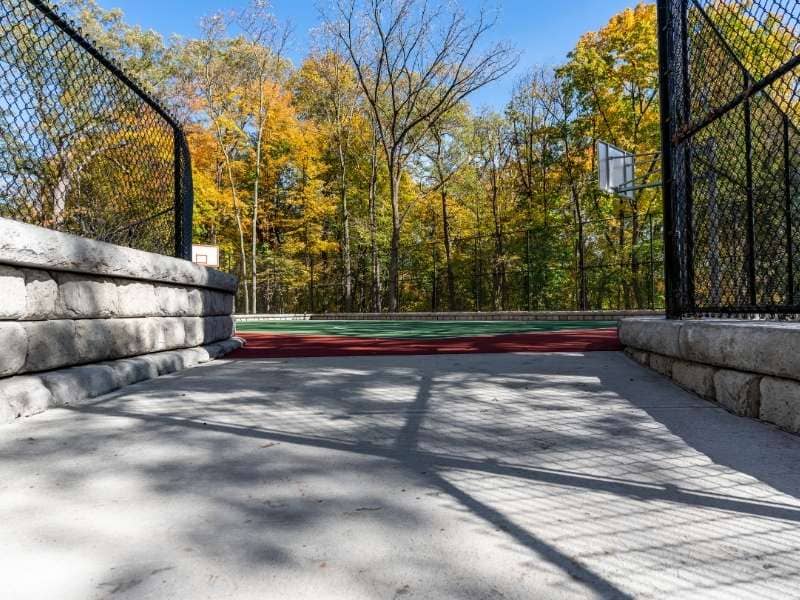
Stone retaining wall beside a backyard sport court with paver walkway, drainage area, and landscaped yard.

A backyard sport court needs flat ground, and a few yards start out that way. Most courts are built by cutting into a slope, filling a low corner, or both. That grading leaves a change in elevation, and a retaining wall usually holds it in place.

A well-planned wall keeps soil off the court, moves water away from the surface, and gives the yard a finished edge. A rushed one can lean, crack, or trap water within a few seasons. Settle the wall layout, drainage, materials, and connections to the rest of the yard before the court goes in.

Planning Retaining Walls Around the Sport Court

Plan the retaining wall during grading, before any court surface is placed. Where the wall sits decides how much flat space you get and where soil and water end up. Moving a wall later usually means cutting into finished work.

Leave a buffer between the court boundary and the wall face. Players chase balls past the lines, and a hard wall right at the edge is a safety risk. Turf, gravel, or pavers can fill that strip and give runoff somewhere to go.

Height matters too. A low wall can double as seating for people watching a game. Taller walls, or walls holding back a driveway or steep bank, may need an engineer’s design and a permit depending on local code and site conditions.

Before work starts, walk the site with your contractor and confirm:

  • How much the grade changes across the court footprint
  • Where water flows during heavy rain today
  • Whether the wall will also serve as seating or a fence base
  • How the court will connect to the house, patio, or outdoor kitchen

Choosing Stone Masonry for Durable Court Edges

Stone masonry suits court edges because it handles impact, weather, and steady foot traffic well. The right choice depends on appearance, budget, upkeep, and the masonry already on your property. No single material wins in every yard.

Natural stone gives a rugged look that blends into planting beds. Cut stone with a flat cap creates a crisp edge beside a modern court. Segmental wall block interlocks without mortar and fits many mid-height walls. Brick masonry facing can tie the area to a brick home, though a brick wall holding soil usually needs a structural core of reinforced block or concrete behind it.

Pay Attention to the Cap

The cap is the top course that finishes the wall. Beside a court, it takes hits from balls, shoes, and people sitting between games. Pick a thick, smooth cap with eased edges, and make sure it’s set firmly so it won’t rock or chip.

Managing Drainage Behind the Retaining Wall

Water is the most common reason a retaining wall fails. Rain-soaked soil gets heavier and pushes harder against the wall. Without an exit, that pressure builds until the wall leans, bulges, or cracks.

Good drainage behind a court wall often includes clean crushed gravel behind the stone, a perforated drain pipe at the base, and filter fabric that keeps fine soil out of the gravel. Mortared walls also use weep holes, which are small openings near the bottom that let trapped water escape. Each piece has a job, and skipping one weakens the whole system.

The outlet matters as much as the drain. It should carry water away from the court, the house, and any patio. Courts are built with a slight slope for runoff, and that water shouldn’t end up at the base of your wall. Exact design depends on soil type, slope, and wall height, so ask your contractor to show you on the plan where water will travel.

Connecting Courts to Patios With Stone Pavers

A court rarely stands alone. Most families want a path to the house, a place to sit, and maybe an outdoor kitchen or outdoor fireplace nearby. Stone pavers and brick pavers both link these spaces well.

Stone pavers offer natural color and a textured surface with good grip. Brick pavers bring a classic look that pairs nicely with a brick patio or brick home. Choose based on style, traffic, maintenance, and the masonry you already have.

Make the walkway wide enough for two people carrying gear to pass without stepping into the grass. Stake it out before deciding, since the right width depends on traffic and layout. Where the court meets pavers, the edge should sit flush with no lip to catch a foot. Where the wall breaks the grade, stone steps or a gentle sloped walk can join the levels. Every paver area also needs a compacted gravel base and firm edge restraints so pavers don’t spread or sink.

Maintaining Retaining Walls and Hardscape Transitions

Walls and paver transitions need simple, regular checks. Walk the area each spring and after major storms. Small problems cost far less to fix early.

Watch for stones that lean or bulge, cracked mortar or cap stones, clogged weep holes or drain outlets, and pavers that sink or lose joint sand near the court. Keep outlets clear and refill paver joints when they wear low. Cracked mortar may need repointing, which means removing damaged mortar and packing in fresh mortar. A leaning or bulging wall calls for a mason soon, since it usually points to drainage or base problems behind the stone.

Frequently Asked Questions

How tall can a retaining wall be next to a sports court?

Height limits depend on local code, soil, and what the wall supports. Many areas require a permit or an engineer’s design above a set height. Walls holding back a driveway or steep slope may need review even when they’re shorter. Your contractor or local building office can confirm what applies to your property.

How far should a retaining wall sit from the court edge?

Most owners leave a buffer between the playing area and the wall face. That space gives players room to stop and gives runoff a place to drain. The right distance depends on the sport, yard size, and slope. Turf, gravel, or pavers fill the gap well.

Are brick pavers or stone pavers better for connecting a court to a patio?

Neither is better in every case. Stone pavers offer texture and natural color, while brick pavers suit brick homes and patios. Both can last many years with a solid gravel base and edge restraints. Your choice depends on style, budget, upkeep, and existing masonry.

What drainage does a retaining wall near a court need?

Most walls need gravel backfill, a perforated drain pipe at the base, and filter fabric. Mortared walls also use weep holes to release trapped water. The outlet should send water away from the court, house, and patios. The exact design depends on soil, slope, and wall height.

How often should I inspect a retaining wall around a sports court?

A quick check each spring and after heavy storms works for most yards. Look for leaning stones, cracked joints, clogged drains, and sinking pavers. Catching small issues early keeps repairs smaller. Call a mason if you see bulging or soil washing out from the base.

Plan the Court and Wall Together

A sport court is a big investment, and the wall and hardscape around it decides how well it holds up. Before any digging starts, talk with an experienced masonry contractor about layout, materials, drainage, and the condition of your existing patios, walls, and walkways. A clear plan up front prevents rework and gives you a court area that feels like a natural part of your yard.A sport court is a big investment, and the wall and hardscape around it decides how well it holds up. Before any digging starts, talk with an experienced masonry contractor about layout, materials, drainage, and the condition of your existing patios, walls, and walkways. A clear plan up front prevents rework and gives you a court area that feels like a natural part of your yard.
Wide French Doors Can Shape a Stone Patio Layout

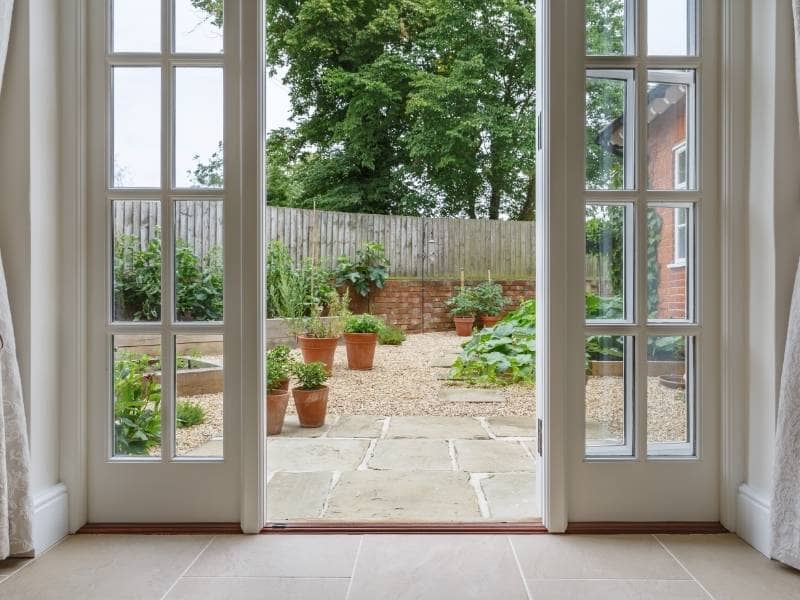
Wide French doors change how people use a backyard. When both panels swing open, the doorway turns into a broad gateway, and the patio outside has to handle that traffic. A stone patio planned around those doors feels like part of the house instead of a slab set beside it. The best approach is simple: let the door opening guide the layout, the grade, and the transitions before a single stone gets ordered.

Planning a Stone Patio Around Wide French Doors

Start at the door and build the patio outward. The width of the opening, the way the doors swing, and the path people take after stepping outside should shape the first few feet of stone. In many layouts, the landing runs a little wider than the open doors and deep enough for two people to pass without stepping onto grass.

Wide doors also create a strong view line into the yard. Guests look straight out when they walk toward the glass, so that line is a natural place for a table, a fire feature, or the start of a walkway. Lining up the patio with that view makes the space feel planned from the inside and the outside.

Before layout starts, it helps to check a few details with your mason:

  • The height of the door sill and how much room sits below it
  • Whether the doors swing outward and need clear space
  • Where furniture, grills, or planters will sit near the opening
  • Any existing steps, walls, or brick masonry the patio has to meet

These details decide how the first row of stone meets the house. Skipping them often leads to awkward cuts, blocked doors, or a step nobody expected.

Choosing Stone Pavers for a Smooth Doorway Transition

Pick stone pavers that sit flat, stay a steady thickness, and give good grip when wet. The area right outside a French door gets the most foot traffic on the whole patio. Uneven flagstone can look great in a garden, but a small lip at the doorway turns into a trip hazard fast.

Sawn or cut stone usually gives the cleanest threshold because the edges line up tightly. Tumbled or natural-cleft stone brings more texture and can still work well when the setting bed is carefully leveled. A textured finish helps when rain blows onto the landing or wet feet come in from the pool.

Brick pavers are worth a look too, especially when the house already has brick.A brick border along the door and patio edge can tie a stone patio back to the home’s stone masonry and brickwork.  Neither material is always the better choice. The right pick depends on appearance, traffic, upkeep, climate, existing masonry, and budget.

Using a Stone Patio to Connect Outdoor Living Areas 

The stone patio outside French doors works best as a hub. From that spot, paths can branch toward an outdoor kitchen, an outdoor fireplace, a seating area, or garden beds. Each branch should feel like a clear route, so guests know where to walk without thinking about it.

Keep walkways wide enough for how you use them. A path for one person carrying plates needs less room than a route where two people walk side by side. Many homeowners find a width of about three to four feet comfortable, but the right size depends on the yard and the traffic.

Changes in elevation need their own plan. A sloped yard may call for stone steps or a low retaining wall to hold a level patio area near the house. That wall can double as extra seating when it’s built at the right height. Plan these features together so the stone, caps, and mortar colors match across the whole space.

Managing Drainage Near French Doors and Patio Edges

Water should always move away from the doors. A patio that slopes toward the house can push rainwater under the threshold and into the floor system. Many patios are built with a gentle fall of roughly 1/8 to 1/4 inch per foot, though the right slope depends on the site, soil, and design.

Height at the door matters just as much. The finished stone should sit below the door sill, and it should not bury siding, cover weep holes in brick walls, or trap water against the foundation. Heavy rain and clay-rich soil make these details even more important, since water tends to sit where it can’t soak in.

When the slope is tight, a channel drain near the doorway or along a patio edge can catch water before it reaches the house. Downspouts also need a plan so they don’t dump water onto the stone. Look at drainage early. Fixing it after the patio is built usually means pulling up stone.

Building Durable Stone Patio Transitions for Long-Term Maintenance 

A stone patio lasts only as long as the base under it.  Most stone patios start with excavation, a compacted gravel base placed in layers, and a bedding layer that sets the stone at the right height. Edge restraints keep dry-laid pavers from drifting outward over time.

The soil right next to a house needs extra attention. That area is often loose backfill from when the foundation was built, and it can settle for years. Careful compaction near the door helps keep the landing from sinking and leaving a gap or a step at the threshold.

Transitions deserve the same care. The points where stone meets the door, a step, a retaining wall, a brick patio, or the lawn are where shifting shows up first. Keep an eye on these spots each season, refill joints and sand when it washes out, and reset any paver that starts to rock. Small fixes early cost far less than a rebuilt section later.

Frequently Asked Questions

How far below French doors should a stone patio sit?

The finished stone should sit below the door sill so water can’t run inside. The exact gap depends on the door, the threshold design, and local building code. Your mason should also check siding, weep holes, and the foundation line before setting the height. Plan this step first, because it controls the grade for the rest of the patio.

Are stone pavers or brick pavers better near French doors?

Both can work well at a doorway when they’re installed on a solid base. Stone pavers offer natural color and a wide range of textures. Brick pavers often match the house and create a classic look. The best choice depends on your home’s existing masonry, style, upkeep, and budget.

How wide should a patio be outside wide French doors?

Many layouts make the landing a bit wider than the open doors. That extra room lets people step out, turn, and pass each other easily. The depth should leave space for traffic without crowding furniture. Your yard size and the way you entertain will guide the final size.

Can a new stone patio be built over an existing concrete slab?

It can work in some cases, but the slab needs to be sound, stable, and sloped away from the house. Cracks, settling, or poor drainage in the old slab can show through the new stone. Adding stone also raises the surface, which may crowd the door sill. A mason should inspect the slab before deciding.

How do I keep pavers near the door from shifting?

Shifting usually starts with a weak base, loose soil, or poor drainage. A well-compacted gravel base and solid edge restraints help hold pavers in place. Keeping joints filled with sand also limits movement. Check the area each season and reset any loose pavers before the problem spreads.

Built-In Firewood Storage Around a Stone Fireplace

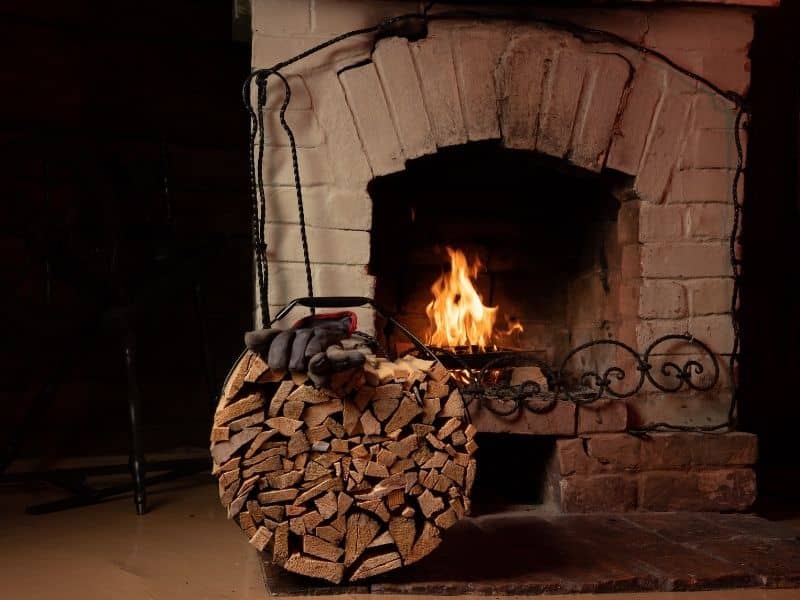
Stone fireplace with firewood stacked beside the hearth in a cozy indoor setting

A built-in firewood niche next to a stone fireplace does more than hold logs. It keeps wood dry, keeps bark off the floor, and gives the whole fireplace wall a finished look instead of a stack of logs shoved in a corner. Done right, the niche looks like it was always part of the design. Done wrong, it looks tacked on and it fills up with bark, dust, and bugs. The difference comes down to a few choices made early, before the first stone goes up.

Designing Built-In Firewood Niches Into the Stonework

A firewood niche works best when a mason plans it as part of the fireplace, not as an afterthought. That means picking the opening size, shape, and stone pattern before the wall gets built, not cutting a hole into finished stonework later.

The stone should wrap the opening the same way it wraps the firebox. Matching stone size, color, and joint pattern around the niche ties it to the rest of the fireplace instead of making it look like a separate box stuck on the side. A clean stone lintel or a simple arched top over the opening gives it a finished edge and keeps loose mortar from crumbling into the stored wood.

Some homeowners want the niche flush with the fireplace face. Others want it recessed a few inches so it reads as its own feature. Either works, but the mason needs to know which one before laying stone, since the wall thickness and header support depend on that decision.

Positioning Firewood Storage Without Crowding the Hearth

Where the niche sits matters as much as how it looks. It needs to sit close enough to the fireplace for easy loading, but far enough away that it doesn’t block the hearth or crowd the space where someone kneels down to build a fire.

A good rule is to keep the niche opening at least a foot away from the firebox opening. That gap protects the stored wood from direct heat and keeps someone from reaching past hot brick to grab a log. It also keeps the hearth extension clear, which most local fire codes require for a set distance in front of the firebox.

Think about how people actually move around the fireplace. If the niche sits on the side where people usually stand to add wood, it works. If it sits on the side people walk through to get to a chair or a doorway, it becomes a trip hazard and a dust magnet from foot traffic. Walking the space before construction starts, not just looking at a drawing, catches problems a flat plan misses.

Planning Storage Depth Around Common Split-Firewood Sizes

A firewood niche that looks great but only holds six logs isn’t doing its job. Depth and width should match the wood people actually burn, not just whatever looks balanced on paper.

Most split firewood for a home fireplace runs about 16 to 18 inches long. A niche needs at least that much depth, plus a couple of extra inches so logs aren’t jammed tight against the back wall. Jammed logs are harder to pull out and they knock bark loose every time someone tugs one free.

Width matters too. A narrow niche might look elegant, but it forces someone to stack wood in a single tall column that tips over easily. A wider opening, even just a few extra inches, lets wood sit in a stable low stack that’s easier to load and easier to grab from.

Height should stay practical as well. A niche that’s too tall wastes space at the top and makes the bottom logs hard to reach without bending awkwardly. Sizing the opening around real firewood dimensions, not a guess, is what makes the feature actually get used instead of ignored.

Managing Bark, Debris, and Moisture Inside the Storage Niche

Firewood sheds. Bark flakes off, sawdust collects, and small bugs sometimes ride in with the wood. A niche without a plan for that mess turns into a dusty problem fast.

A raised stone or metal base inside the niche keeps wood off any damp subfloor and makes sweeping out debris easier than trying to clean a floor-level opening. Some designs use a shallow lip at the front edge of the base to catch loose bark before it spills onto the room floor.

Moisture is the bigger concern. A niche built into an exterior-facing wall or near a chimney chase can pick up dampness if it isn’t sealed properly behind the stone. That dampness can make firewood mold instead of dry out, which defeats the whole purpose of indoor storage. A vapor barrier behind the niche stonework, matched to whatever barrier the rest of the fireplace wall uses, keeps moisture from working its way through the masonry.

Good airflow helps too. A niche that’s too enclosed traps humidity around the wood. Leaving a small gap at the top or back, or using an open-front design instead of a door, lets air move through and keeps logs seasoning properly instead of sitting in stale air.

Integrating Firewood Storage Into Custom Home Interiors

Auburn has seen a steady run of custom home upgrades where homeowners want their fireplace wall to feel like a designed feature, not just a functional heat source. A built-in firewood niche fits right into that trend when the proportions and finish match the rest of the room.

Stone choice plays a big part here. Homes going for a traditional look often pair the niche with the same fieldstone or cut stone used on the fireplace face, so the whole wall reads as one continuous design. More modern builds sometimes contrast the niche with a different stone texture or a darker mortar joint, using it as a deliberate accent instead of a match.

Proportion is what separates a niche that looks built-in from one that looks bolted on. A niche scaled too small next to a tall stone fireplace looks like an afterthought. One sized to echo the fireplace opening, even at a smaller scale, reads as intentional.

Details finish the look. A stone shelf above the niche, a matching header style, or trim that lines up with existing millwork in the room all help the storage space feel like part of the original architecture. For homeowners investing in a full fireplace build or renovation, that kind of planning is what turns a firewood spot into a feature worth showing off.

Stone Exterior Trim Details That Give Homes a More Finished Look

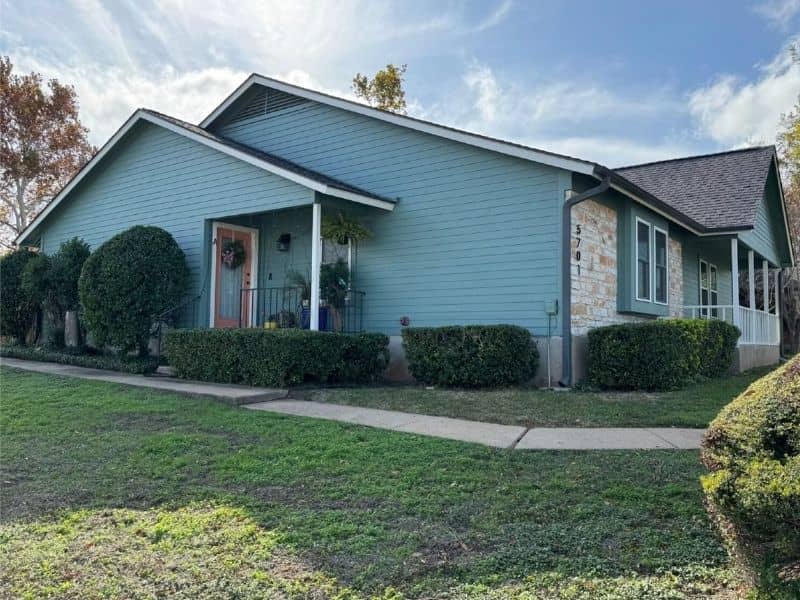
Teal home with stone exterior accents and a landscaped front yard

A little stone in the right spot can change how a whole house reads. Stone exterior trim has become one of the easier ways homeowners freshen an older exterior without redoing the entire front of the house. You choose one section, add stone texture there, and let the siding or brick around it stay the same. That one move can give a plain exterior a more finished look.

An accent wall works this way. It brings stone into the picture on a single part of the house instead of wrapping every wall in it. The contrast carries the effect. A small run of stone stands out far more when the surfaces around it stay quiet. In a home that already exists, that fits how the work usually goes. You aren’t starting from a blank plan. You’re adding to what the house already has.

Four things decide whether the stone looks right: where you place it, how big the area is, which stone you pick, and how it meets the rest of the exterior. Line those up and the accent looks planned. Miss them and it can look stuck on after the fact. Each section below takes one of them.

Start With the Part of the Exterior That Needs More Visual Weight

Pick the wall that feels flat, not the wall that happens to be the largest. An accent wall gives one part of the exterior more presence, so it belongs where the house looks thin or unfinished. Maybe that’s the section beside the front door. Maybe it’s a gable that reads as empty. The goal is to add weight where the eye wants something to land.

Look at the home’s proportions before you choose. A stone section should sit in balance with the walls, windows and roofline around it. Siding, brick and stucco each change how the stone will look next to them. A bright wall of siding makes the stone read darker. A busy brick pattern can crowd it. Study the whole face of the house first, then decide.

Covering too much undoes the point. When stone spreads across most of the exterior, the contrast that made it feel special goes flat. For homeowners updating a house that’s already built, restraint tends to win. One well-placed section says more than stone on every wall.

Let Existing Exterior Materials Set the Tone for the Stone

Let what’s already on the house guide the stone you choose. A stone accent wall should feel related to the exterior around it, not dropped in from a different house. Match the mood first. Warm brick pairs with warm stone tones. Cool gray siding sits better with cooler stone. Color, texture, scale and pattern all play into whether the two read as one exterior or two.

Walk the full exterior before you settle on a stone. Front, sides and any spot where materials change all shape the choice. A heavily textured stone throws deep shadow and reads rugged. A smoother, more even stone feels calmer and more modern. Neither is wrong. They just send different signals, so pick the one that suits the house.

Think about the seams too. The line where the new stone meets the old siding or brick is part of the design, not an afterthought. When you’re gathering exterior accent wall ideas, keep the transition in mind from the start. A clean meeting point is what makes an accent wall look like it belongs.

Use Scale and Joint Patterns to Keep the Feature From Feeling Heavy

Stone size and joint pattern control how heavy the wall feels. Large stones with wide joints read bold and solid. Smaller stones with tight, busy joints pack in more lines and can feel restless. On a modest accent area, a calmer arrangement usually looks more intentional.

A very busy pattern fights with the rest of the house. If the exterior already has trim lines, window grids and brick coursing, dense stonework adds one more layer of noise. The eye has nowhere to rest. A more controlled layout lets the stone hold its spot without shouting over everything else.

Controlled texture beats piled-on texture. The point is to add just enough, in a pattern that stays calm. A few signs the pattern may be doing too much:

  • Stones so small the wall looks speckled from the curb
  • Joint lines so busy they blur into one gray mass
  • A pattern that pulls attention away from the front door or windows
  • Texture so deep it clashes with a simple, clean exterior

Scale the pattern down and a small accent can feel confident instead of crowded.

Plan the Edges Where Stone Meets the Rest of the Exterior

The edges are where a stone accent looks finished or unfinished. The start and stop points deserve real thought, not whatever happens when the stone runs out. Plan where the stone begins and ends before anyone sets the first piece.

Clean transitions matter most at corners, around openings and anywhere the exterior material changes. Stone that dies into a wall with no clear edge looks like a job someone left half done. A section framed by a corner, a trim line or a change in material looks deliberate. The house tells you which shape fits. A tall narrow home may want a vertical stone band. A wide low home may suit a contained horizontal panel.

On existing homes, the new stone has to meet materials that are already there. That’s the hard part of renovation work. The old siding, brick or stucco won’t move, so the stone has to join them cleanly. Good installation matters as much as the idea. A smart design still fails if the edges are sloppy where the two surfaces meet.

Decide Whether the Accent Should Blend In or Stand Apart

Decide early whether you want the stone to whisper or to speak up. A subtle accent uses stone close in tone to the rest of the house, so it adds texture without much contrast. A high-contrast accent uses stone that clearly differs in color or texture, so it becomes the thing you notice first. Both can look great. They just do different jobs.

Light changes everything. Morning sun hits textured stone at an angle and deepens every shadow. Flat afternoon light softens the same wall. The siding, plants and paint around the stone shift its look too. A stone that seemed bold on a sample board can read quiet once it’s up on the house.

Step back and check it from the street, from the driveway and from up close. Stone that looks rich at arm’s length can turn muddy from the curb. This is where planning with a mason or designer pays off. A pro can look at the stone, the spot you have in mind and the size of the area, then tell you whether the three work together before the work begins.