Masonry Mailbox Repairs After Property Damage

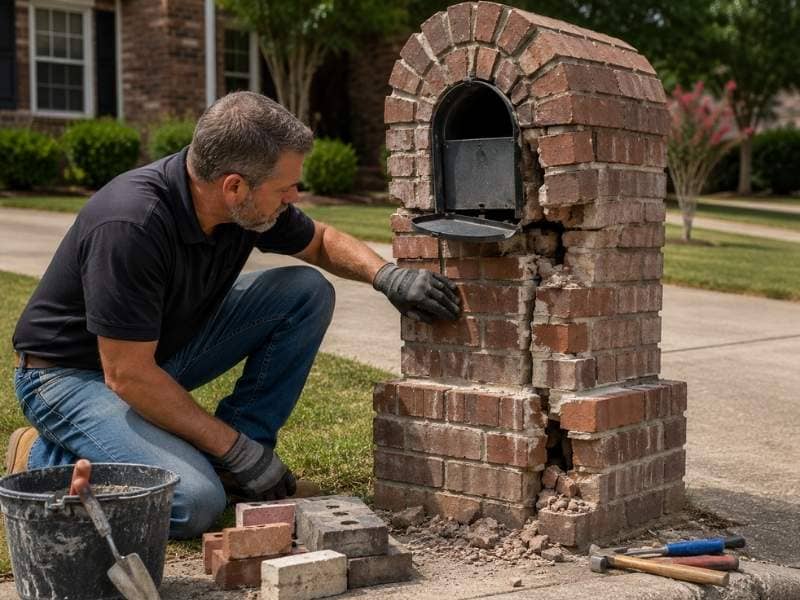
Professional mason inspecting a damaged masonry mailbox with cracked bricks, loose mortar, and a shifted mailbox insert after property damage.

A masonry mailbox can take a real beating from cars, storms or simple age. When one gets damaged, a good repair depends on knowing exactly what went wrong. A quick check of the whole structure points you toward the right fix.

These mailboxes are heavier and sturdier than the metal kind, so repairs work a bit differently. The brick or stone, the mortar and the mailbox unit inside all need review. Careful work now helps the finished result stand strong for years.

Assessing Damage Before Repairing a Masonry Mailbox

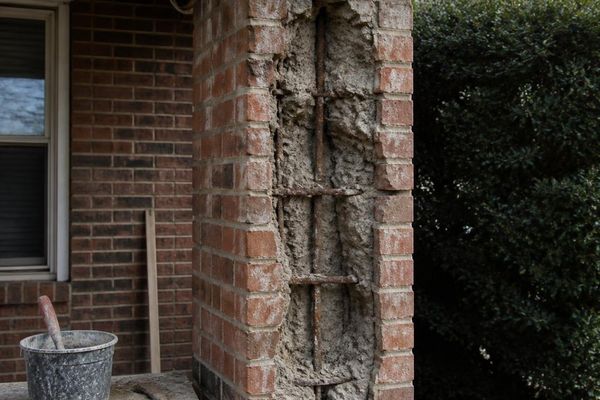
The first step is a full inspection of the mailbox from top to bottom. Look for cracked brick or stone, loose or missing mortar and any leaning in the structure. Impact from a vehicle can also bend or jam the metal mailbox unit inside.

Checking everything before you start guides the whole repair. A problem that looks small on the surface may reach deeper into the base. A clear read on the damage helps you choose the right method and avoid a patch that fails later.

When a Masonry Mailbox Can Be Repaired Instead of Rebuilt

Not every damaged mailbox needs to come down. Minor cracks, worn mortar joints, a loose unit or a single dented spot can often be repaired. In these cases, a mason can fix the affected area and leave the rest in place.

Bigger trouble calls for a rebuild. A strong lean, a failing base or damage spread across the whole structure usually points that way. Rebuilding may cost more up front, yet it gives you a safer and steadier result when the old base can no longer hold.

Matching Brick, Stone, and Mortar During Masonry Mailbox Repairs

A good repair should blend in, not stand out. The replacement brick or stone needs to match the color, size and texture of the original. The mortar and the style of the joints should line up as well.

This attention to detail keeps the mailbox looking whole. A mismatched patch draws the eye and can lower the look of the whole entrance. Taking time to match the materials helps the repair disappear into the rest of the work.

Insurance and Documentation After Masonry Mailbox Damage

Good records can make a real difference after an accident. Photos of the damage, notes on when and how it happened and copies of repair estimates all help your case. Keep any receipts once the work is done.

This paperwork supports a few possible steps:

  • Filing a claim with your homeowners insurance
  • Seeking payment from a driver who caused the damage
  • Showing the cost and cause if a dispute comes up

Solid documentation protects you if questions arise later. It shows what the mailbox looked like, what the repair cost and who may be responsible. That record can save you money and hassle down the line.

Preventing Future Damage to a Masonry Mailbox

A few simple steps can lower the odds of another hit. Better visibility helps drivers see the mailbox, so trimming nearby plants and adding reflective markers can help. Keeping the base solid and fixing small cracks early also builds long-term strength.

Some care is needed with any changes near the road. Adding heavy barriers can break local roadside or postal rules. Simple, safe upgrades protect the mailbox without crossing those lines.

Frequently Asked Questions

Can a Damaged Masonry Mailbox Usually Be Repaired?

Often, yes, especially when the damage stays in a small area and the base is still sound. A mason should study the structure to decide between a repair and a rebuild. The condition of the foundation usually tips the choice.

Should a Leaning Masonry Mailbox Be Rebuilt?

A slight lean may be fixable if the base underneath is still solid. A large or growing lean often signals movement in the foundation. That kind of shift usually calls for a partial or full rebuild.

Will Homeowners Insurance Cover Masonry Mailbox Damage?

It depends on your policy and the cause of the damage. A vehicle strike, a storm or vandalism may be covered. Normal aging or poor upkeep usually is not.

How Long Do Masonry Mailbox Repairs Typically Take?

Small fixes can wrap up in a single day. Larger repairs or a full rebuild take longer, since they involve demolition, material matching and foundation work. The mortar also needs time to cure before the job is truly done.

Painted Brick Problems Homeowners Should Understand Before Recoating

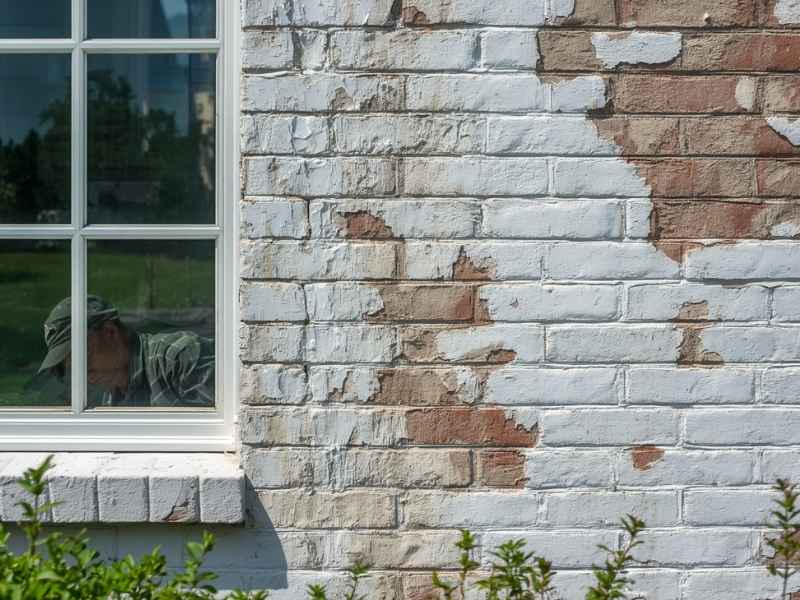
Close-up of a painted brick exterior wall with peeling white paint exposing the original brick, showing common moisture-related paint failure before recoating.

Painted brick looks fresh and clean the day it’s finished. A few years later, that same paint can peel, bubble, or trap moisture inside the wall. Before you recoat painted brick, it helps to understand what’s actually happening under that layer of color.

Auburn’s mix of hot, humid summers and heavy rain makes this an easy trap for homeowners to fall into. A quick coat of paint can hide a problem instead of fixing it.

Painted brick can trap moisture, peel, and hide underlying damage. Before recoating, check for trapped water, existing paint failure, and the brick’s original condition, or you risk locking in bigger problems.

Why Painted Brick Behaves Differently Than Bare Brick

Bare brick breathes. Water that gets into the brick during a rainstorm can slowly evaporate back out. Paint changes this. Most standard paints form a layer that blocks some of that natural movement.

This creates a tricky balance. Paint that’s too thick or the wrong type can trap water inside the brick instead of letting it escape. Over time, this trapped moisture becomes the root cause of many painted brick problems.

The Peeling Paint Problem Almost Everyone Sees Eventually

Peeling paint on brick is common, and it rarely means the paint job itself was bad. More often, it means water got trapped behind the paint and pushed its way back out.

Signs this is happening include:

  • Paint bubbling or blistering, especially after a heavy rain
  • Peeling that starts near the ground or near downspouts
  • Flaking sections that reveal a chalky or damp surface underneath

Recoating over peeling paint without addressing the moisture source usually leads to the same problem showing up again within a year or two.

What’s Really Happening Under a Layer of Paint

Painted brick can hide issues that would be obvious on bare brick. Cracks, old repairs, and even minor structural shifts can get covered by a fresh coat without anyone noticing.

Before recoating, check for:

  • Hairline cracks running through mortar joints, not just the brick itself
  • Old patch jobs where mortar color or texture doesn’t match
  • Soft or crumbling brick edges hidden just under the paint surface

A quick visual check from a few feet back often misses these details. Getting closer, or having a mason take a look, catches problems before they get sealed under new paint.

Why Moisture Trapped Behind Paint Causes Long-Term Damage

When water gets into brick and can’t escape through the surface, it looks for another way out. This often means pushing through weak points, cracking the brick face, or breaking the paint bond entirely.

This process, sometimes called spalling, can chip away at the brick’s outer layer over repeated freeze-thaw cycles or repeated wet-dry cycles. Auburn doesn’t see hard freezes often, but the wet-dry cycle alone is enough to cause slow damage over several years.

Checking for Trapped Moisture Before You Recoat

A simple check can save a lot of trouble later. Press your hand against the brick on a dry day, ideally after several days without rain.

Signs of trapped moisture include:

  • A cool, damp feel to the brick surface
  • A musty smell near the wall, especially indoors on the other side
  • Visible white, powdery residue called efflorescence forming on or near the paint

If any of these show up, painting over the surface without solving the moisture issue first is likely to fail again.

Choosing the Right Product Matters More Than Most Homeowners Expect

Not all paint is designed for masonry. Standard latex paint made for wood or drywall doesn’t handle brick’s natural moisture movement well.

Masonry-specific paints and breathable coatings allow some vapor to escape while still protecting the surface. Using the wrong product is one of the most common reasons painted brick fails again within a short time.

Before choosing a product, ask:

  1. Is this coating rated specifically for masonry surfaces?
  2. Does it allow vapor transmission, or is it a solid, non-breathable barrier?
  3. What is the expected lifespan compared to standard exterior paint?

Prepping the Surface Properly Before Any Recoat

Skipping prep work is one of the fastest ways to guarantee an early paint failure. Proper prep usually includes:

  • Removing any loose, peeling, or flaking paint completely
  • Cleaning the surface to remove dirt, mildew, or efflorescence buildup
  • Repairing any cracked mortar joints before applying new paint
  • Allowing the brick to fully dry before any new coating goes on

Rushing this stage to save time almost always costs more later, once the new paint starts failing in the same spots as before.

When Painted Brick Should Be Left Alone Instead of Recoated

Sometimes the better move is stripping paint entirely rather than adding another layer. This makes sense when:

  • The brick has failed multiple paint jobs in the same area
  • There’s clear evidence of ongoing moisture problems that haven’t been fixed
  • The underlying brick shows signs of spalling or crumbling

In these cases, a mason may recommend full paint removal and brick restoration instead of another coat that’s likely to fail again.

Questions to Ask Before Hiring Someone to Recoat Painted Brick

  • Will you check for trapped moisture before applying any new paint?
  • What specific product do you recommend for masonry, and why?
  • How will you handle any cracked mortar or damaged brick found during prep?
  • What is the expected lifespan of this coating compared to what’s currently on the wall?
  • Do you recommend recoating, or does this wall need paint removal instead?

Frequently Asked Questions

Why does paint on brick peel more than paint on wood siding?

Brick absorbs and releases moisture differently than wood. When paint prevents that natural moisture movement, trapped water can force the paint to peel away from the surface.

Can I paint over brick that already has some peeling paint?

No. Applying new paint over peeling areas usually traps the same moisture problem underneath, causing the new coating to fail much sooner.

What is efflorescence, and does it affect painted brick?

Efflorescence is a white, powdery mineral deposit left behind when moisture moves through brick and evaporates. On painted brick, it often indicates trapped moisture that should be addressed before repainting.

How do I know if my painted brick has moisture trapped behind it?

Signs include damp or cool areas on the wall, a musty odor, bubbling or peeling paint, and white mineral deposits around cracks or edges. These are common indicators of excess moisture behind the paint.

Is it better to strip painted brick completely instead of recoating it?

It depends on the condition of the brick. If multiple paint layers have failed or the wall shows signs of moisture damage or deteriorating masonry, removing the paint completely is often the better long-term solution.

Brick Pavers Around the Home: Where They Work Best and Why They Shift

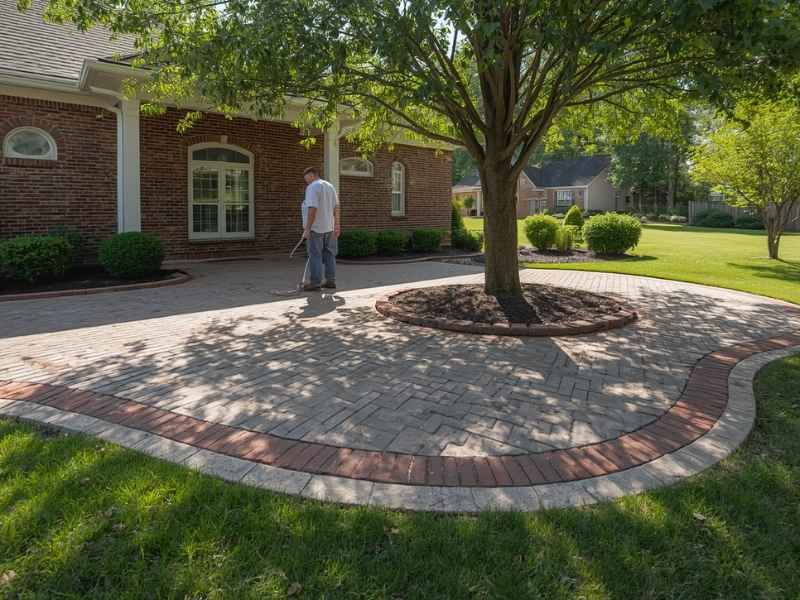
Brick paver patio with decorative border surrounding a mature tree beside a brick home, showing a professionally installed residential hardscape in Auburn, Alabama.

Brick pavers can turn a plain yard into a sharp, finished space. But walk across a lot of paver walkways in Auburn and you’ll spot the same problem. Bricks that dip, tilt, or pop up out of nowhere.

That shifting isn’t random. It almost always comes down to where the pavers sit and how the ground under them was prepped.

Brick pavers work best on driveways, patios, walkways, and pool decks with proper base prep. They shift most often due to poor drainage, weak base material, or roots pushing up from below.

Where Brick Pavers Perform Best

Brick pavers handle foot traffic and light vehicle weight well. They also handle Auburn’s mix of hot summers and heavy rain better than some other materials, as long as the base underneath is solid.

The best spots for brick pavers include:

  • Walkways leading to a front door or side gate
  • Patios used for outdoor seating or dining
  • Pool decks, since pavers stay cooler underfoot than solid concrete
  • Driveways, when installed with a base rated for vehicle weight
  • Garden paths that need a defined edge without a poured slab

Each of these spots benefits from the same basic setup. A firm base, proper drainage, and edging that holds the bricks in place.

Why Pavers Work So Well for These Spaces

Unlike a poured concrete slab, brick pavers are made of individual pieces. This gives them a small but real advantage. They can flex slightly with ground movement instead of cracking straight through like a solid slab often does.

This matters more in Alabama clay soil, which expands and contracts more than sandy or rocky ground. A paver walkway can handle some of that movement. A concrete slab usually cannot.

Why Brick Pavers Shift Over Time

Shifting rarely happens because of the bricks themselves. It happens because of what’s underneath them, or what’s missing.

Weak Base Preparation

A paver installation needs a compacted base layer, usually crushed gravel, tamped down firmly before the bricks go in. Skip this step, or rush it, and the ground beneath will settle unevenly once it takes on foot traffic and rain.

Signs of a weak base include:

  • Bricks that rock slightly when you step on them
  • Low spots that collect water after rain
  • Edges that pull away from the border pavers over time

Poor Drainage Underneath

Water is one of the biggest reasons pavers shift. If water pools under the base layer instead of draining away, it softens the ground and lets bricks sink or tilt.

This shows up most in:

  • Low areas of the yard where water naturally collects
  • Spots near downspouts without proper drainage routing
  • Areas close to sprinkler heads that overwater the base

Tree Roots Pushing From Below

Auburn has plenty of mature trees, and their roots don’t stop growing just because there’s a paver path in the way. Roots can push bricks up from underneath, creating a bump or a whole section that tilts.

This is especially common with walkways placed too close to established trees. A root six inches under the surface can lift an entire row of pavers within a few years.

Missing or Failing Edge Restraints

Pavers rely on edge restraints, a border that keeps the whole pattern locked together. Without this border, or if it fails over time, the outer bricks can drift outward. Once that happens, the whole field of pavers loses its tight fit and starts shifting more easily.

How to Tell If Your Pavers Are at Risk

Walk your paver surface and check for these warning signs:

  1. Any brick that wobbles or rocks under your foot
  2. Water pooling on the surface more than a few minutes after rain
  3. Visible gaps widening between bricks near the edges
  4. A noticeable dip or wave across a flat section
  5. Cracked or chipped bricks near tree roots or low spots

Catching these early usually means a simple repair. Ignoring them often means replacing a much larger section later.

Fixing Pavers That Have Already Shifted

Small shifting issues don’t always require a full tear-out. Depending on the cause, a mason can often:

  • Lift the affected bricks, add fresh base material, and reset them level
  • Improve drainage near the area to stop future water damage
  • Trim or reroute around root growth before resetting the surface
  • Replace or reinforce edge restraints that have failed

Larger issues, especially widespread sinking across a big patio or driveway, usually call for a full base rebuild rather than a patch job.

Preventing Future Shifting Before It Starts

If you’re planning a new paver installation, a few choices up front reduce the odds of shifting later.

  • Choose a base depth suited to the paver’s use (walkways need less depth than driveways)
  • Grade the area so water flows away from the pavers, not toward them
  • Keep new installations a safe distance from mature trees when possible
  • Use a proper edge restraint system rather than skipping this step to save cost

A little extra care during installation saves a lot of repair work down the road.

Frequently Asked Questions

Why do brick pavers shift more than a concrete slab?

Brick pavers are individual units installed over a compacted base, so they respond to ground movement differently than a solid concrete slab. While this flexibility can be an advantage in shifting soil, poor base preparation is more likely to result in visible movement.

Can tree roots really lift brick pavers?

Yes. As tree roots grow beneath a paved surface, they can gradually push individual bricks upward, especially along walkways and patios located near mature trees.

How do I know if my pavers need a full base rebuild or just a small repair?

A few loose bricks or a single low spot can often be repaired with a localized reset. If large sections are sinking, rocking, or becoming uneven, the underlying base may need to be rebuilt.

Does poor drainage always cause paver shifting?

Not always, but it is one of the most common causes. Water that collects beneath the base weakens the foundation and can lead to uneven settling over time.

How close to a tree is too close for installing brick pavers?

The safe distance depends on the tree species and the spread of its root system. In general, leaving several feet of clearance from mature trees helps reduce the risk of future root-related damage to the paver surface.

Brick Mailbox Repair: What Homeowners Should Know

A damaged brick mailbox is easy to ignore. It sits at the edge of the property, gets bumped by a car or battered by rain, and most homeowners put off dealing with it. That’s a mistake. Brick mailbox repair is a lot cheaper when problems get caught early. Wait long enough and you’re looking at a full rebuild instead of a simple fix.

Common Signs That a Brick Mailbox Needs Repair

The signs are usually obvious once you know what to look for.

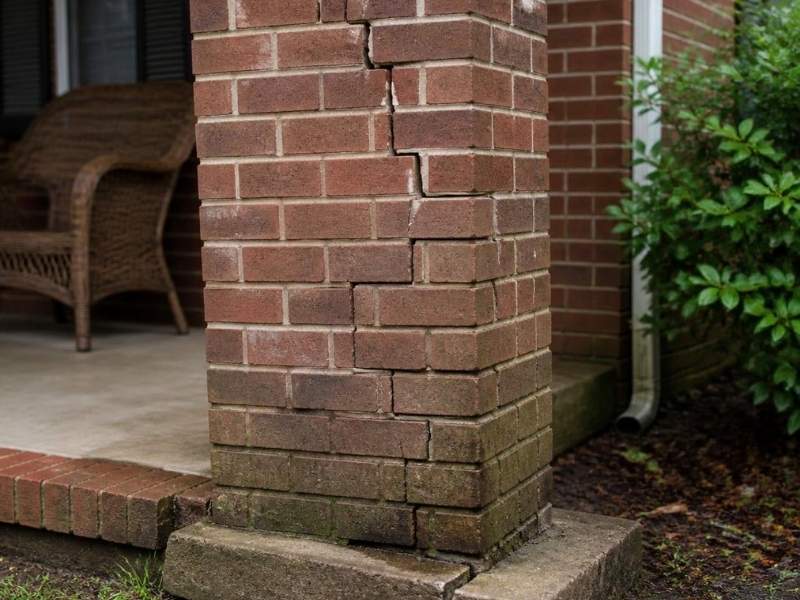
Loose or wobbly bricks are the clearest signal. If any brick shifts when you press it, the mortar holding it has failed. Crumbling or missing mortar in the joints is another warning. You might see white powder on the brick surface, which is called efflorescence, and that means water is moving through the structure.

A leaning brick mailbox is more serious. Some lean is caused by soil movement beneath the base. A small lean can sometimes be corrected. A severe lean usually means the base has shifted too much to repair without rebuilding.

Vehicle impacts are common. Even a slow clip from a delivery truck or a car pulling too wide on a curve can crack bricks or knock a mailbox off-center. Weather plays a role too. Auburn gets heat, heavy rain and occasional freezes, and that cycle pulls mortar apart over years.

Don’t wait for a brick to fall off. A loose brick means water is already getting in, and water speeds up every other problem.

What Causes Brick Mailboxes to Deteriorate Over Time

Moisture is the main culprit. Water gets into small cracks in the mortar, sits there, expands during temperature drops and slowly breaks the joint apart. A mailbox that holds standing water at its base will deteriorate faster than one with proper drainage around it.

Soil movement is the second big factor. Auburn’s clay-heavy soil shifts with moisture changes. Wet seasons swell the ground, dry seasons shrink it, and over years that movement can tilt or crack a mailbox base. If the original base wasn’t poured deep enough or wide enough, movement happens faster.

Aging mortar is a natural part of the process. Standard mortar has a useful life of 20 to 30 years under good conditions. A mailbox exposed to direct sun, rain and vehicle exhaust may show joint failure in 10 to 15 years. That’s not a defect. It’s just wear.

Knowing the cause matters because it changes the repair. A mailbox with failed mortar but solid bricks needs repointing. A mailbox with a shifting base needs foundation work first, or the new mortar will crack again within a season.

When Minor Repairs Are Enough and When Rebuilding Makes More Sense

Minor repairs cover most situations. If the bricks are intact, the structure is plumb, and the damage is limited to cracked or missing mortar joints, repointing is the right call. A mason removes the failed mortar to a depth of about three-quarters of an inch, packs in fresh mortar that matches the original, and the repair can last another 20 years if done correctly.

Replacing one or two cracked bricks also falls into the minor repair category. The work takes a few hours and costs a fraction of a full rebuild.

Rebuilding makes sense when the mailbox leans more than a few degrees and the base has shifted. It also makes sense when multiple bricks are cracked through, not just chipped. A mailbox that’s been hit by a vehicle and has structural damage at the base is often cheaper to rebuild than to try to salvage.

One honest piece of advice: if a contractor tells you a leaning mailbox needs to be torn down and rebuilt without first checking the base condition and how many bricks are actually compromised, get a second opinion. Sometimes a base reset and repointing is all that’s needed.

Why Matching Existing Bricks and Mortar Matters

A repair that uses the wrong brick or the wrong mortar color looks bad. That sounds obvious, but it’s a more common problem than most homeowners expect.

Brick color varies by manufacturer, batch and age. A new brick from the same product line can look noticeably different next to weathered bricks that have been sitting in Alabama sun for 15 years. A good mason will source reclaimed or closely matched bricks before starting work, not after.

Mortar color and hardness matter too. Using a mortar that’s harder than the original bricks is a documented problem in masonry repair. Hard mortar doesn’t flex with the structure. Instead of the mortar cracking under stress, the brick faces crack. For most residential mailboxes, a Type N mortar is the right choice. It’s softer than Type S and lets the structure move slightly without damage.

A mismatched repair on a brick mailbox draws attention in the wrong way. The goal is for the repair to disappear into the existing structure. That takes time and care in material selection.

How Regular Maintenance Can Extend the Life of a Brick Mailbox

Most brick mailboxes that fail early didn’t have to. A little attention once a year catches the problems that turn into expensive repairs.

Walk up to the mailbox and press on a few bricks. None of them should move. Run your finger along the mortar joints. If mortar comes off in your hand or feels sandy rather than solid, repointing is due. Check for cracks running through the brick face itself, not just the joints.

Look at the ground around the base. Water should drain away from the structure, not pool against it. Soil that’s built up against the base over the years can hold moisture and accelerate deterioration. Pull it back and make sure the base is visible.

Cleaning the surface once a year keeps efflorescence from building up and gives you a clear look at what’s happening with the brick. Use water and a stiff brush. Avoid pressure washing at close range because it can force water into joints and erode mortar that’s still in decent shape.

If you see a crack or a slightly loose brick, fix it that season. A small repointing job on one or two joints costs very little. The same damage ignored for two or three winters can spread to surrounding joints and turn a minor fix into a full section repair.

Frequently Asked Questions

How much does brick mailbox repair cost?

Minor repairs, such as repointing a few joints or replacing one or two bricks, typically cost between $150 and $400. More extensive repairs involving multiple damaged areas may range from $600 to $900. A complete rebuild of a standard brick mailbox generally costs between $800 and $2,000, depending on its size and design.

Can I repair a brick mailbox myself?

Replacing mortar in a small area is something a handy homeowner may be able to do. However, matching the mortar color, achieving the correct joint depth, and finishing the joints properly require experience. For anything beyond a minor repair, hiring a professional mason is usually the better option.

How long does brick mailbox repair last?

A properly completed repointing job using the correct mortar type can last 20 to 30 years under normal conditions. Repairs performed with mismatched or overly hard mortar may fail much sooner.

Does homeowners insurance cover brick mailbox damage?

Coverage depends on the cause of the damage. Damage caused by a vehicle collision may be covered under the at-fault driver’s insurance policy. Damage from weather or normal wear and tear is generally not covered. Homeowners should review their policy details before filing a claim.

Do I need a permit to repair or rebuild a brick mailbox in Auburn?

Minor repairs typically do not require permits. A full rebuild may require a review of setback requirements, especially if the mailbox is located close to the road. Homeowners should contact the City of Auburn or Lee County to confirm any local requirements before beginning a major rebuild.

How Water Damage Affects Brick Walls Over Time

Brick walls look solid. That’s part of why water damage catches so many homeowners off guard. The wall seems fine right up until it doesn’t, and by that point the damage has usually been building for years. In Auburn, Alabama, where heavy rain and humid summers are the norm, brick walls take a beating that shows up slowly and costs a lot when it finally gets attention.

Early Signs of Water Damage in Brick Walls

The first signs are easy to miss if you’re not looking for them.

White powder or streaking on the brick surface is called efflorescence. It happens when water moves through the wall and pulls mineral salts to the surface. It looks like a cosmetic problem, but it tells you water is actively moving through the masonry.

Mortar that crumbles when you drag a key across it is another early warning. Healthy mortar feels hard. Damaged mortar feels sandy or comes off in small pieces. That’s not normal aging. That’s moisture doing its work.

Damp spots on interior walls near exterior brick, mold along baseboards, or peeling paint on the inside of an exterior wall all point to the same source. Water is getting through.

Brick faces that flake or split, called spalling, are more advanced. The surface layer of the brick is separating because water got in, expanded during temperature changes and pushed the face off. Once that starts, it spreads.

Catching any of these signs early keeps the repair bill manageable. Ignore them and you’re looking at section rebuilds instead of simple repointing.

How Moisture Gets Into Brick and Mortar

Brick is not waterproof. Most people assume it is. Clay brick is actually porous, and mortar joints are more porous than the brick itself. Water gets in through both.

The most common entry points:

  • Cracked or missing mortar joints where the seal between bricks has failed
  • Gutters that overflow or pull away from the fascia and dump water down the wall
  • Sprinkler systems aimed too close to the foundation or wall base
  • Low-lying soil that traps water against the wall rather than draining it away
  • Gaps around windows, doors and where brick meets other materials

Heavy rain alone isn’t always the problem. Chronic low-level exposure is often worse. A sprinkler that hits the same wall section every day for years, or a downspout that drains two feet from the foundation, will cause more cumulative damage than a single storm.

In Auburn’s climate, the combination of summer rain, humidity and warm temperatures creates ideal conditions for moisture to work its way deep into masonry before the surface ever looks wet.

Problems That Can Develop When Water Damage Is Ignored

The damage doesn’t stop on its own.

Once moisture gets past the mortar joints, it starts working on the brick itself. The brick absorbs water, and that water carries minerals that weaken the internal structure over time. Freeze-thaw cycles, which Auburn does see occasionally in winter, accelerate this process fast. Water expands when it freezes. That expansion puts pressure on brick from the inside.

Loose bricks are a structural concern, not just a cosmetic one. A brick that’s no longer bonded to its neighbors by solid mortar is held in place mostly by weight and friction. That’s not a long-term solution.

Interior leaks follow. Water that gets through the outer wythe of brick can reach the interior wall cavity, insulation and framing. Once wood framing gets wet repeatedly, mold and rot follow. That’s when a masonry repair job turns into a much larger renovation.

Mold on interior walls is sometimes the first sign a homeowner notices because the exterior wall showed no obvious damage. By the time mold is visible inside, moisture infiltration has been happening for a while.

The repair cost curve is steep. A repointing job on a damaged section might cost a few hundred dollars. A section rebuild with interior repairs behind it can run several thousand. The gap between those two numbers is mostly time.

Why Proper Drainage Helps Protect Brick Walls

Controlling water around the house protects the masonry better than any sealer on the market.

Gutters need to be clean and intact. A clogged gutter overflows and sends water sheeting down the wall face repeatedly through every rain event. That’s direct, sustained exposure to the most vulnerable part of the wall, which is the mortar joint at the top of the course nearest the roofline.

Downspouts need to extend far enough from the foundation. The standard recommendation is at least six feet of clearance. A downspout that drains right at the foundation keeps the base of the wall wet through every rainstorm.

Grading matters. Soil that slopes toward the house directs surface runoff straight to the foundation and the base of the wall. Proper grading slopes away from the structure at roughly one inch per foot for the first six feet.

Landscape choices close to the house affect drainage too. Dense shrubs pressed against brick trap moisture and reduce airflow, which slows drying after rain. Sprinklers aimed at or near the wall base cause the same problem on a daily schedule.

None of these fixes are complicated or expensive. But skipping them while spending money on brick sealer is like fixing the symptom and ignoring the source.

When Homeowners Should Consider Masonry Repairs

Some situations call for a professional assessment rather than a wait-and-see approach.

Widespread mortar deterioration across a large wall section needs professional repointing. This isn’t a one-joint touch-up. It’s systematic work across multiple courses, and the mortar type and mix need to match the original to avoid making the wall more brittle, not less.

Missing bricks or bricks with significant spalling need to be replaced and matched carefully. A brick with a split or missing face is no longer doing its job. Water enters faster, and the surrounding courses carry more stress.

Recurring moisture problems on interior walls, especially after multiple rain events, signal that the water is finding a path through the wall that surface inspection alone won’t identify. A mason who can assess the full wall assembly, not just the face, is the right person for that situation.

Stair-step cracking in the mortar joints, where cracks follow the diagonal pattern of the mortar rather than cutting through the brick, can indicate foundation movement or wall settlement. That goes beyond a standard repair and needs evaluation before any masonry work begins.

In Auburn, where soil movement from clay expansion is a known issue, stair-step cracking deserves attention rather than just cosmetic patching. Patching over active movement doesn’t fix anything and wastes the repair budget.

Frequently Asked Questions

What is the white powder on my brick walls?

The white substance is called efflorescence. It forms when water moves through brick or mortar and carries mineral salts to the surface. As the moisture evaporates, it leaves behind a white residue. Efflorescence is a sign that moisture is moving through the wall and should be investigated instead of simply cleaned away.

Can I waterproof brick walls myself?

Penetrating water repellents made for masonry are available and can help protect walls that are in good condition. However, sealers will not solve problems caused by damaged mortar or deteriorating brick. Existing issues should be repaired first so moisture does not become trapped inside the wall.

How long do brick walls last if water damage is addressed early?

Brick walls that are properly maintained and repaired when needed can last 100 years or more. Repointing mortar joints every 20 to 30 years is considered normal maintenance. Walls exposed to long-term moisture without repairs may deteriorate much faster and eventually require partial or complete rebuilding.

Does Auburn’s humidity make brick water damage worse?

Yes. Auburn’s humid climate can slow the drying process after rain or moisture exposure. Brick and mortar that remain damp for long periods are more likely to develop mold, mineral deposits, and other forms of deterioration than masonry in drier environments.

Is stair-step cracking always a serious problem?

Not always. Stair-step cracks in mortar joints may result from normal settling, but they can also indicate foundation movement. Minor cracks in older homes can often be repaired and monitored. Cracks that continue to widen or reappear after repairs should be evaluated to determine whether a more significant structural issue is present.

Brick Patio or Walkway Installation: What Affects the Cost

Getting a brick patio installed is a solid investment. But the final price can swing by thousands of dollars depending on decisions made before the first brick goes down. Knowing what drives that number helps you plan smarter and avoid budget surprises mid-project.

Why the Size and Shape of the Project Matter

Square footage is the starting point for any estimate. The more ground you cover, the more materials and labor you pay for. A small 10×10 patio runs in a completely different price range than a 20×30 outdoor entertaining area.

Shape matters just as much as size.

A standard rectangle is the cheapest layout to build. Straight lines mean clean cuts, predictable material waste, and faster installation. Add a curve or a rounded border and the cost goes up. Curved edges require more precise cutting, more wasted brick, and more time on the job.

Custom layouts of brick with multiple angles, inset patterns, or irregular borders can add 20 to 40 percent to the total cost compared to a basic square or rectangle of the same square footage.

What Developers Should Know

Plan the footprint before finalizing a budget. A design that looks simple on paper can become expensive in the field if it has too many directional changes or tight radius curves.

How Material Choices Change the Price

Not all bricks cost the same. Standard clay pavers are the most affordable option and work well for most residential projects. Tumbled brick, reclaimed brick, and specialty colors or textures cost more per unit and often require more care during installation.

Here is what affects material cost most:

  • Brick type: Clay pavers, concrete pavers, and natural stone vary significantly in price per square foot.
  • Color and finish: Standard red brick costs less than custom blends or aged finishes.
  • Pattern complexity: Running bond uses the fewest cuts. Herringbone and basketweave require far more precision cutting, which means more waste.
  • Edging materials: Soldier course borders, steel edging, or concrete borders add material and labor costs.
  • Quantity buffer: Most contractors order 10 to 15 percent extra to account for cuts and breakage.

In Auburn’s climate, choosing a brick rated for outdoor use matters. Materials that absorb water and cannot handle freeze-thaw cycles will crack or shift sooner than expected.

Why Site Preparation Can Increase Costs

The work that happens before the first brick is placed often determines whether the finished product lasts five years or twenty-five years. It also determines how much you spend getting to that point.

Basic site prep includes:

  • Removing existing grass, concrete, or gravel
  • Excavating to the correct depth (typically 6 to 8 inches for a patio base)
  • Grading and leveling the surface
  • Compacting a gravel base layer
  • Adding sand bedding before setting brick

Straightforward flat lots in good soil are the cheapest to prep. Problems start when the site has challenges.

Slopes require grading work. Poor drainage requires French drains or gravel channels. Soft or unstable soil may need additional compaction or base depth to prevent settling. Tree roots near the project area can add removal costs.

Labor and Installation Methods That Affect the Budget

Labor is typically 50 to 60 percent of the total project cost for brick patio and walkway work. The complexity of the installation drives that number up or down.

Simple running bond: Bricks laid in straight horizontal rows. Fastest to install. Fewest cuts. Lowest labor cost.

Herringbone: Bricks set at 45-degree angles in a V-pattern. Requires diagonal cuts at every edge. Takes considerably longer to lay correctly.

Basketweave: Alternating pairs of bricks in perpendicular groups. Looks clean and traditional. More time-consuming than running bond.

Custom medallions or inset patterns: Specialty designs within the field of the patio. These require experienced masons and significantly more time.

Labor rates in Auburn vary by contractor experience and workload. Expect to pay more for crews with established track records on complex installations. Cutting corners on labor selection often shows up in the finished product within a year or two.

Features That Add to the Final Cost

Most brick patio projects grow once the initial scope gets reviewed. Homeowners and developers start adding features that improve how the space functions and looks. Each addition is a legitimate value-add, but each one also increases the budget.

Common additions and their cost impact:

  • Retaining edges or seat walls: Structural brick walls along the perimeter add significant material and labor. They also require their own foundation preparation.
  • Steps: Each step involves excavation, a concrete footing, and careful brick setting. A single set of two steps can add $800 to $1,500 or more depending on width.
  • Lighting: Low-voltage in-ground or wall-mounted lighting requires electrical rough-in and adds both material and coordination time.
  • Connections to existing landscaping: Tying the new patio into existing garden beds, trees, or drainage systems takes additional planning and fieldwork.
  • Drainage features: Channel drains, pop-up emitters, or redirected downspouts protect the installation and prevent pooling, but they cost extra to install.

The best approach is to identify which features matter most before the project starts. Adding them during the design phase costs less than retrofitting them after installation is complete.

Frequently Asked Questions

What is the average cost to install a brick patio?

Most residential brick patio projects in Auburn run between $15 and $30 per square foot installed, depending on design complexity, site conditions, and materials chosen. A 200-square-foot patio typically costs $3,000 to $6,000 or more.

How long does brick patio installation take?

A standard 200- to 300-square-foot patio takes a professional crew two to four days from site preparation through final cleanup. Larger or more complex projects may take longer.

Does the brick pattern affect how long the patio lasts?

The pattern itself does not affect durability. The quality of the base preparation, drainage design, and materials used has a much greater impact on how long the patio performs over time.

Is brick more expensive than concrete for a patio?

Brick generally costs more upfront than poured concrete. However, individual bricks are easier to repair than cracked concrete slabs, which can make brick a cost-effective choice over the long term.

Can a brick walkway be added to an existing patio later?

Yes. A brick walkway can be added later, but matching the existing brick color and pattern is often easier when both are planned at the same time. Older bricks may no longer be available, and the new walkway must connect properly to the existing base.

Brick Masonry Repair Before Listing a Home: Small Issues Buyers Notice FastĀ 

Brick Masonry issues near the front steps being inspected before listing a home for sale.

Buyers form opinions quickly. Before they step inside, they’ve already looked at the front of the home, the steps, the chimney, and the walls. Brick masonry is one of the first things they see, and damaged or worn masonry sends a message that’s hard to walk back. Fixing brick masonry problems before listing gives a home a better shot at making a strong first impression from the moment a buyer pulls up.

Why Small Brick Masonry Problems Catch a Buyer’s Eye Fast

Small problems in brick masonry stand out more than most sellers expect. A hairline crack in a mortar joint, a chipped corner on a step, or a patch of crumbling mortar near an entryway are all easy to spot from a few feet away. Buyers walk up slowly. They look at everything.

What makes these details matter is not just how they look. It’s what they suggest. A buyer who sees worn or damaged masonry right at the front of a home starts wondering what else hasn’t been kept up. That kind of doubt is hard to shake once it sets in. Fixing small issues before the first showing prevents that reaction before it starts.

Areas of Brick Masonry Buyers Notice Right Away

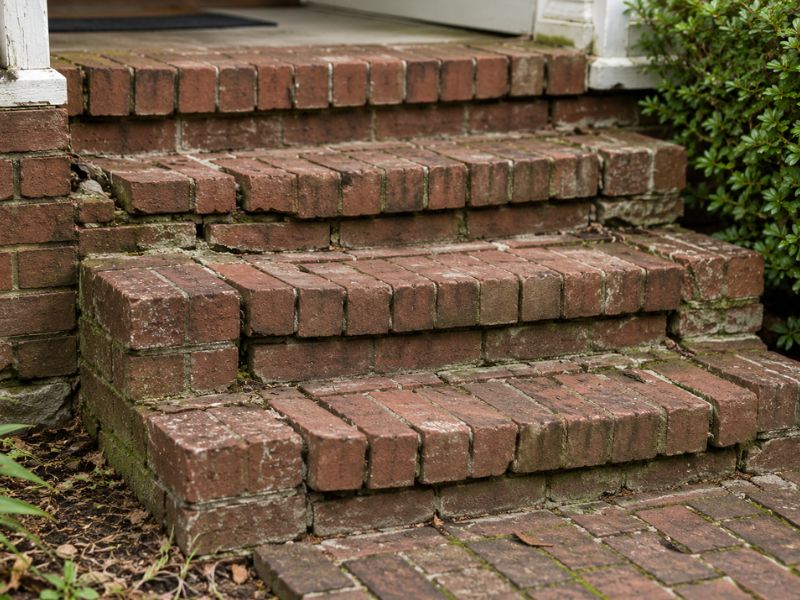
Some areas of a home’s exterior get more attention than others. Front steps are one of the first things a buyer touches, literally, on the way to the door. Chipped edges, loose bricks, or crumbling mortar on steps are impossible to miss and feel like a safety concern on top of a cosmetic one.

Entryways draw the eye because buyers spend time there waiting for the door to open. Any brick or mortar damage near the front door is right in their line of sight. Chimneys get noticed from the street, and visible cracks or missing mortar near the top signal a potential repair that buyers will want to price into any offer. Exterior walls along the front of the home also matter more than walls in the back or sides, because they’re part of what buyers photograph, share, and remember.

How Well-Kept Brick Masonry Can Improve Curb Appeal

Clean, repaired brick masonry changes how a home looks from the street. Freshly pointed mortar joints bring the brickwork back to a sharp, finished appearance. Replaced or repaired chipped bricks remove the worn patches that break up an otherwise clean exterior. Power washing the brick face to remove dirt and surface staining can make a significant difference without any structural work at all.

These repairs don’t need to be extensive to make a visible difference. A few hours of repointing along the front steps and entryway, combined with a thorough cleaning of the brick face, can make a home look noticeably more cared for. Buyers respond to that. A home that looks maintained on the outside gives them more confidence about the inside.

Why Ignoring Brick Masonry Damage Can Worry Buyers

Visible damage in brick masonry doesn’t just affect how a home looks. It affects how buyers think about the whole property. When a buyer sees cracked mortar or broken bricks at the front of a home, they start making assumptions about what else might be deferred or overlooked.

That concern can show up in lower offers, more aggressive inspection requests, or buyers walking away entirely. A buyer who spots a problem with the masonry before the inspection has already started building a mental list of concerns. Addressing brick masonry issues before listing removes that opening. It tells buyers, without saying a word, that the home has been looked after.

Signs Your Brick Masonry May Need Repairs Before Selling

A quick walk around the exterior before listing can catch most of the issues buyers will find during a showing. Loose or crumbling mortar in the joints is one of the most common problems and one of the easiest to miss if you stop looking at your own home closely.

Cracked bricks, especially ones with visible gaps or pieces that have broken off, are harder to overlook but worth checking for along steps, walls, and chimney sections. Uneven surfaces where bricks have shifted slightly out of alignment, or areas where mortar has pulled away from the brick face, also show up clearly to a careful eye. Checking all of these areas before listing, and repairing what needs attention, means buyers see the home at its best rather than finding problems you didn’t know were there.

Frequently Asked Questions

Why should brick masonry be repaired before selling a home?

Small problems in brick masonry are easy for buyers to spot during a showing. Fixing them before listing helps the home look well cared for and creates a better first impression from the moment buyers arrive.

What parts of brick masonry do buyers notice first?

Buyers tend to notice brick masonry around front steps, entryways, chimneys, and exterior walls facing the street. These areas are easy to see and get a lot of attention during showings.

Can damaged brick masonry hurt curb appeal?

Yes. Cracked mortar, chipped bricks, and worn surfaces make a home look less maintained. Repaired and clean brick masonry improves how the home looks from the street and gives buyers a better first impression.

Do small brick masonry problems matter to buyers?

Yes. Even small problems can make buyers wonder about the overall condition of the home. Visible damage at the front of a property raises questions that can affect how buyers feel about making an offer.

What are signs that brick masonry needs repairs before listing?

Look for cracked bricks, loose or crumbling mortar, chipped areas along steps and entryways, and surfaces where bricks have shifted out of alignment. Finding and fixing these before listing means buyers see the home in its best condition.

Why Brick Masonry Cracks Show Up After a Hot, Wet Summer

Brick Masonry cracks on an exterior wall being inspected after heavy summer rain and changing soil conditions.

Summer heat and heavy rain don’t just make yards muddy. They can stress the structure of a home in ways that aren’t obvious until the season ends. One of the most common signs is brick masonry cracks. They seem to appear out of nowhere, but the conditions that cause them build up slowly over weeks of wet heat. Understanding why brick masonry cracks form after a hot, wet summer makes it easier to catch problems early and know when to act.

How Clay Soil Affects Brick Masonry After Heavy Summer Rain

Many homes sit on clay-heavy soil. Clay behaves differently from other soil types because it changes size depending on how much water it holds. When rain soaks into clay soil, it swells. When dry heat follows, it shrinks back down. This back-and-forth happens repeatedly through a wet summer.

That movement puts stress on everything above it, including the foundation and the brick masonry attached to it. When the ground shifts even slightly, the structure above shifts too. Brick is strong but not flexible. Under repeated stress from soil movement, small cracks form in the mortar joints or across the face of the brick itself.

Why Hot Weather and Extra Moisture Can Stress Brick Masonry

A hot, wet summer creates conditions that work against brick masonry in two ways at once. Heat causes building materials to expand. Moisture works into small gaps and softens mortar over time. When both happen together and then reverse, the cycle puts constant pressure on the wall.

After a stretch of heavy rain followed by dry heat, mortar joints that were already slightly weak can crack open further. Bricks that absorbed moisture and then dried out quickly are more likely to show surface damage. Cracks that were too small to notice in spring can become visible by late summer because the wet-dry cycle has widened them. This is why many homeowners notice new cracks right after the hottest and wettest part of the year.

Signs That Brick Masonry Cracks Are Getting Worse

Not every crack in brick masonry needs immediate attention. But some signs point to a problem that’s growing and shouldn’t wait.

Watch for cracks that are wider than they were before, especially ones that now have a visible gap rather than a hairline split. Gaps in mortar joints, where the mortar has crumbled or pulled away from the brick, are another sign that water and movement have done real damage. If doors or windows near an exterior brick wall start sticking or won’t close smoothly, that can mean the wall or frame has shifted. Cracks that run diagonally from the corners of windows or doors are worth taking seriously. They often point to foundation movement rather than surface damage alone.

How Poor Drainage Around a Home Can Affect Brick Masonry

Water that sits near a home’s foundation keeps the soil wet long after rain stops. Gutters that overflow because of clogs dump large amounts of water right along the base of the home. Downspouts that are too short deposit water only a foot or two away from the foundation instead of directing it away from the structure. Low spots in the yard that collect standing water keep the soil saturated in those areas.

All of that extra moisture makes the soil movement worse. Clay soil that stays wet longer swells more and for longer periods. When it dries, it pulls back more sharply. The more extreme that cycle is, the more stress it puts on the brick masonry above. Keeping water away from the base of the home is one of the most direct ways to reduce that stress.

When to Have Brick Masonry Cracks Checked by a Masonry Expert

Small cracks that stay the same size and appear in only one spot may not require immediate repair. But some situations call for a professional look sooner rather than later.

If cracks keep coming back after being patched, the underlying cause hasn’t been fixed. If a crack has grown noticeably wider over a single season, the movement driving it is still active. If multiple cracks appear at the same time, especially after a wet summer, that pattern often points to soil movement or drainage problems rather than normal settling. A masonry expert can identify whether cracks are cosmetic or structural, find the source of the movement, and recommend repairs that address the cause rather than just the surface.

Frequently Asked Questions

Why do brick masonry cracks show up after a hot, wet summer?

Heavy rain and high heat cause soil and building materials to expand and contract. That repeated movement puts stress on brick masonry and can make existing cracks more visible or cause new ones to form.

Does clay soil cause brick masonry cracks?

Yes. Clay soil swells when wet and shrinks when dry. That movement shifts the ground beneath a home’s foundation, which puts pressure on brick masonry and can lead to cracking over time.

Can water around the house damage brick masonry? 

Too much water near the foundation keeps clay soil swollen longer and causes more dramatic shrinkage when it dries out. Over time, that cycle increases stress on brick masonry and raises the risk of cracking.

How can I tell if a brick masonry crack is getting worse?

Look for cracks that are wider than before, gaps where mortar has crumbled away, or doors and windows near the wall that stick or don’t close properly. These signs suggest the movement causing the crack is still active.

Should I have brick masonry cracks inspected? 

Yes, especially if cracks keep returning, have grown wider over a single season, or appear alongside other signs of movement. A masonry professional can find the cause and recommend repairs that fix the problem at its source.

How Brick Masonry Adds Value to Your Home

Professional mason building a brick wall to improve durability and home value

Most home improvements depreciate. A new roof, fresh paint, updated appliances. They wear out, go out of style, or get replaced by the next owner. Brick masonry works differently. It holds its value over decades, requires almost no maintenance compared to wood or vinyl, and signals a level of quality that buyers and appraisers notice immediately. If you’re weighing where to put money into your home, brick masonry is one of the few investments that keeps paying back.

Brick Masonry vs. Brick Veneer: Why the Difference Matters

A lot of homeowners assume all brick exteriors are the same. They’re not.

Full brick masonry means the brick is structural. It carries load, forms the actual wall, and ties into the foundation. Brick veneer is a single layer of brick attached to a wood or steel frame behind it. It looks similar from the outside but behaves completely differently over time.

Full brick masonry homes have compressive strength measured in thousands of pounds per square inch. They resist wind, moisture and fire better than frame construction with veneer. They also last longer without requiring the same level of upkeep.

When an appraiser or buyer sees a true brick masonry home, the valuation reflects that. Veneer is valued differently, and experienced buyers know the difference.

What Appraisers Actually Look For

Appraisers don’t give blanket value increases for brick. What they look for is condition, craftsmanship and longevity.

Clean mortar joints in good repair signal that the masonry has been maintained. Tight, consistent coursing with no cracking tells an appraiser the work was done correctly. Brick that shows no staining, spalling or efflorescence reads as low maintenance and high quality.

Poorly done brick masonry, or brick that has been patched with mismatched mortar, actually works against value. The material isn’t what matters most. The quality of the installation and the condition of the existing work does.

That’s why choosing a qualified mason matters as much as choosing brick in the first place.

Which Brick Masonry Projects Return the Most Value

Some brick masonry projects add more value than others. The ones with the strongest return share a common trait: they’re visible, durable, and tied to the structure of the home.

Exterior brick walls and facades consistently top the list. A full brick exterior can add 6 to 10 percent to a home’s appraised value, according to estimates from real estate and appraisal industry data. In markets where brick homes are common, the absence of brick can actually lower a home’s perceived value relative to comparable properties.

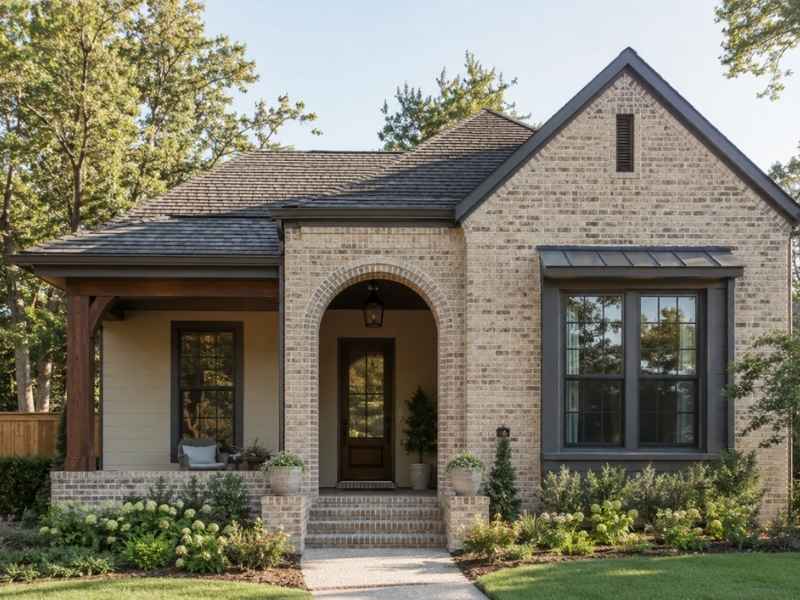
Brick columns and entry features add strong curb appeal. They frame the entrance, signal quality before a buyer ever steps inside, and require almost no maintenance over the life of the home.

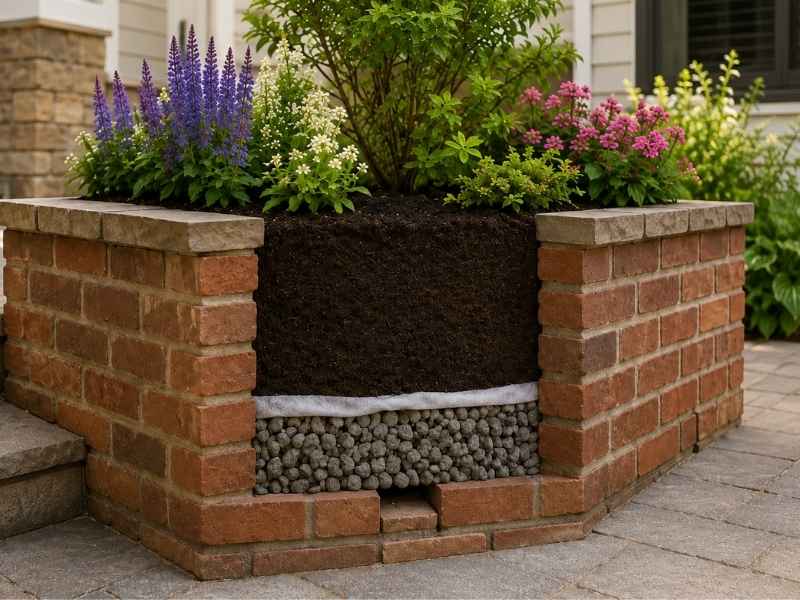
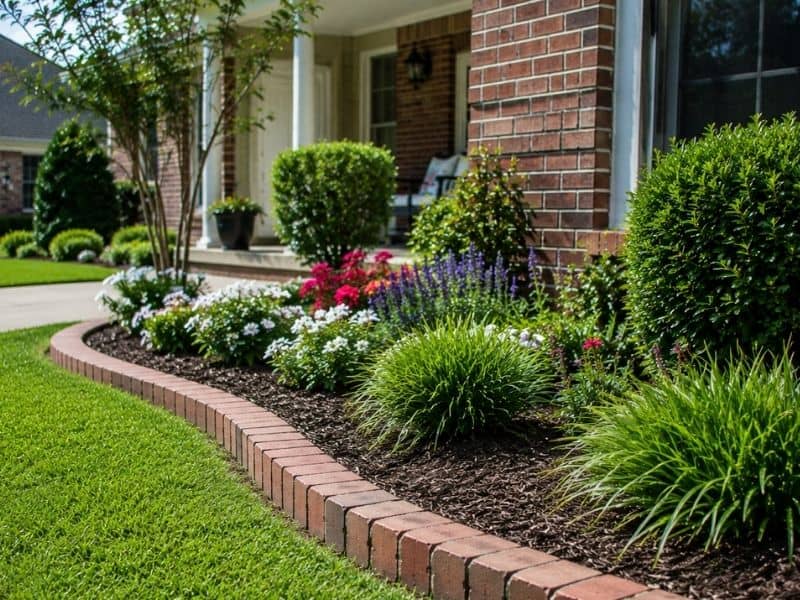
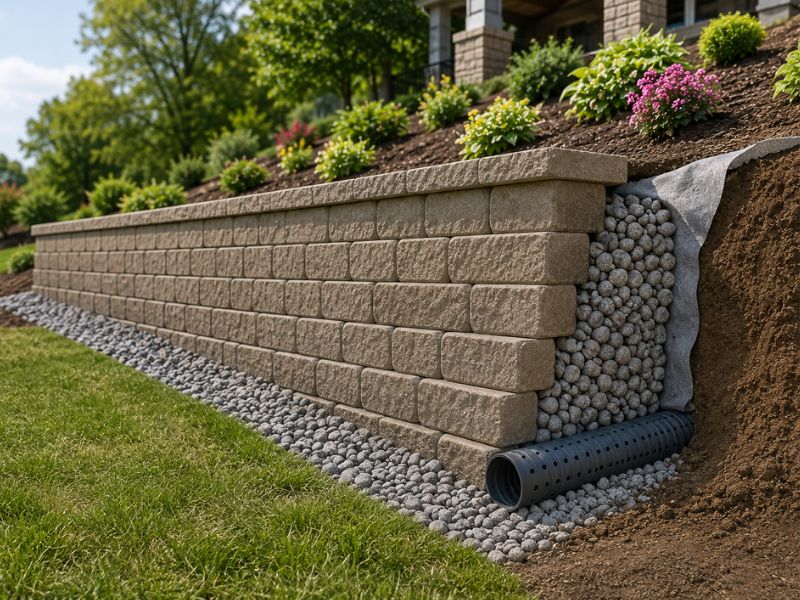
Brick garden walls and raised planting beds read as permanent improvements rather than decorative additions. They add structure to the yard, define outdoor spaces, and hold up through decades of weather without rotting, warping or fading.

Brick walkways and steps tend to age better than poured concrete. They can be individually replaced if a unit gets damaged, and the natural variation in brick color holds up visually even as the surface weathers.

How Brick Masonry Affects Insurance and Maintenance Costs

This is the part most homeowners don’t think about until they get their insurance quote.

Brick masonry is non-combustible. Insurance carriers rate masonry construction lower for fire risk than wood frame construction. Depending on your insurer and location, a brick masonry home can carry meaningfully lower premiums than a comparable frame home. That difference compounds over years.

Maintenance costs are lower too. Brick doesn’t need painting. It doesn’t rot, warp, or get damaged by insects. The main maintenance task for a brick masonry exterior is periodic inspection of mortar joints and repointing when needed, typically every 25 to 30 years for a well-built wall. Compare that to wood siding, which needs repainting every five to seven years, or fiber cement, which requires caulking and sealing on a regular cycle.

Over a 30-year period, the total maintenance cost of a brick masonry exterior is substantially lower than most alternative materials. That savings is real money, and buyers who understand construction factor it into what they’re willing to pay.

What to Ask a Mason Before Starting Any Brick Masonry Project

Not every mason produces work that holds its value. A few questions upfront separate qualified contractors from ones who cut corners.

Ask about mortar type. Exterior brick masonry requires Type S mortar for most residential applications. A mason who uses standard interior mortar outdoors is setting up a repair job within a few years.

Ask about coursing and foundation prep. The base matters more than the brick. A mason who rushes the footing or skips proper leveling on the first course produces work that shows problems as the structure settles.

Ask to see completed projects, not just photos. Seeing work in person after two or three years of weathering tells you more than a fresh installation photo ever will. Look at the mortar joints, the alignment of courses, and whether any cracking or efflorescence is visible.

Ask about the warranty on labor. Materials carry manufacturer warranties. The installation is what you’re paying the mason for, and a contractor who stands behind their work should be willing to say so in writing.

Frequently Asked Questions

Does brick masonry increase home value? 

Yes. A full brick masonry exterior can add 6 to 10 percent to a home’s appraised value. The actual figure depends on your market, the condition of the brick, and the quality of the installation. Well-maintained brick masonry in good repair consistently outperforms other exterior materials on long-term value retention.

How long does brick masonry last?

A properly built brick masonry structure can last 100 years or more. The Brick Industry Association has documented clay brick walls and structures still in service after a century of use. The mortar joints are the first component to show wear, typically needing repointing every 25 to 30 years.

Does brick masonry require a lot of maintenance? 

No. Brick masonry requires significantly less maintenance than wood, vinyl or fiber cement. It doesn’t need painting, doesn’t rot, and doesn’t warp. The main maintenance task is inspecting and repointing mortar joints when they show wear, which for a well-built wall happens on a very long cycle.

What is the difference between brick masonry and brick veneer? 

Brick masonry refers to structural brick that forms the actual wall and carries load. Brick veneer is a single decorative layer of brick attached to a separate structural frame. Both use brick, but they perform differently over time. Full brick masonry is more durable, better insulated, and valued differently by appraisers.

Which brick masonry projects add the most value? 

Exterior brick facades, entry columns, brick walkways and garden walls consistently return the most value. Projects that are visible, structural and tied to the long-term condition of the property hold their value best. Decorative-only brick additions in less visible areas return less.